Wix Bookings: Managing Email Notifications You Get
4 min
In this article
- Type of email notifications you get
- Managing your inbound emails
- Customizing the content of your email
- FAQs
When clients book, cancel, or reschedule a service, or when you need to review a booking request, Wix automatically sends email notifications to you, your staff, and your clients.
When one of your clients books or cancels a service, Wix emails you and the staff member providing the service. You can choose which notifications you want to receive.
Notes:
- Email notifications are not sent in preview mode while your site is unpublished or under construction.
- When using a merchant account (e.g., PayPal or Stripe), notifications are sent to the email address linked to your payment account.
Type of email notifications you get
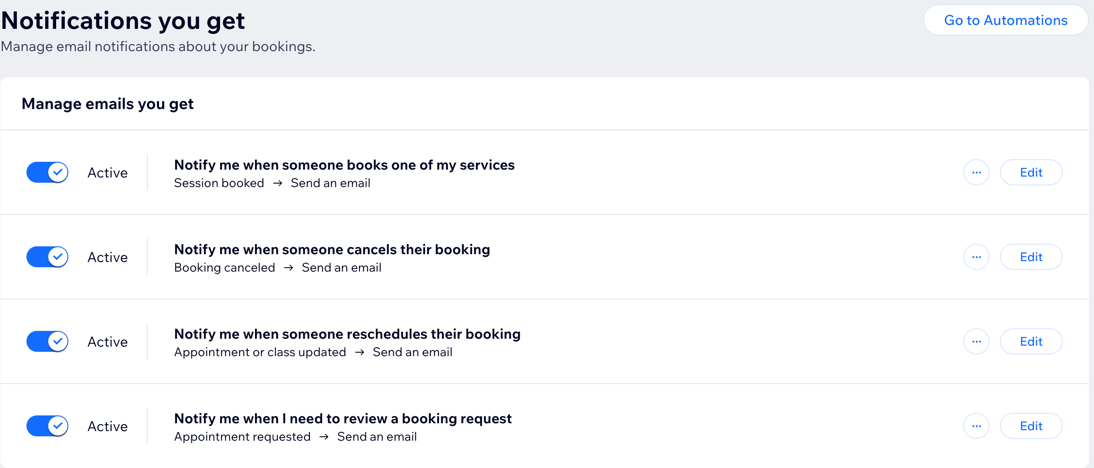
There are several types of automated emails to keep everyone informed about bookings and changes. These emails are active by default, but you can deactivate the toggle next to any automation to stop sending them.
- Notify me when someone books one of my services
- Notify me when someone cancels their booking
- Notify me when someone reschedules their booking
- Notify me when I need to review a booking request
Want to know more?
Read more about Wix Automations.
Managing your inbound emails
Make sure you and your team never miss a booking by managing email notifications in the dashboard.
Note:
Emails are sent to the business and staff email addresses listed in the business info and staff tabs in your dashboard. Make sure these addresses are accurate and up-to-date.
To manage your inbound emails:
- Go to Booking Settings in your site's dashboard.
- Click Notifications you get.
- Click the toggle next to the relevant email notifications to enable or disable the automation.
Customizing the content of your email
You can customize automated emails to create a professional and personalized experience for your team. Automatically include client-specific details like the client's name, booking info, or service price to keep everyone informed and enhance communication.
To customize your emails:
- Go to Booking Settings in your site's dashboard.
- Click Notifications you get.
- Click Edit next to the automation you want to customize.
- In the automation flow, click the Send an email action to open the panel.
- Choose which section you want to update:
Sender details
Create an email
Set email type
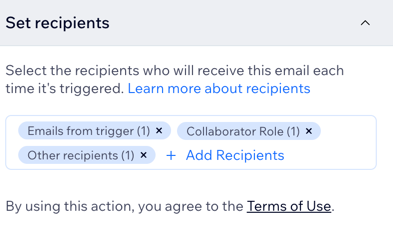
Set recipients
6. Click Apply.
7. Choose what you want to do:
- Save: Save your changes without publishing.
- Publish Changes: Make your changes live.
Notes:
- Only certain parts of the pre-installed email automations can be edited to maintain the delivery of essential service updates.
- The main image in these emails matches the image selected when creating a service.
- Read more about customizing your automated Wix emails.
FAQs
Click a question to learn more about email notifications you get.
How do I test my customized email notifications?
What should I do if I don't receive email notifications?
How do I ensure my emails don't go to spam?
Can I send email notifications to multiple recipients?