


Connecting a Domain to the Wix Name Servers
In this article
- Video Tutorial
- Step 1 | Add the domain to your Wix account
- Step 2 | Update the name servers in your domain host account
- Step 3 | Wait for your domain to propagate
You can
create a website with Wix, and then connect a domain you already own to it by changing its name servers. With this connection method, Wix hosts your DNS, while your domain remains registered with its current host.
Need a domain?
If you don't already own a domain, you can
buy a domain name from Wix.
In most cases we recommend connecting via name servers. However, the pointing method may be a better option if you have several DNS records you'd prefer not to reconfigure. Learn more about the differences between
connecting your domain via name servers vs. pointing.
Important:
- You must upgrade your Wix site with a plan before you can connect your domain.
- Wix does not support the use of DNSSEC or DNS Proxies like Cloudflare. To ensure DNS propagation, please make sure these options are not enabled before connecting your domain to a Wix site.
Video Tutorial
Watch our video tutorial to see how to connect your domain to Wix name servers, or scroll down for step-by-step instructions.
Step 1 | Add the domain to your Wix account
Before updating the DNS settings in your domain host account, you'll need to add the domain to your Wix account.
To add your domain:
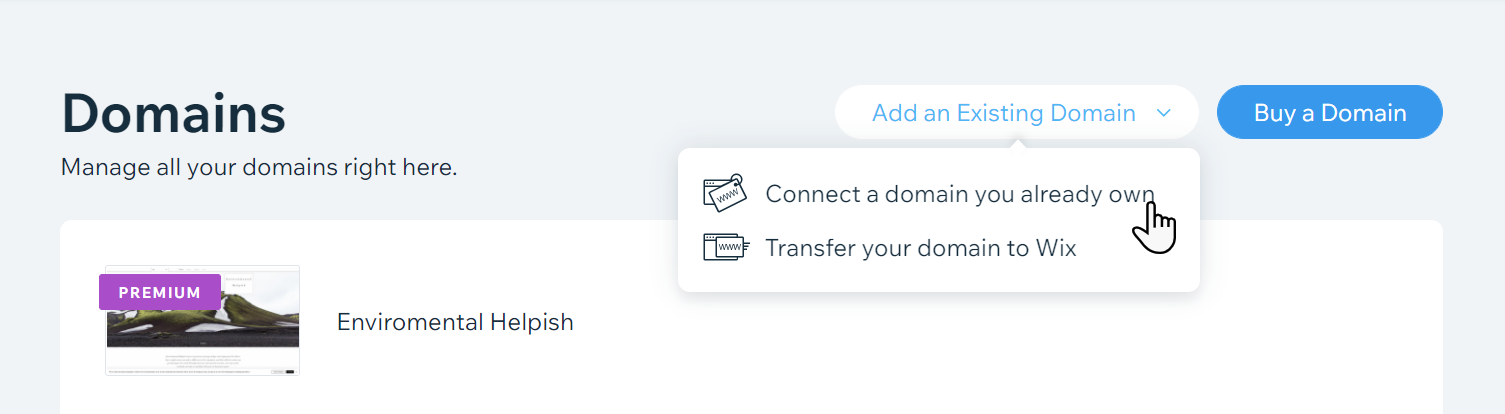
- Go to Domains in your Wix account.
- Click Add an Existing Domain.
- Click Connect a domain you already own.
- Select the site you want to connect your domain to and click Continue.
- Enter your domain in the search bar and click the arrow icon
 .
. - Click connect it to your site in the sentence below the search field.
- Some domain providers support connecting your domain automatically. Depending on your provider, you may see different steps. Choose an option:
Note: If a "Start Transfer" option appears, click connect your domain in the sentence below it.
Connect your domain automatically

Connect your domain manually

Tip:
If the domain is already connected in another Wix account, you do not need to continue to Step 2. Instead, you'll need to
remove the domain from the other Wix account so it can be connected in the Wix account you're logged into.
Step 2 | Update the name servers in your domain host account
To connect your domain, you need to update your name server records in your domain provider's account (this is usually the company you bought your domain from).
We'll guide you through the process of changing the name servers in your provider's account. Keep this page open for reference and follow the step-by-step on-screen instructions in your Wix account.
The instructions in your account will tell you everything you need to know, including the name servers you should use to connect your domain.
To update the name servers:
- Log into your domain host account:
- Open a new tab in your browser.
- Go to your domain host's site and log in.
- Return to the Wix domains page.
- Click I logged in.
- Find your domain settings page in your domain host account:
- Go to the domains page on your domain host's site.
- Find your domain and go to the settings panel.
- Return to the Wix domains page.
- Click I found my domain settings.
- Find the name servers in your domain host account:
- In your domain settings, find the area where you manage or edit name server records.
- Return to the Wix domains page.
- Click I found the nameservers.
- Replace the name servers in your domain host account:
- On your domain host's site, delete the old name servers, and replace them with the Wix name servers shown on the screen.
- Click I've replaced my nameservers.
Need help?
If you're having trouble updating your name servers, contact your domain host for assistance. For your convenience, we've created this email template to help you explain what you need to do:
Send these details to your domain host
Step 3 | Wait for your domain to propagate
Your work is done. It may take up to 48 hours for your domain's new DNS records to propagate and your site to appear worldwide. Learn more about
domain propagation.
Tip:
Make it easier for people to contact you. Get a personalized business email for your custom domain through our partnership with Google Workspace. Learn more about
purchasing and setting up a business email.
