Wix Pro Gallery: Adding a Scroll Animation to Your Gallery
2 min
In this article
- Adding a scroll animation to your gallery
- Customizing your animation settings
Add an animated effect that appears as visitors scroll through your gallery items. Maintain your visitors' curiosity about what comes next in your gallery by adding a transition style to your animation and adjusting its duration.
These animations begin once the visitor scrolls below the part of your site known as the fold. 'Above the fold' refers to the portion of your site that is initially visible when the site loads. 'Below the fold' is the portion of your site that requires scrolling downwards to be seen.
Tip:
This article is for customizing your gallery designs for view on desktop devices. You can also customize the gallery design for your mobile site.
Adding a scroll animation to your gallery
Add a visual effect that plays when visitors scroll downward over your gallery. Fun scroll animations are available in all gallery layouts except the Magic layout. Available animation effects depend on the layout you choose.
To add a scroll animation to your gallery:
- Go to your editor.
- Click the pro gallery element on your page.
- Click Settings.
- Click the Design tab.
- Click Scroll Animations.
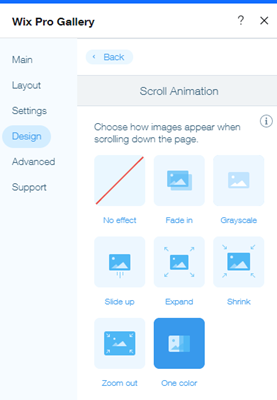
- Select an animation from the following options:
- No effect: No effect is applied to the scroll.
- Fade in: Images gradually appear during the scroll.
- Grayscale: The images become black and white when scrolling.
- Slide up: The images slide up when scrolling.
- Expand: The images get larger when scrolling.
- Shrink: The images get smaller when scrolling.
- Zoom out: The images zoom out when scrolling.
- One color: A single color overlay is applied when scrolling.

Note:
Only the Scroll, Fade and Stack slide animations are available in the Slideshow and Thumbnails layouts.
Customizing your animation settings
Keep your site visitors interested in what comes next in your gallery by customizing the duration of your scroll animation and adding a smooth transition between gallery items.
Which gallery layouts can I customize my animation settings for?
To customize your animation settings:
- Go to your editor.
- Click the pro gallery element on your page.
- Click Settings.
- Click the Design tab.
- Click Scroll Animations.
- Click Customize Animations.
- Edit your animation settings:
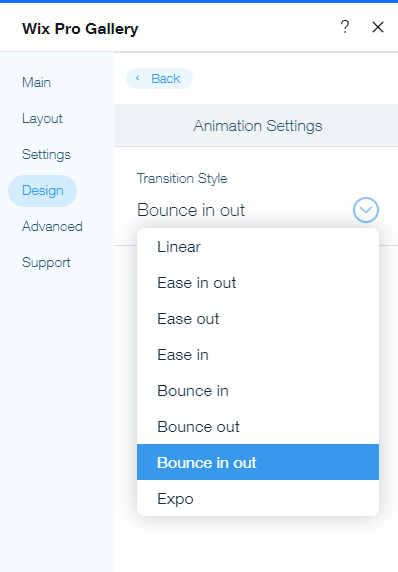
- Transition style: Click the drop-down and choose the style in which the animation plays (e.g. Linear, Ease in, Bounce out).
- Duration: Drag the slider to adjust how long your animation lasts.

See how it looks on your live site:
Preview your site to see your animations in action.


