Wix Contacts: Creating and Managing Workflows
7 min
In this article
- Creating a new workflow
- Managing a workflow
- Automating a workflow
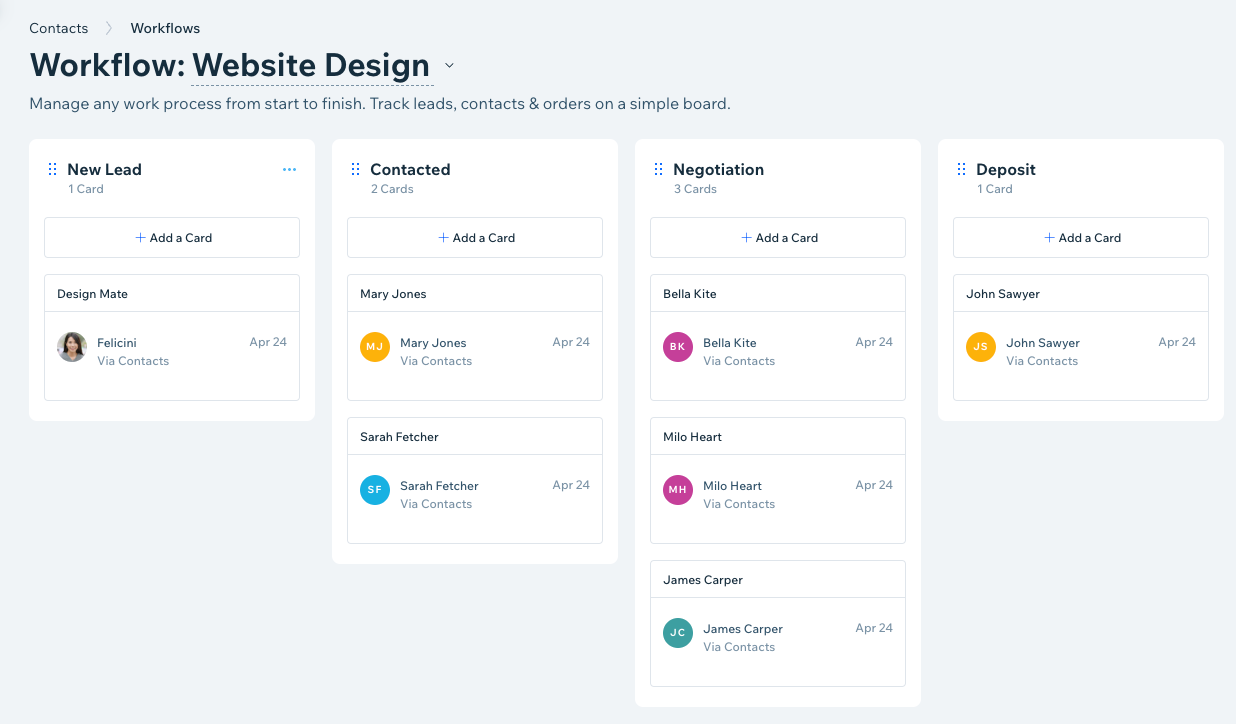
A workflow is a board that organizes all the steps (columns) of a project, helping you track every phase with ease. Workflows let you manage and prioritize projects, marketing campaigns, sales funnels, or any other processes. For example, you can use them to handle customer inquiries, track sales leads, and follow up on orders.
Creating a new workflow
Workflows are connected to specific contacts. From Contacts in your site's dashboard, create a new workflow with your own custom steps or use a ready-made template. Use cards and steps to visualize a lead or customer journey.
What templates are available?
To create a new workflow:
- Go to Contacts in your site's dashboard.
- Click the More Actions icon
 at the top right and select Workflows.
 - Click Get Started.
Note: If your site already has existing workflows, click New at the top right and select + Create Workflow. - Choose a template or click + Start from Scratch to create your own custom workflow.
- Click the workflow title to rename it.
- Click New at the top right to add steps and cards to build out your workflow.
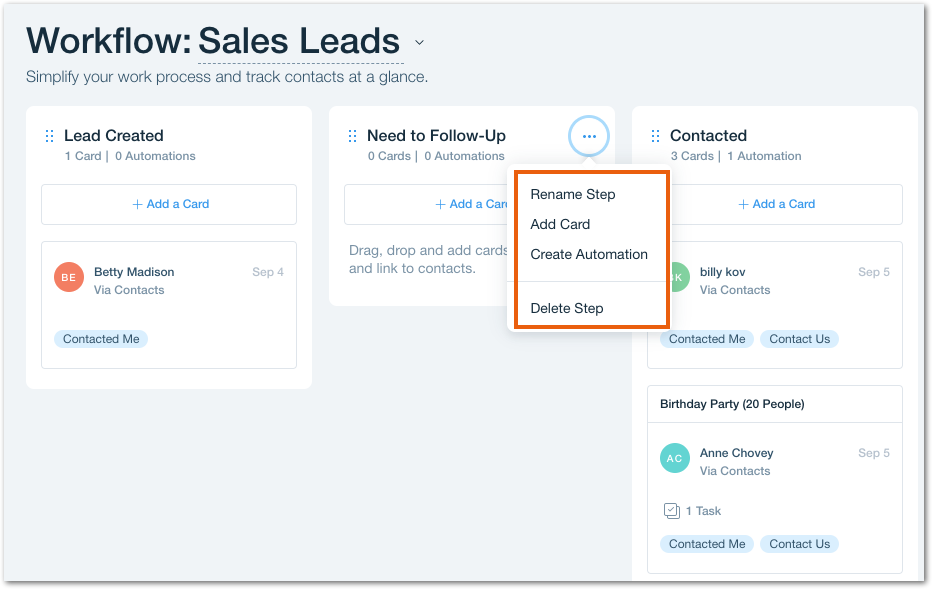
- Steps: The steps (or columns) in your workflow are the columns that visually represent steps in your project or process. Cards move from step to step as contacts progress through the workflow.
- Cards: Each step contains cards that are linked to a contact. Cards give you a visual understanding of where you stand with a contact or lead, as well as what still needs to be done. Once you've made progress with a contact, move them to the next step by dragging and dropping the card to the relevant column.
What's next?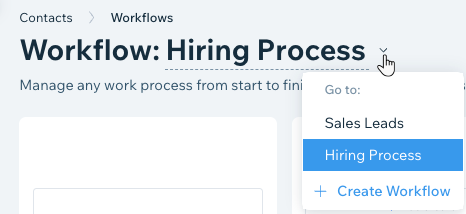
After building your workflow, it saves automatically. Use the drop-down next to the workflow title to switch between workflows.
Managing a workflow
After creating your workflow, you may need to make adjustments such as renaming the workflow, reordering cards, or deleting unnecessary steps.
To manage a workflow:
- Go to Contacts in your site's dashboard.
- Click the More Actions icon at the top right and select Workflows.
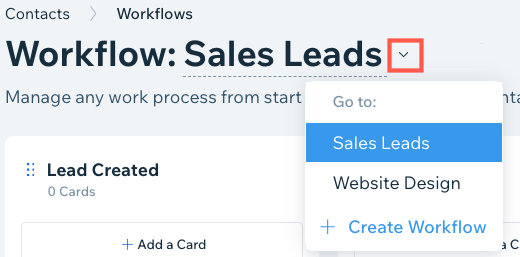
- Select the relevant workflow from the drop-down next to the workflow title.
- Choose what you want to do:
Add or remove a card


Reorder a card
Add or remove a step
 next to the step and drag it to the relevant location.
Rename your workflow
Delete your workflow
Automating a workflow
Wix Automations helps you streamline your workflow by taking care of smaller tasks for you. You can create an automation for workflows in two ways:
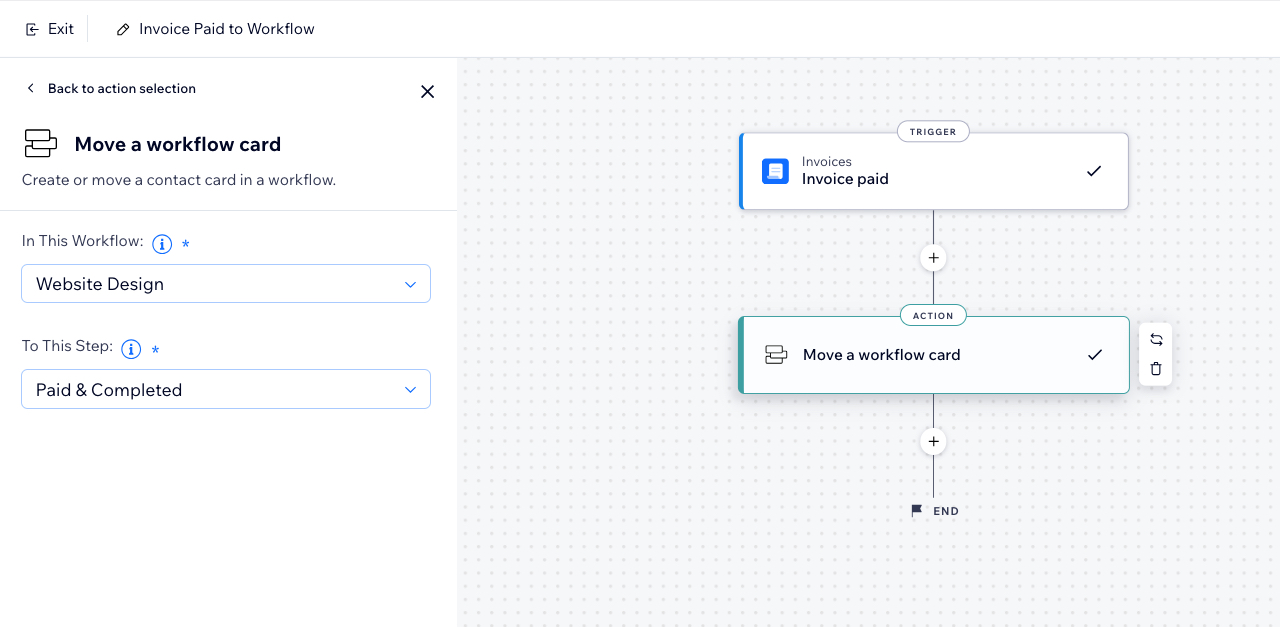
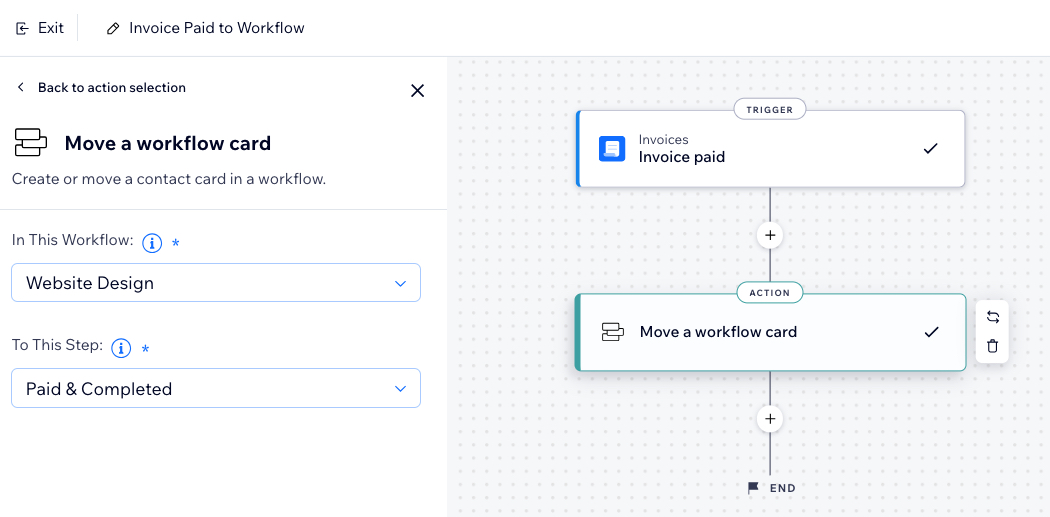
- Use 'Card added or moved' as a trigger: Every time a card is moved from one workflow step to another, it triggers an automated response (e.g. sends an email, creates a task).
- Choose 'Move a workflow card' as an action: Depending on your selected trigger (e.g. invoice paid), automate a workflow card to move from one step to another.
For example, you can create an automation that moves a card and its linked contact to the "Paid & Completed" step of a workflow once an invoice is paid (i.e. the trigger).
To automate a workflow:
- Go to Automations in your site's dashboard.
- Click + Create Automation at the top right.
- Click Start from Scratch to begin from a blank automation template.
- Choose what you want to do:
Use 'Card added or moved' as the automation trigger

Add 'Move a workflow card' as the automation action