

Wix Table Reservations: Creating an Experience
11 min
In this article
- Step 1 | Create an experience
- Step 2 | Set up your experience preferences
- FAQs
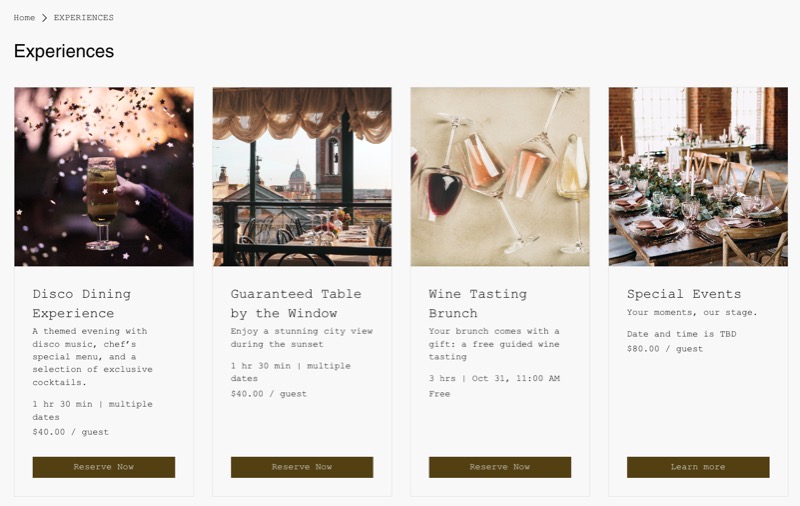
Create a unique dining experience through table reservations that goes beyond a standard booking. Experiences let you showcase what makes your restaurant special — whether it’s a chef’s tasting menu, a wine-pairing dinner, or a seasonal holiday brunch.
Fully customize each experience by setting the schedule, guest capacity, pricing, and booking options to fit your concept.
Before you begin:
Make sure to add and set up Wix Table Reservations on your site.
Step 1 | Create an experience
Start by creating an experience to define what guests can book and how it appears on your site.
To create an experience:
- Go to Experiences in your site's dashboard.
- Click Create Experience.
Tip: Click + Add Experience if you've already saved at least one experience. - Enter your experience details using the options:
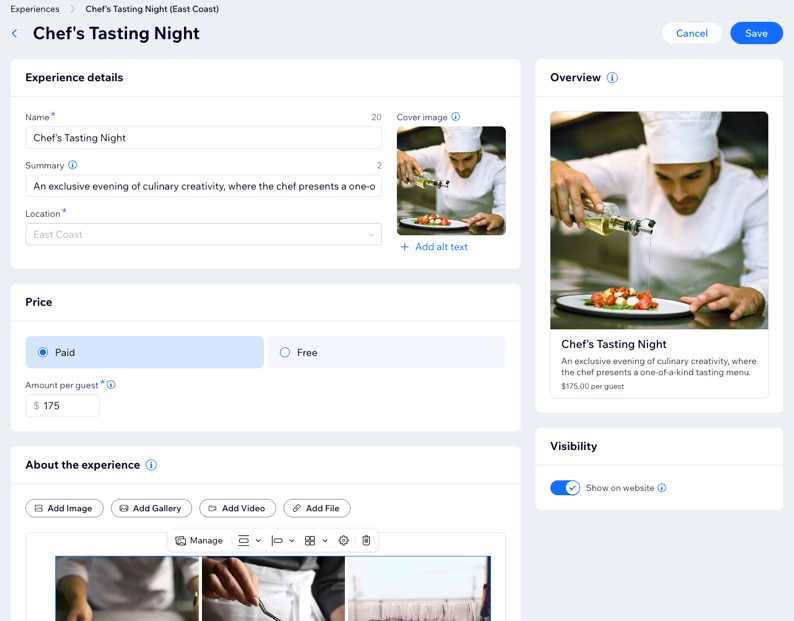
- Name: Enter the title of the experience.
- Cover image: (Optional) Upload the main visual that appears on your site.
- Summary: (Optional) Add a short description highlighting what guests can expect.
- Location: (If relevant) Click the drop-down and select the location for your experience.
Note: The location can’t be changed after the experience is created.
- Set the Price for your experience:
- Paid: Enter the amount per guest.
- Free: Select if there is no cost to attend.
- Add information in the About the experience section so guests know what to expect. Choose the options that best represent your experience:
Write a description
Add an image
 / Alignment
  : Adjust the size and positioning of the image.
 : Make the image clickable and direct users to a specific webpage or a part of your post.
 : Add a caption for context, provide alt text for accessibility, enable or disable image downloads, and mark as a spoiler to blur content until clicked.
Add a gallery
 : Click Manage to add more images.
 Add a video
Add a file
6. Click the Show on website toggle under Visibility to display this experience on your site.
7. When ready, click Save.
Step 2 | Set up your experience preferences
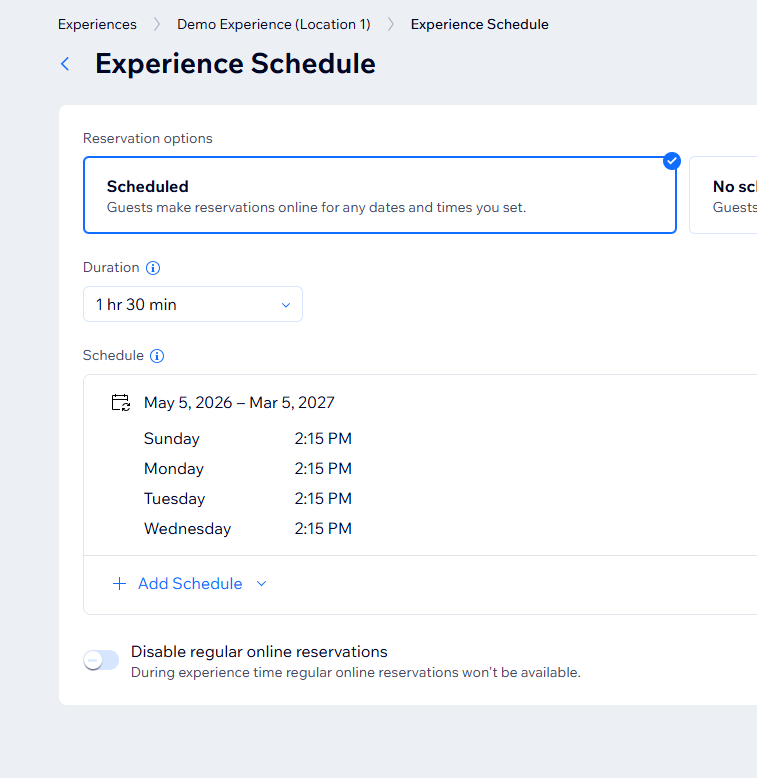
Once your experience is set up, fine-tune how guests book it. You can let them reserve online for select dates and times, or have them reach out to you directly to make a reservation.
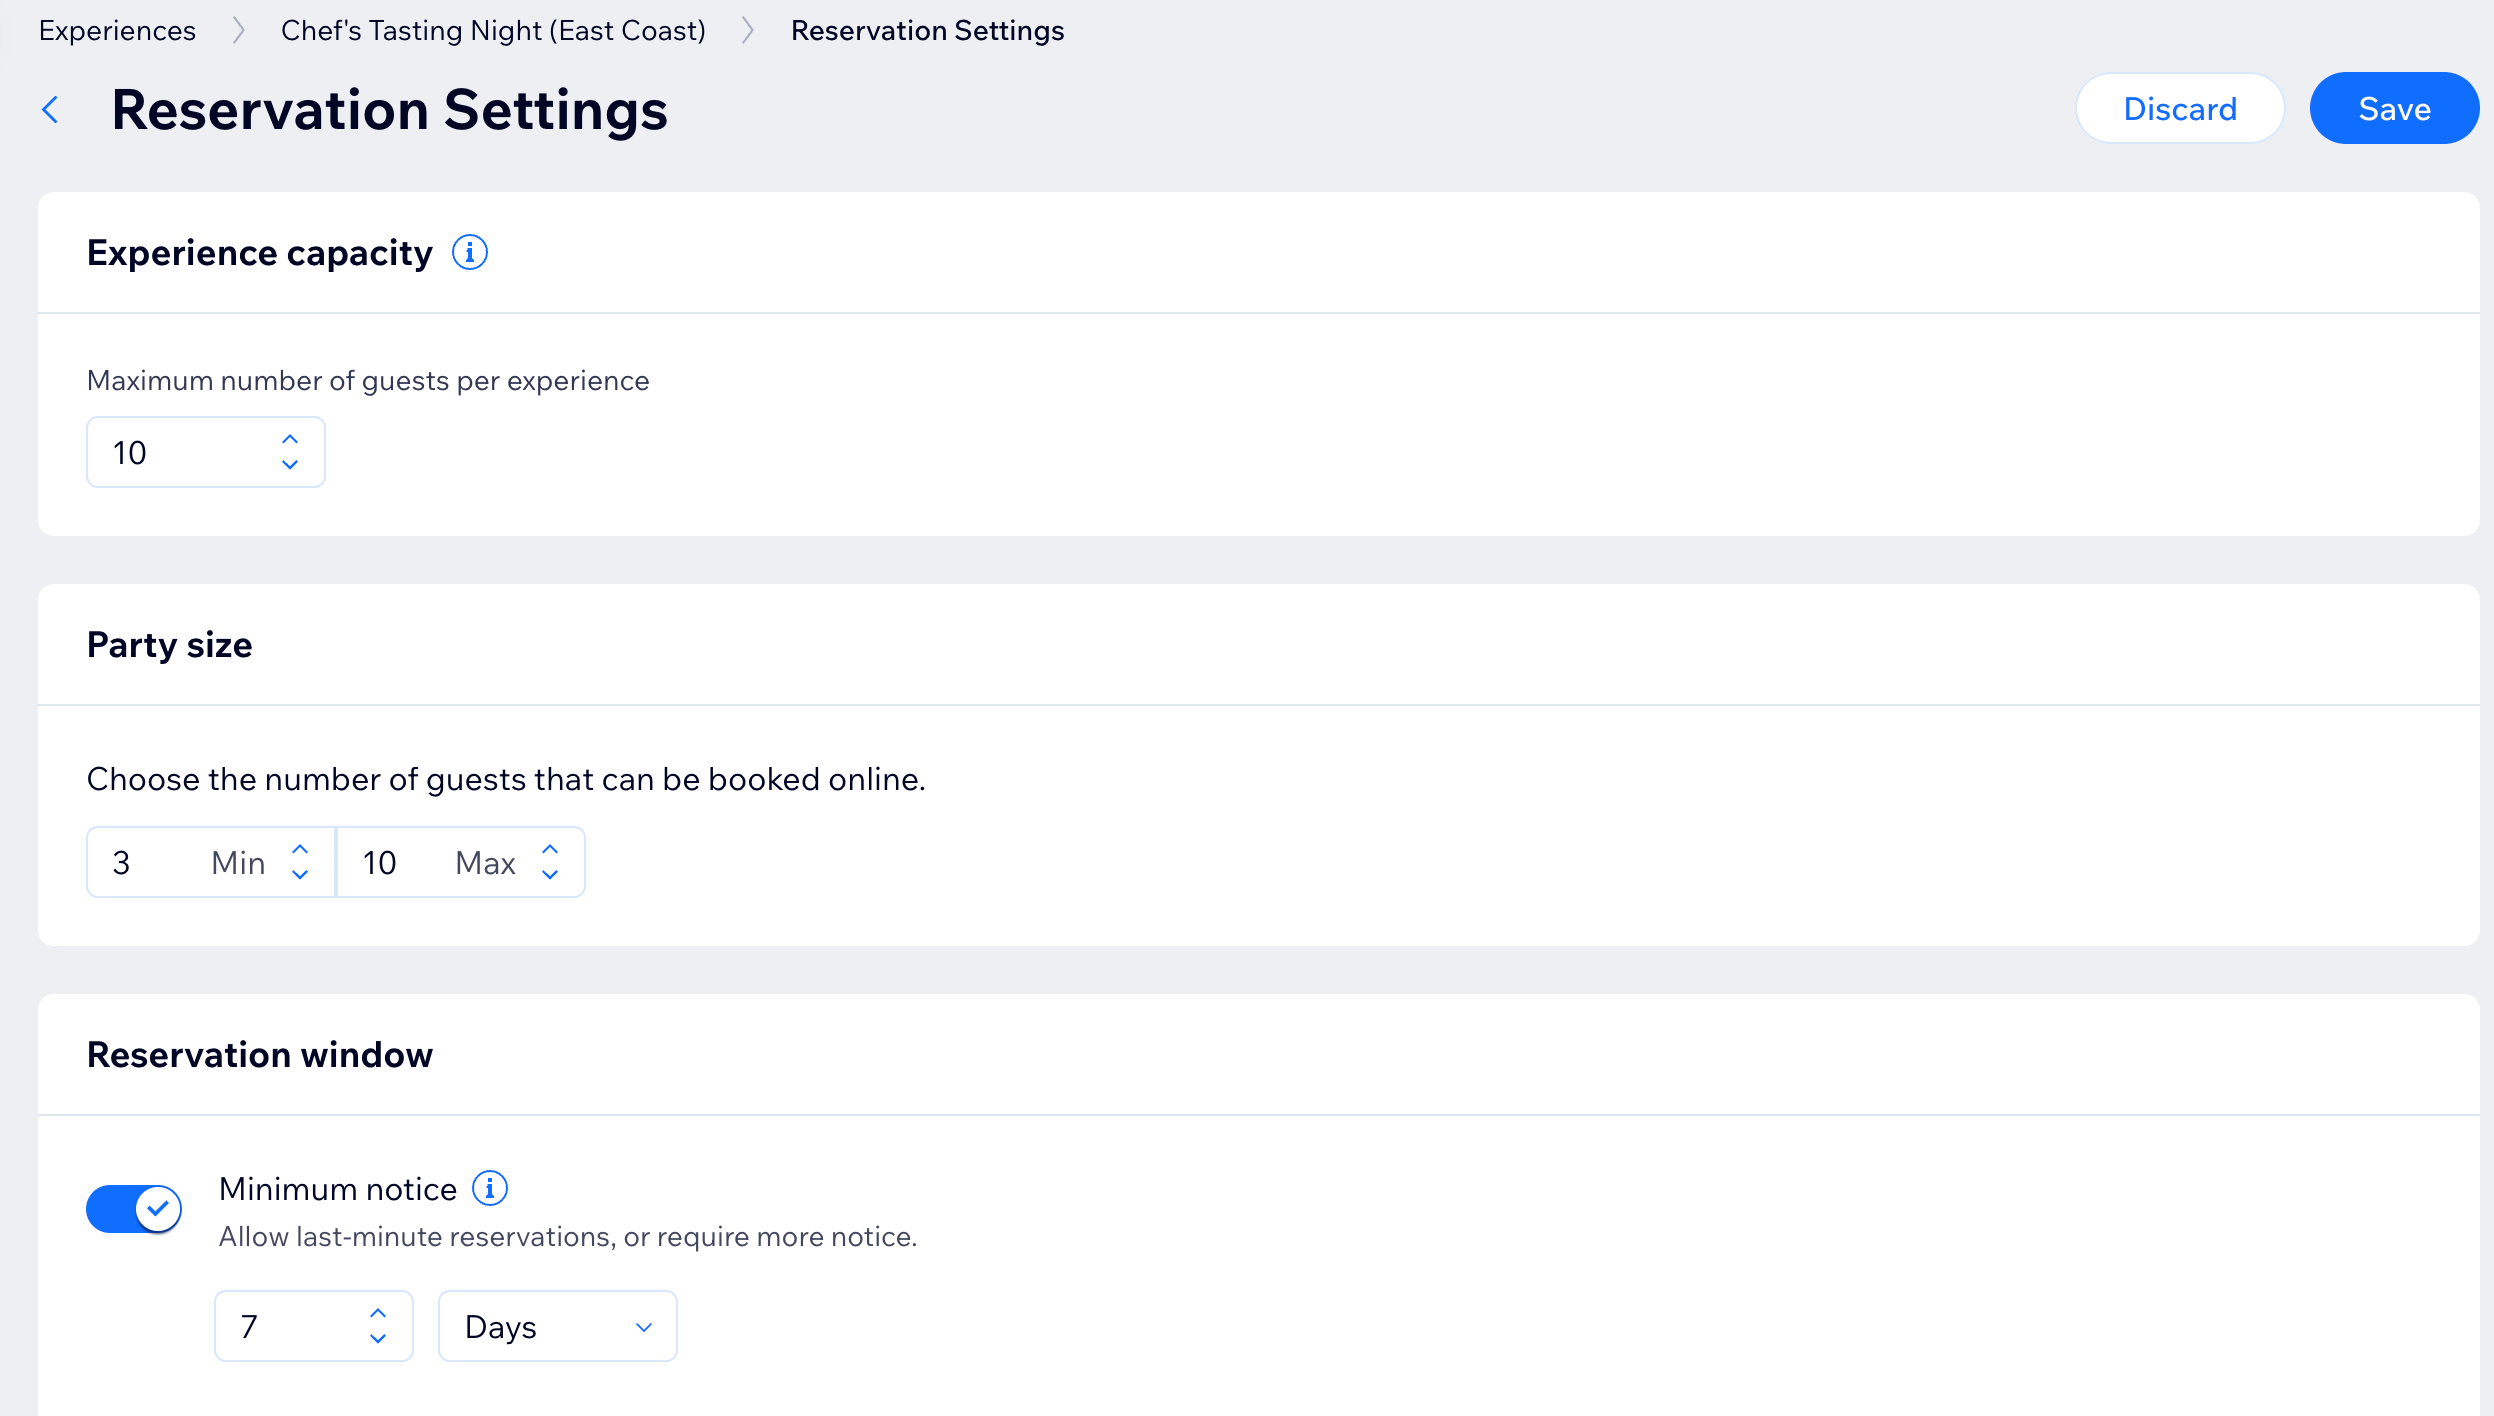
You can also define important details like the maximum number of guests per time slot, party size limits, and how far in advance guests can reserve.
To customize experience perferences:
- Go to Experiences in your site's dashboard.
- Hover over the relevant experience and click Edit.
- Set your experience preferences:
Schedule
Reservation settings
Reservation form

Policies
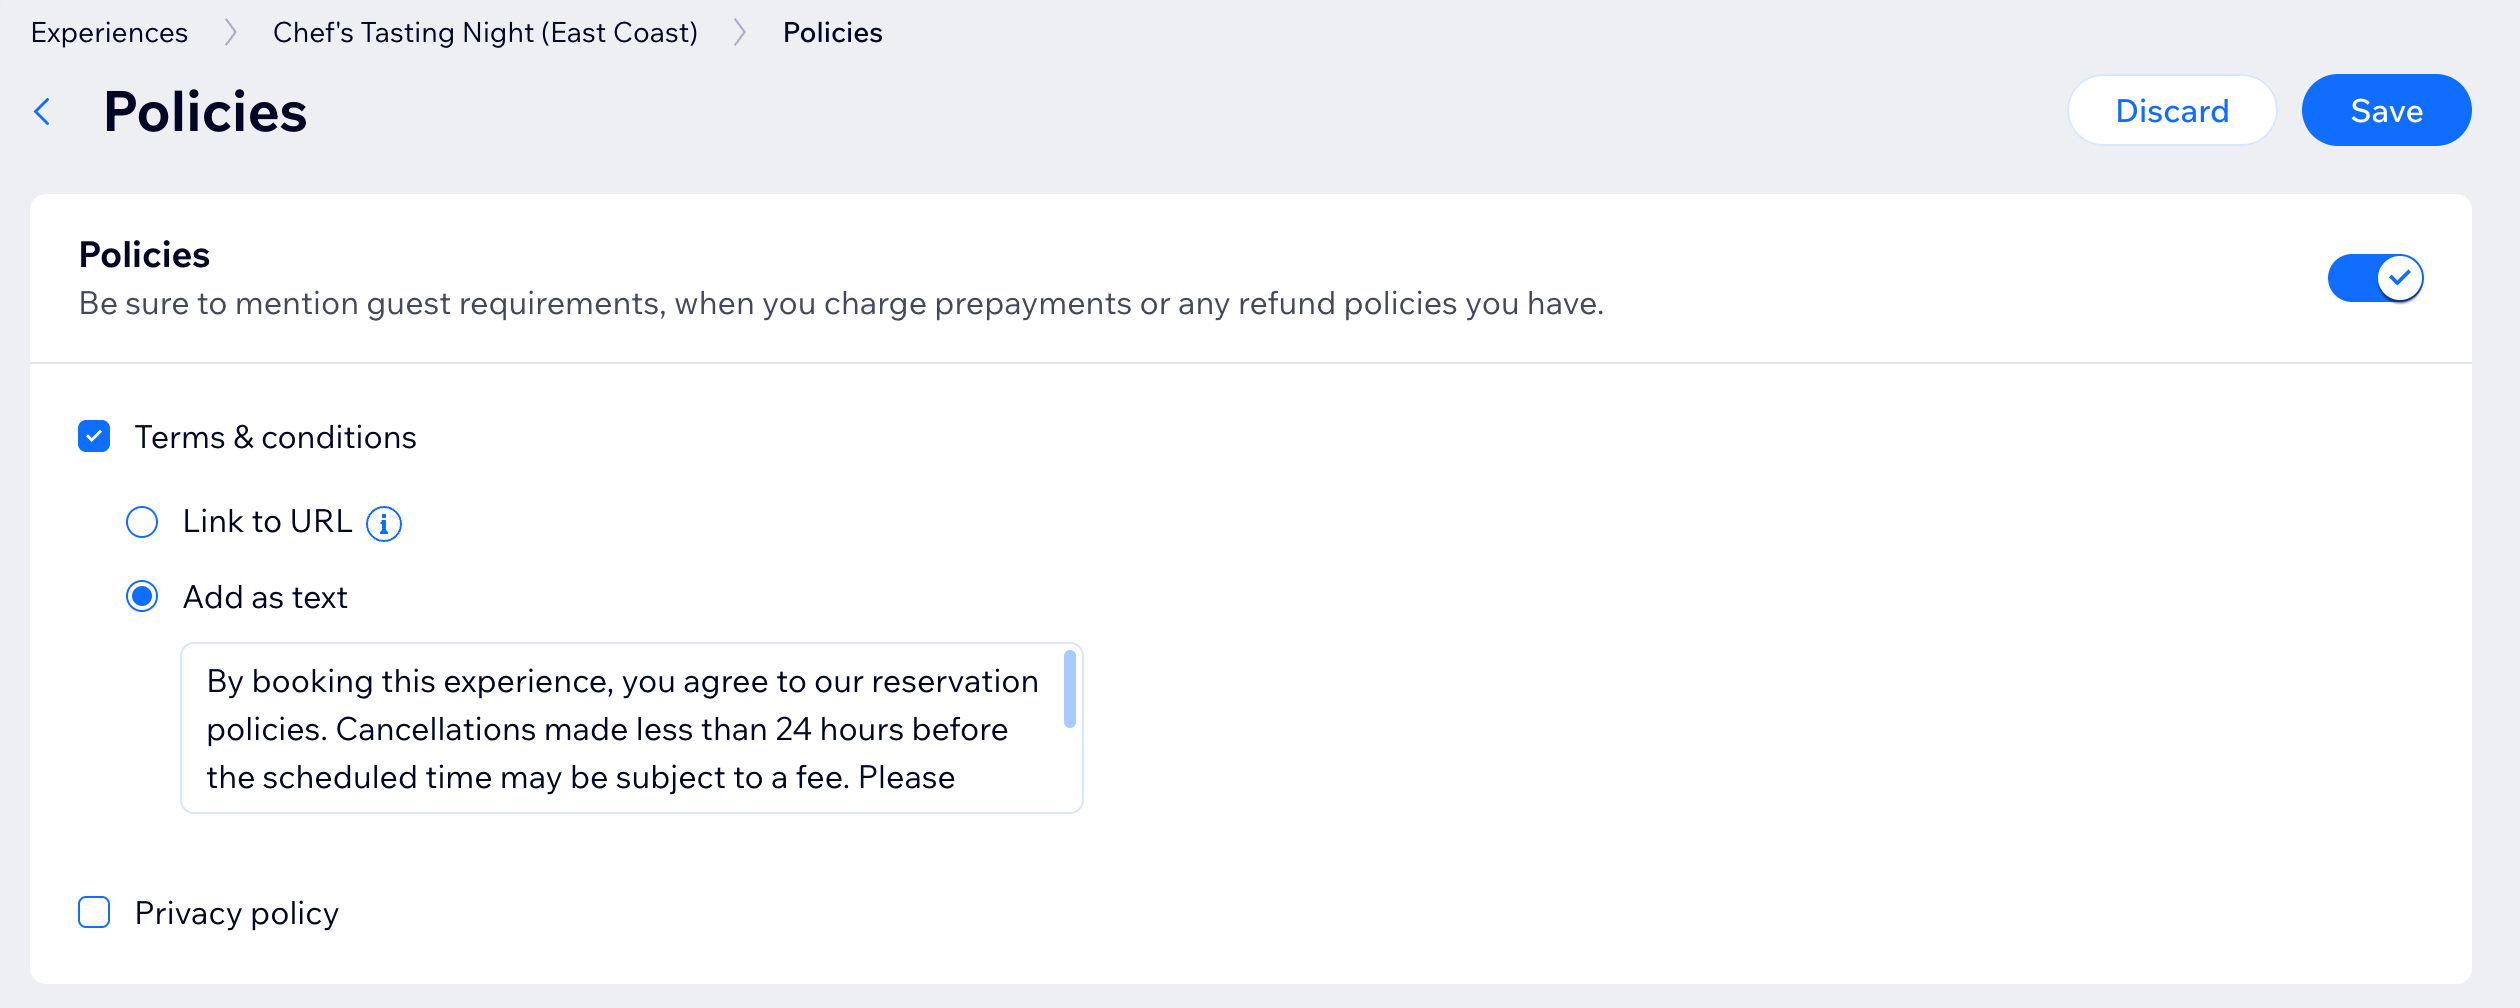
Table Assignment
Tip:
For full details about choosing table connections, blocking regular reservations for selected tables, and setting assign mode, learn how to set up table assignment for experiences in Wix Restaurants: Adding Your Restaurant Tables.

What's next?
Turn on online reservations to allow guests to reserve an experience:
- Go to Table Reservations in your site's dashboard.
- Click Settings at the top right.
- Click the Online reservations are toggle to enable or disable online reservations:
- Online reservations are on: Customers can book a table on your site.
- Online reservations are off: The reservations app appears on your site, but customers won't be able to book a table.
FAQs
Click a question below learn more about creating an experience with table reservations.
Can I show / hide an experience on my live site?
 next to relevant experience.
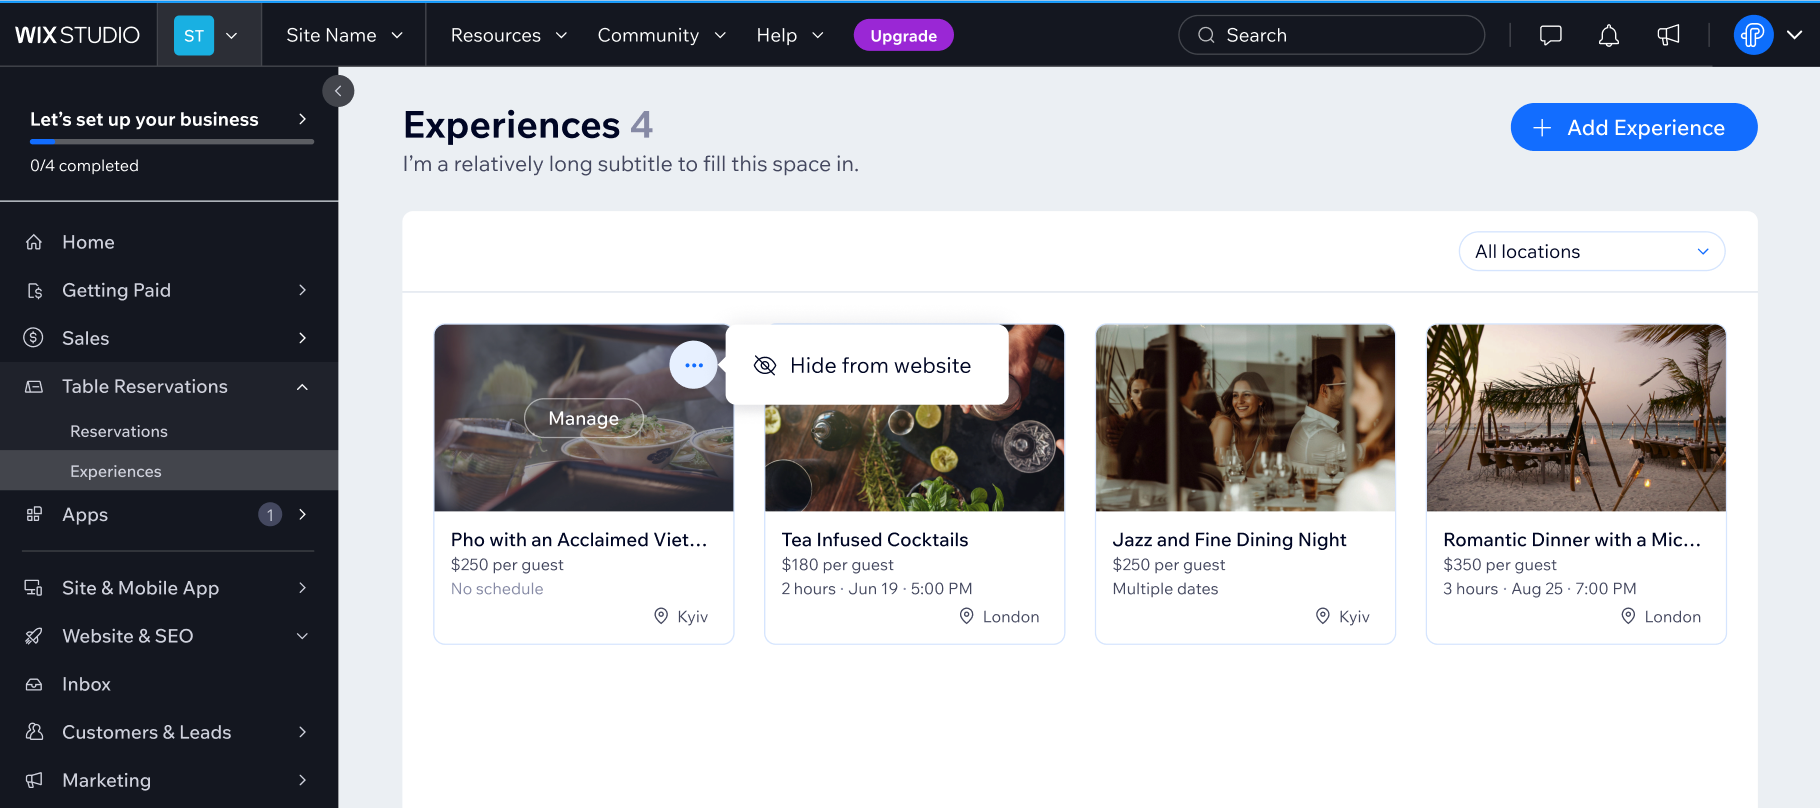
Can I change a location after creating an experience?
Can I assign an experience to more than one location?
Can I delete an experience?
How do I archive or unarchive an experience?
Can I display my experiences on any page?
