

Wix Stores: Setting Up Live Rates with USPS
6 min
In this article
- Step 1 | Prepare your products
- Step 2 | Select a region and shipping services
- Step 3 | Choose a package type
- Step 4 | Select your "Ship From" address
- Step 5 | Add backup settings & save your changes
- FAQs
Important:
- This feature is available for merchants based in the U.S selling in USD (except Puerto Rico).
- Rates calculated during checkout may vary from the final shipping rates charged by USPS.
Live rate shipping calculation with USPS lets you charge customers a more accurate rate for shipping.
How do live rates (real-time shipping calculations) work?
The USPS calculator provides approximate, dynamically calculated shipping rates based on the weight and dimensions of the order, and on the shipping cost to and from addresses.
The USPS calculator provides approximate, dynamically calculated shipping rates based on the weight and dimensions of the order, and on the shipping cost to and from addresses.
Is this an estimate or the actual shipping price?
The price is a close estimate; however, actual shipping costs may vary based on how you choose to ship the package - the actual package you use, and the actual weight of your package as determined by the carrier.
The price is a close estimate; however, actual shipping costs may vary based on how you choose to ship the package - the actual package you use, and the actual weight of your package as determined by the carrier.
Do I have to ship with USPS?
No, USPS is used for calculation purposes only. The estimate is also the shipping rate your customers are charged. When you actually ship orders, you are free to do so with any carrier you choose.
No, USPS is used for calculation purposes only. The estimate is also the shipping rate your customers are charged. When you actually ship orders, you are free to do so with any carrier you choose.
Step 1 | Prepare your products
Shipping calculations can be based on the weight of your products. If you have not already done so, enter a weight for each shippable product.
Before you begin:
Enter your address in your site's business info, so you can select it later on.
To prepare products:
- Go to Products in your site's dashboard.
- Click to select a product.
- Scroll down to the Inventory and shipping section and enter the Shipping weight.
- Click Save.
Tip:
When adding products in future, make sure to enter a weight.
Step 2 | Select a region and shipping services
Start by selecting the region where you want to add live rates with USPS. You can set up as many regions as you like. Next, select a shipping service for that region.
Services available in the US:
- Ground Advantage (Previously called First-Class Mail) - Learn more
- Priority Mail - Learn more
- Priority Mail Express - Learn more
Services available internationally:
- First-Class Package International - Learn more
- Priority Mail International - Learn more
- Priority Mail Express international - Learn more
To select a region and shipping services:
- Go to Shipping, delivery & fulfillment in your site's dashboard.
- Select an option:
- Create a new region: Click +Create Region and set up a new delivery area, then click Continue and select Calculated by USPS.
- Add a rate to an existing region: Click Add Rate next a region and select Calculated by USPS.
- Select the checkbox next to the service you want to offer.
- (Optional) Click Add advanced settings to add any of the following:
- Estimated delivery time: Enter a message (e.g. 3 - 5 Business Days).
- Rate adjustment (e.g. a $5 handling fee):
Note: Customers don't see this as a separate fee.- Select percentage or amount.
- Enter the percentage or the adjustment amount.
- Free shipping over a specific amount (e.g. free shipping over $80): Enter the amount.
- To add another option, repeat steps 3 and 4.
Step 3 | Choose a package type
During setup, you're asked to select your main package type. We recommend you choose the package you use most often. This package will be used to calculate all shipping estimates.
Select either your own custom packaging or one of the packaging options offered by USPS:
- Custom packaging: Choose the Custom option to calculate the price of delivery with any type of packaging other than USPS options. Shipping costs are calculated based on package weight and customers' address.
- USPS options: When you select a USPS option, the price is calculated per package (whatever fits in the box). Product weight and destination do not factor into the price for domestic shipping.
Read some examples of how packages are used in calculations.
Note:
Not all shipping services are available for all types of packaging. Check your carrier for details.
To select your package type:
- Click the Choose a package type drop-down.
- Select an option:
- Create a custom package:
- Click Custom.
- Enter a package name.
- Enter the package dimensions.
- Select one of the available USPS options:
- Select a package option (e.g. Small flat rate box).
- Enter the maximum number of products you estimate can fit in this box.
Tip: If you select 3 products and a customer buys 9, shipping is calculated for 3 boxes).
- Create a custom package:
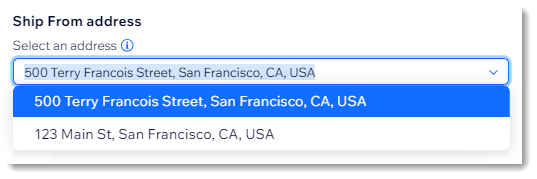
Step 4 | Select your "Ship From" address
If you already entered one or more addresses in the business info page of your site, you can select the relevant address.
However, if you haven't yet added it, or want to enter an additional address, you can do so. When you're done, select the relevant "ship from" option from the drop-down.
Important:
Make sure your address has a 5-digit zip code. Do not add the 4-digit routing number.
To select your address:
- Select the relevant address from the Ship From address drop-down.
- (Optional) If you don't see the address you need in the drop-down, add it and then select it:
- Go to Business Info in your site's dashboard.
- Select an option:
- I have one address: Enter or edit your business address and click Save.
- I have a separate "ship from" address:
- Click +Add a Second Location
- Enter the address.
- Click Save.
- Go back to Shipping & fulfillment in your site's dashboard.
- Click the More Actions icon
 next to the USPS rule and click Edit.
 - Select the relevant address from the Ship From address drop-down.
Step 5 | Add backup settings & save your changes
In most cases, USPS can provide a rate in real time. However, we recommend that you enter a backup weight and rate. These will be used in the unlikely event that a rate cannot be provided while a customer is checking out.
To enter backup rates:
- Enter a backup product weight.
Note: This is calculated per product, not per order. - Enter a backup shipping rate.
Note: This is a flat rate and will be applied to the entire order. - Click Save.
FAQs
Click a question below to learn more.
Why don't I see the Calculated by USPS option?
Can I ship the actual package with a different carrier?
How can I add a handling fee or other additional rate?
Why can't I find a specific service for a particular package?
Why would a real-time rate not be available for a particular order?
