

Wix Stores: Creating Shipping and Delivery Regions
3 min
In this article
- Creating a shipping region
- FAQs
Wix Stores comes with two regions already added: One for your own country (the "Domestic" region), and one for the rest of the world (the "International" region). Both offer free shipping by default.
From here you can edit, remove, and add regions to set up a shipping plan that works for your business.
Creating a shipping region
A shipping region can be a country, a group of countries, or states/provinces within a country. For example, you could create any of the following regions:
- United States
- United States + Canada + Mexico
- United States + Ontario
- California + Oregon + Washington
To create a shipping region:
- Go to Shipping, delivery & fulfillment in your site's dashboard.
- Click + Create Region.
- Enter a name for the region.
Tip: This is for internal use - customers won't see it. - Add one or more destinations.
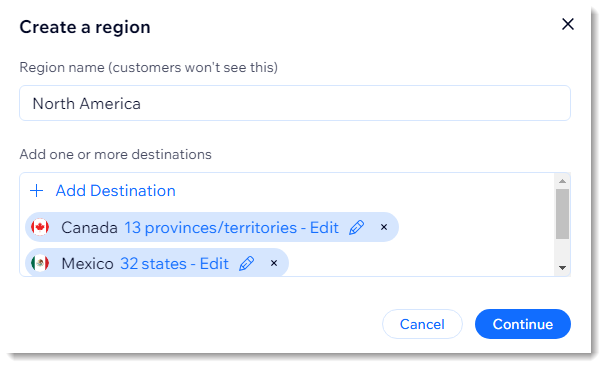
- (Optional) Remove some of the states/provinces in a country:
- Click Edit next to the country name.

- Deselect the areas you don't want to ship to and click Add.
- Click Edit next to the country name.
- Click Continue.
Next steps:
Choose what kind of delivery method you want to set up for this region. After you set up one kind of delivery (e.g. shipping) you can add other methods.
FAQs
Click a question below to learn more.
What happens if there's no shipping rule in a particular region?

How can I delete a region?
 next to the region name and click Delete region.
How do I set up shipping and delivery for multiple regions with different rates for each one?

How can I edit an existing region?

