

Customizing the Cart Icon
7 min
In this article
- Enabling cart checkout (Wix Bookings only)
- Re-adding the cart icon
- Customizing the cart icon design
- Customizing the cart icon behavior
- Customizing the success pop-up
- FAQs
Important:
This article is relevant for Wix Stores, Wix Bookings, and Wix Restaurants Orders (New).
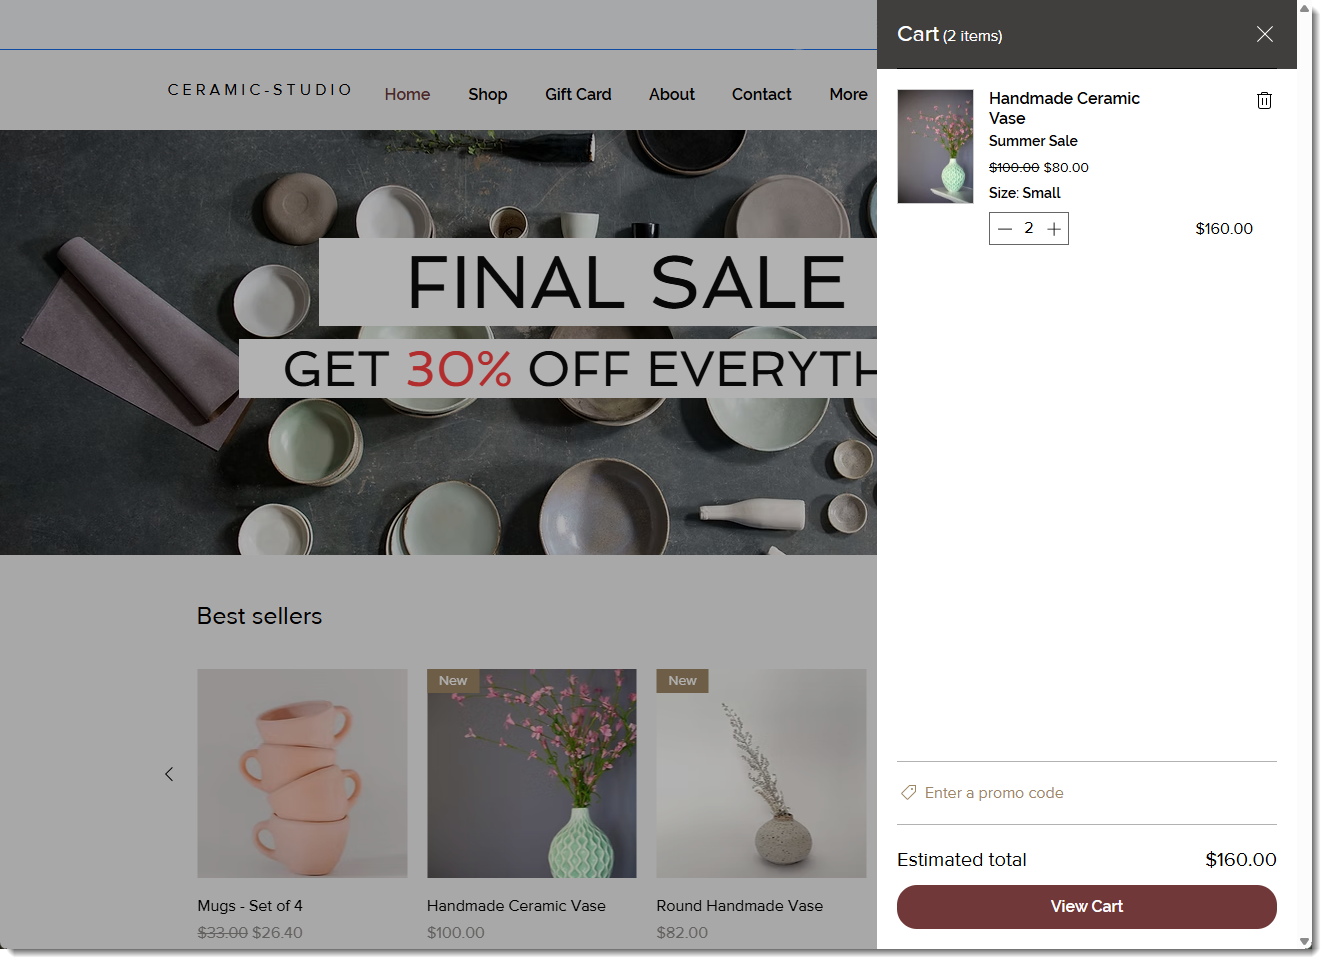
The cart icon appears in your site's header. The number of items added is shown in the cart icon. When your customer is ready to complete the order, they can click the icon to start the checkout process.

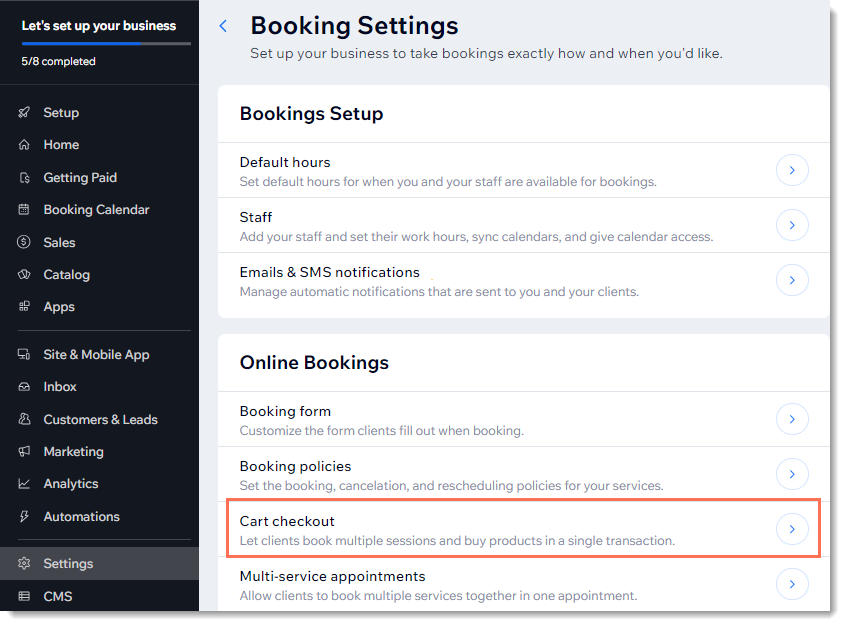
Enabling cart checkout (Wix Bookings only)
Tip:
You can also enable the ability to book multi-service appointments (e.g. one appointment that includes 2 services, such as a manicure and a pedicure).
To enable cart checkout:
- Go to Booking Settings in your site's dashboard.
- Click Cart checkout.
- Click the Active toggle to enable it.
- Click Save.
Re-adding the cart icon
When you add Wix Stores, Wix Bookings, or the new Wix Restaurants Orders to your site, the cart icon is automatically added. You can always re-add the cart icon if it was deleted.
Note:
The same cart icon is used for stores, bookings, and the new restaurant orders.
Wix Editor
Studio Editor
Wix Harmony Editor
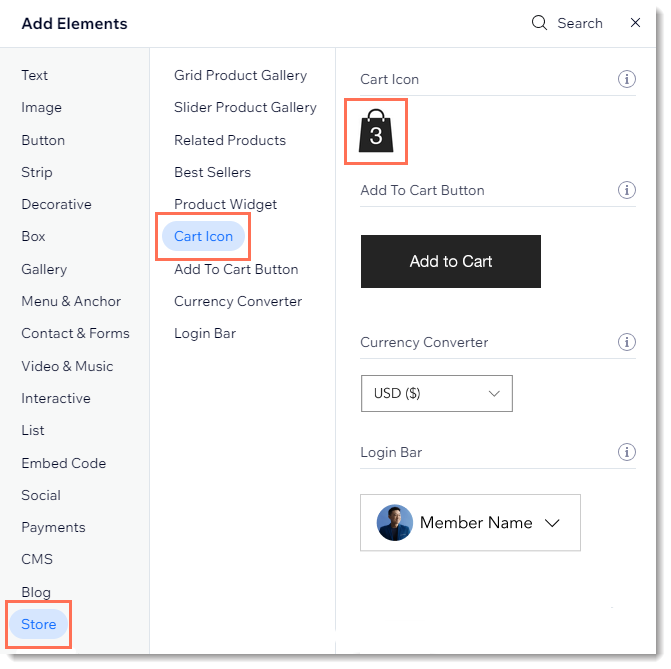
- Go to your editor.
- Click Add Elements
 on the left side of the editor.
 - Depending on the app you're using, click Stores / Bookings / Restaurants.
- Click Cart Icon.
- Drag the cart to your site's header.
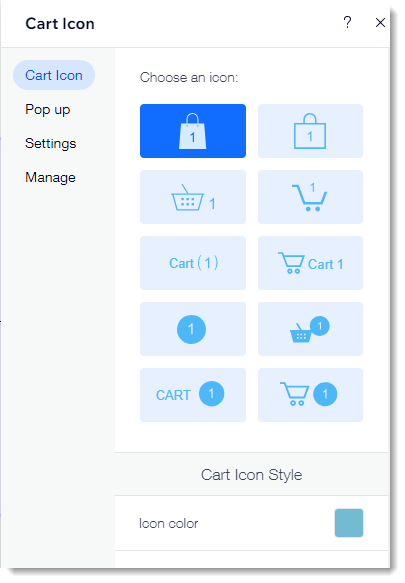
Customizing the cart icon design
Select your favorite cart design and then customize the font and colors to get the perfect look. You can choose from cart designs that have only an image, those with the word "Cart", or designs that have both.
Wix Editor
Studio Editor
Wix Harmony Editor
- Go to your editor.
- Click the Cart Icon in your editor.
- Click Settings.
- Select the Cart Icon tab.
- Select an icon design.
- Customize the icon's colors, font, or text.
Tip: Available options vary depending on the icon you select.
Customizing the cart icon behavior
Decide what happens when customers click the cart icon. The Side Cart can open or customers can be directed to the Cart page.
Wix Editor
Studio Editor
Wix Harmony Editor
- Go to your editor.
- Click the Cart Icon in your editor.
- Click Settings.
- Click the Settings tab
- Select what happens when customers click the cart icon.
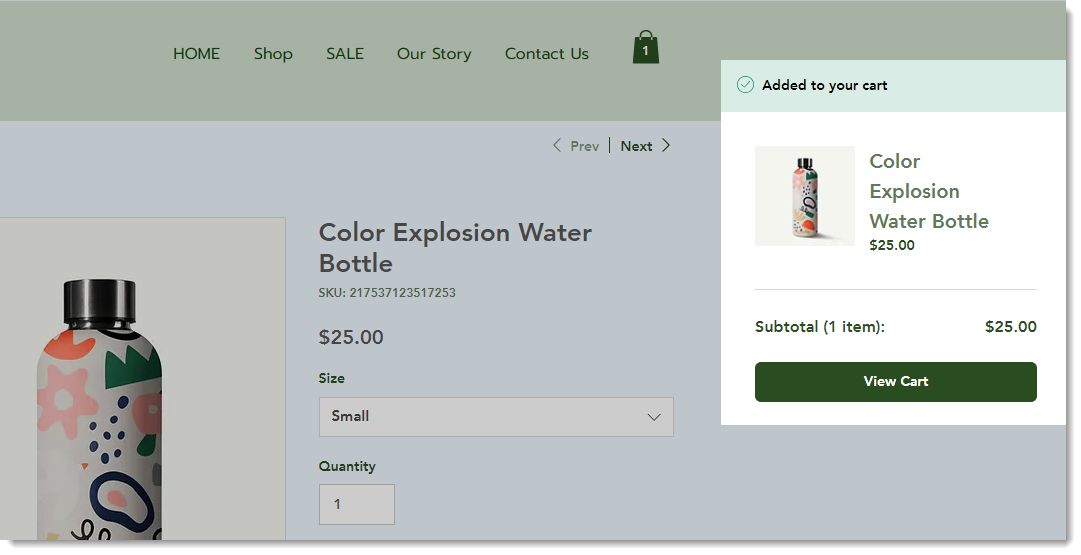
Customizing the success pop-up
The success pop-up is a small pop-up indication that appears on the side. It displays a product that your customer has just added.
Wix Editor
Studio Editor
Wix Harmony Editor
- Go to your editor.
- Click the Cart Icon in your editor.
- Click Settings.
- Select the Pop up tab.
- Customize the success pop-up using the available options.
FAQs
Can customers add different types of items to the cart (store products, bookings services, restaurant items)?
How can I customize the Side Cart?
How can my Wix Stores customers go straight to checkout, bypassing the cart icon and cart page altogether?

How can my Wix Bookings customers go straight to checkout, bypassing the cart icon and cart page altogether?

