

Wix Stores: Adding Info Sections to Products
4 min
In this article
- Adding an Info Section to a product
- Adding a table
- Adding links
- Adding an Info Section to multiple products
Customers are more likely to make a purchase when their questions are answered. Add one or more info sections (e.g. product details, shipping info) to a product to provide all the explanations your customers need.

Adding an Info Section to a product
Help customers feel comfortable about buying your products by adding the information they need. This can include product specs, sizing, care info, and store policies.
To add an info section:
- Go to Products in your site's dashboard.
- Create a new product or edit an existing one.
- Click + Add an Info Section.
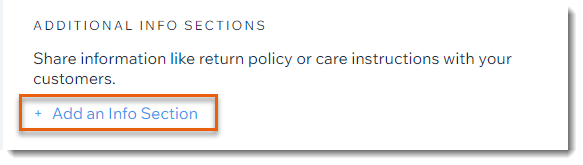
- Enter the info section title.
- Enter the relevant information and use the text editing toolbar to format the text.
- Click Save.
Adding a table
Tables are a great way to display certain types of information, such as a size chart.
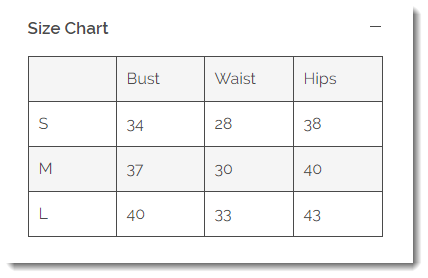
To add a table to an info section:
- Go to Products in your site's dashboard.
- Create a new product or edit an existing one.
- Click + Add an Info Section.

- Enter the title.
- Click the Table icon
 .
.

- Set up your table:
- Enter the total number of columns and rows you want.
- Select an option from the Headers drop-down.
Tip: Rows or columns designated as headers are bolded. - Click OK.
- Enter the table content.
- Click Save.
Adding links
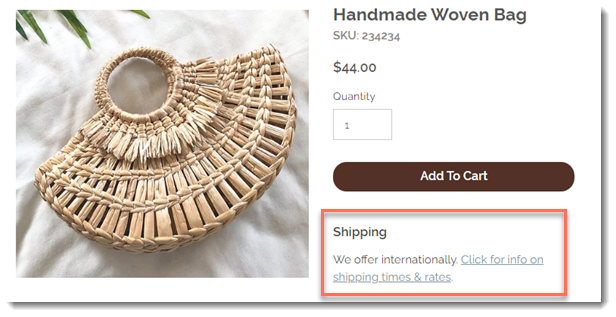
You can add links that direct to pages containing additional info about your product or policies. For example, you may want to display basic shipping information in the info section and also provide a link to a page with detailed shipping information.
Linking options:
You can link to hidden or live pages in your site. You can also link to any external page.
To add links to an info section:
- Highlight any text.
- Click the Link icon
 .
.
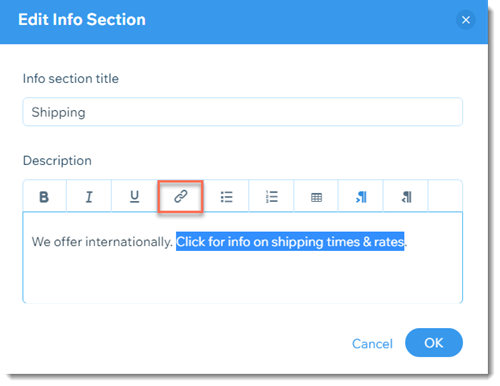
- Enter the URL you want to link to.
- Click OK.
Adding an Info Section to multiple products
To save time, you can add the same info section to multiple products at the same time. Simply select the relevant products and create the info section as you would for a single product.
To add info sections to multiple products at once:
- Go to Products in your site's dashboard.
- Select the checkboxes next to the products you want to edit, or click the checkbox at the top left to select all products.
- Click More Actions.
- Select + Add info section.
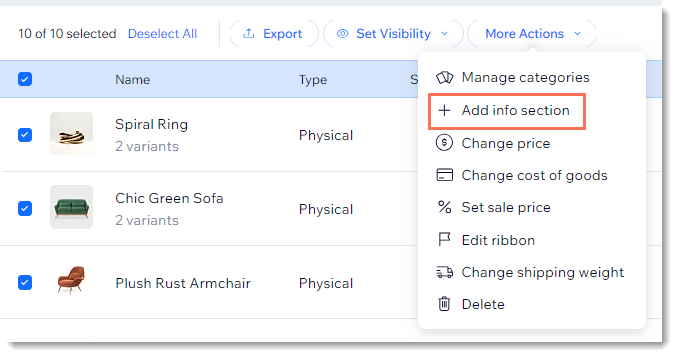
- Create and save the info section following the instructions above.
Next steps:
- After you've created the info sections, go to the Editor to customize their look. Certain layouts in the Product Page work well with certain info section layouts, so check what's best for your site. To access the design customization in the Editor, go to the Design tab and select Info Sections.
- Check out the full Wix Learn course on getting started with Wix eCommerce.
