Wix Stores: Adding and Setting Up a Currency Converter
2 min
Make it easy for customers to view product prices in a familiar currency by adding a currency converter to your store.
The currency converter changes the display currency on your site. It doesn't change the currency of sale transactions.

Notes:
- The currency converter is available with the Business or the Business Elite premium plans.
- Currency rates are provided by XE. By clicking "Add Currencies" you agree to XE's Terms of Use.
- The currency converter is not yet available in the Wix Harmony Editor.
To add and set up a currency converter:
Wix Editor
Studio Editor
- Go to your editor.
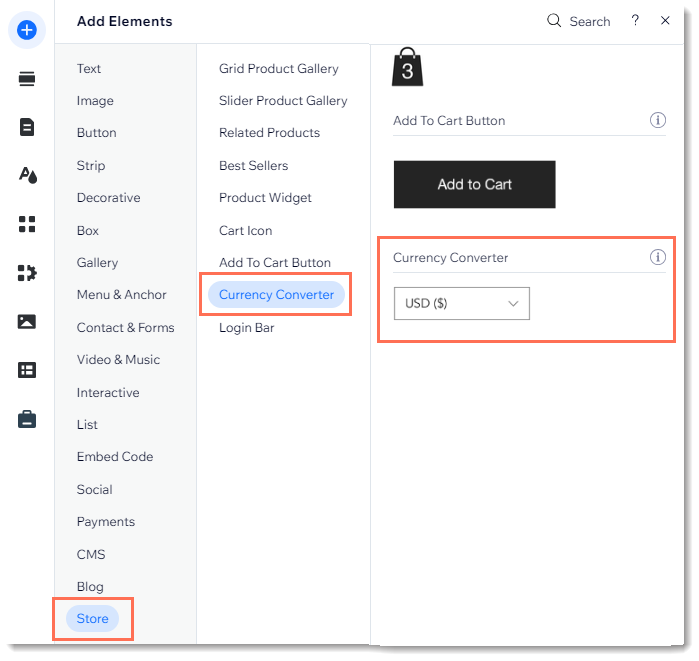
- Click Add Elements
 on the left side of the editor.
 - Click Store.
- Click Currency Converter.
- Drag the converter onto your page.
- Click the currency converter in the Editor.
- Click Settings.
- Add the currencies you want to display:
- Click the Currencies tab.
- Click +Add Currency.
- Select the checkbox next to the relevant currencies.
- Click Save.
- Click Design and customize the converter's design settings:
- Select a background color and adjust the opacity.
- Select a border color and adjust the opacity and width.
- Select the text font and color.