Wix Restaurants: Creating a Separate Page for Dine-in
3 min
In this article
- Step 1 | Add an additional ordering page
- Step 2 | Choose which menu to display on the page
- Step 3 | Set the page to only show dine-in
Want to differentiate your regular online ordering from your dine-in options? Create an additional ordering page dedicated to dine-in.
Step 1 | Add an additional ordering page
To get started, go to your restaurant orders settings page to add another page for dine-in.
Note:
You can have up to 5 online ordering pages in total. If you already have 5 ordering pages, edit one of them to only show dine-in options.
To add another ordering page:
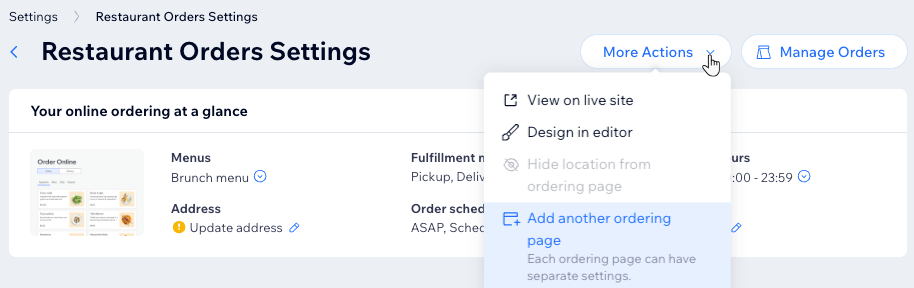
- Go to Restaurant Orders Settings in your site’s dashboard.
- Click the More Actions dropdown and select Add another ordering page.
- Click Add Ordering Page in the popup to confirm.
Step 2 | Choose which menu to display on the page
Next, choose the menu(s) you'd like to show on this page. When editing the menu's details, you can select the ordering page that should display it.
To choose a menu for the dine-in page:
- Go to Restaurant Orders Settings in your site’s dashboard.
- Select the new ordering page from the dropdown under Restaurant Order Settings.
- Click the dropdown under Menus.
- Click Go to Menus.
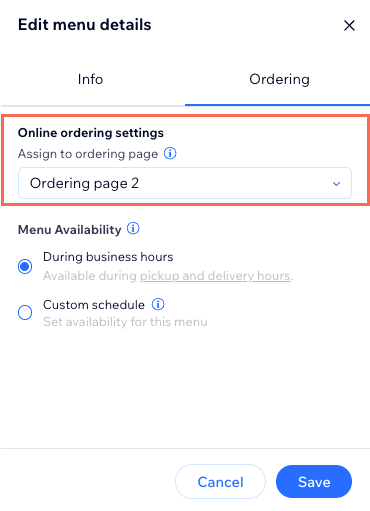
- Click Edit Menu Details next to the relevant menu.
- Click the Ordering tab and select the new ordering page from the dropdown.
- Click Save.
- Click Back to Online Orders Settings to continue.
Step 3 | Set the page to only show dine-in
Finally, set the new ordering page so it only accepts dine-in orders and then customize it in your editor.
To set the page to only show dine-in:
- Go to Restaurant Orders Settings in your site’s dashboard.
- Select the new ordering page from the dropdown under Restaurant Order Settings.
- Click the Edit icon
 under Fulfillment methods.
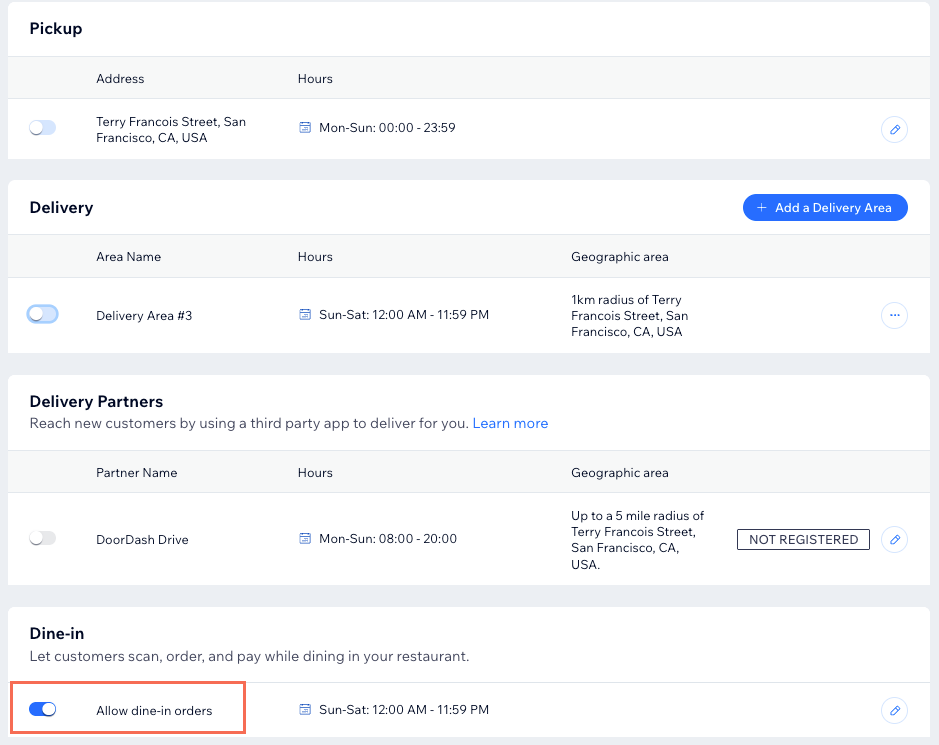
 - Disable the toggles under Pickup and Delivery.
- Enable the toggle under Dine-in.
- (Optional) Click the Edit icon
 to adjust your dine-in availability, download the QR code and share the page link.
What's next?
Customize the look of the new dine-in page in your editor. Click More Actions at the top of the Restaurant Orders Settings page and select Design in editor. Customize the new page to fit your preferred layout and design. When ready, click Publish at the top right.