


Wix Rentals: Adding and Setting Up Your Rentals
- Step 1 | Add Wix Rentals
- Step 2 | Customize the rentals list on your site
- Step 3 | Set your default business hours
- Step 4 | Add your resources
- Step 5 | Create a listing
- Step 6 | Add attributes for clients to filter by
- Step 7 | Create a reservation for your client
- FAQs
Set up Wix Rentals to start renting out your resources online. Add the app, create your resources, build your listings, and choose how they appear on your site.
Wix Rentals is available only on Wix Harmony sites.
You can create up to 3 reservation sessions yourself for free. To let clients reserve online or to create more reservations yourself, you need a Business or Business Elite Premium plan.
Step 1 | Add Wix Rentals
To add Wix Rentals:
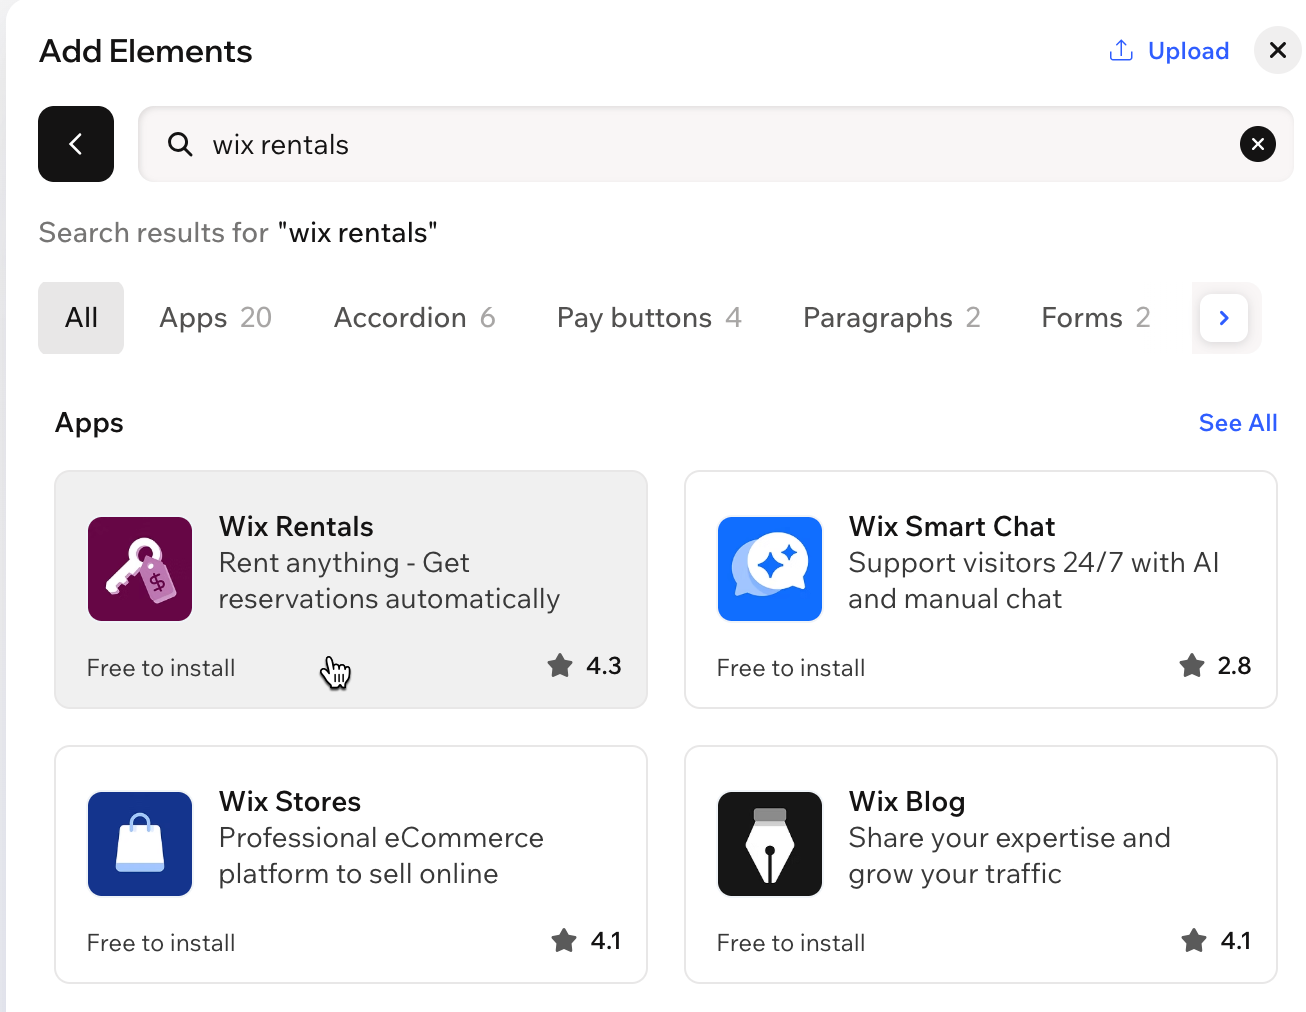
Click + Add at the top left of the editor.
Select Elements.
Use the search bar to find Wix Rentals.
Click Wix Rentals in the search results.
(In the popup) Click Add to Site.
Step 2 | Customize the rentals list on your site
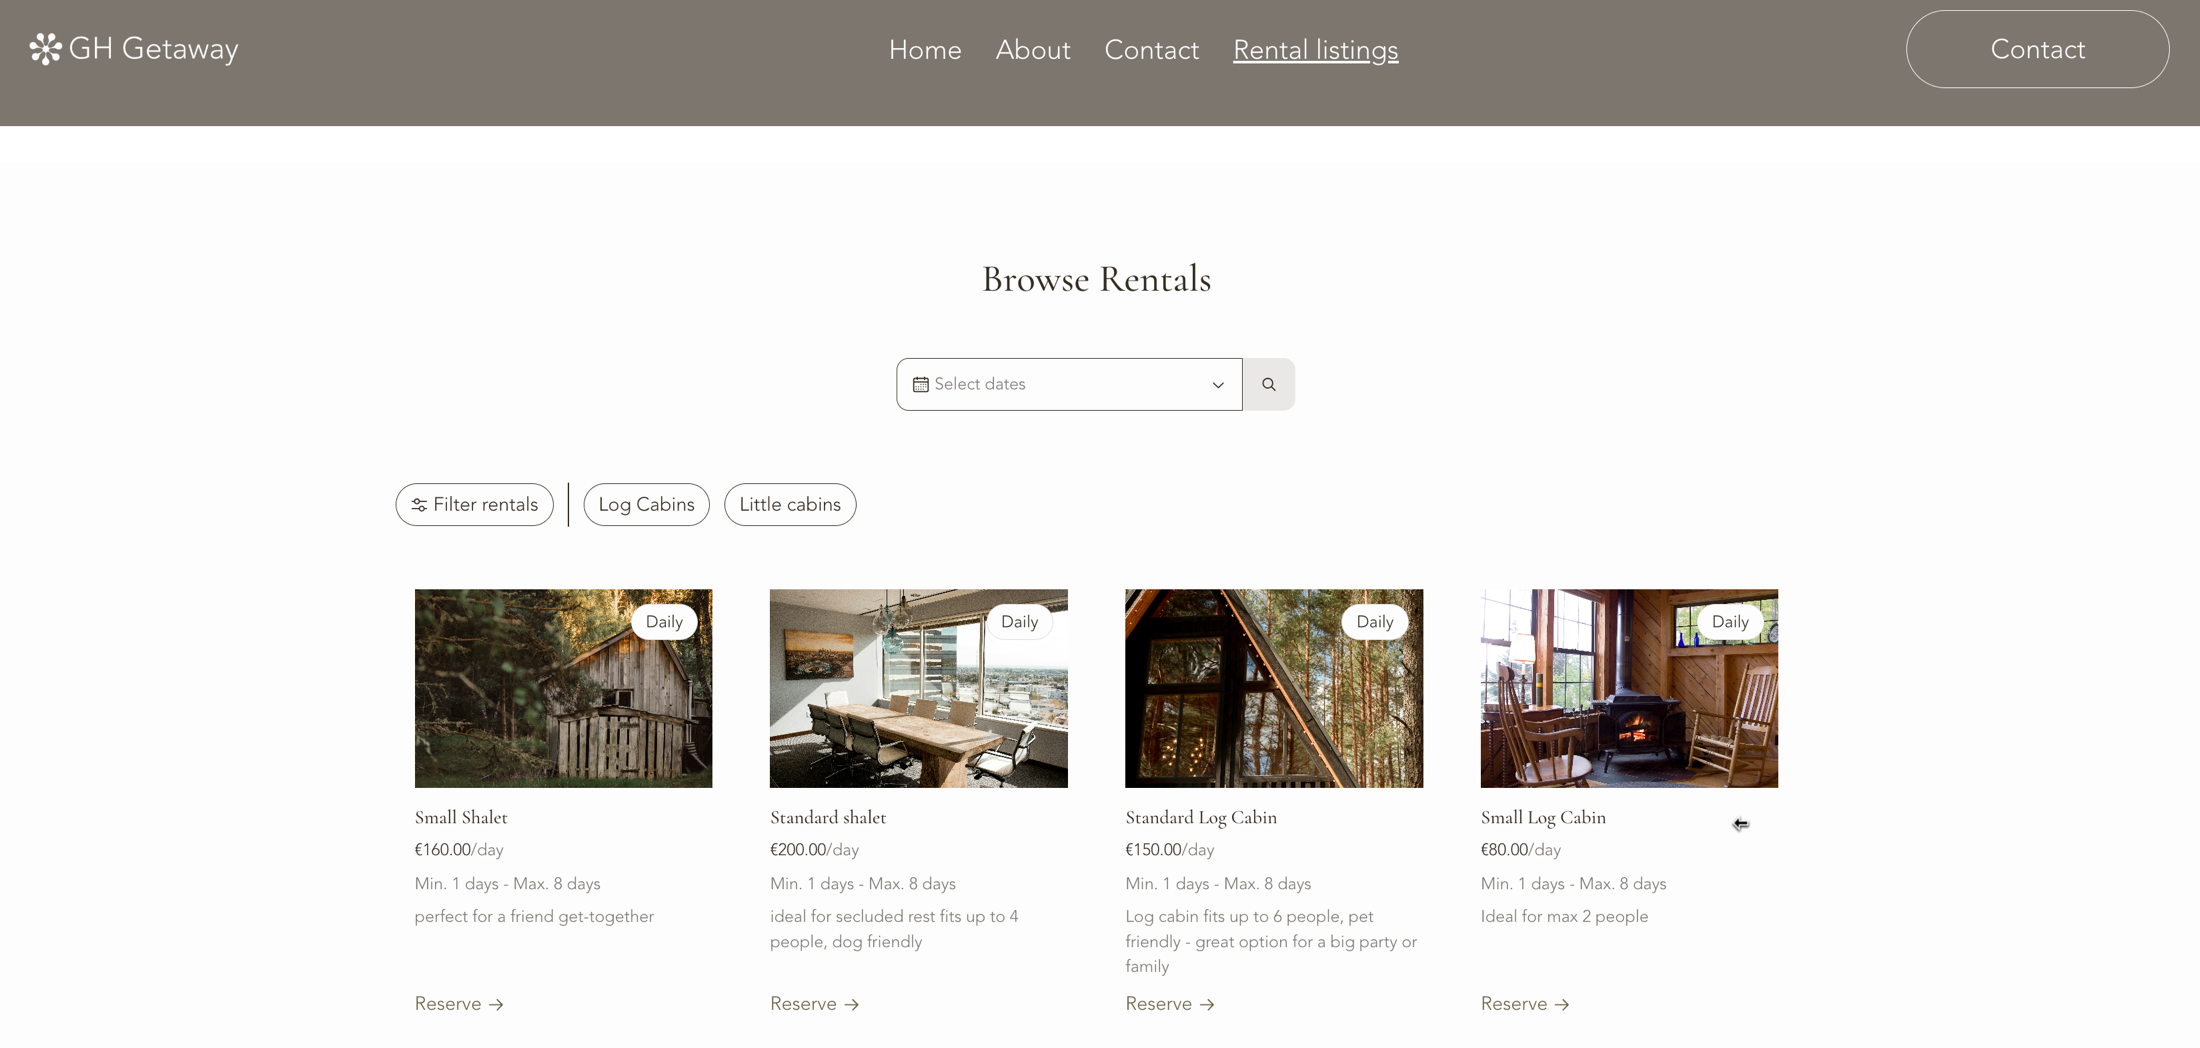
Adding Wix Rentals creates 2 pages on your site. The Rental Listings page shows all your rentals, and the Rental page shows each rental's details and reservation options. You can customize the rentals list on the Rental Listings page to control which rental types appear and how visitors search.
To customize the rentals list:
Go to the Rental listings page in the editor.
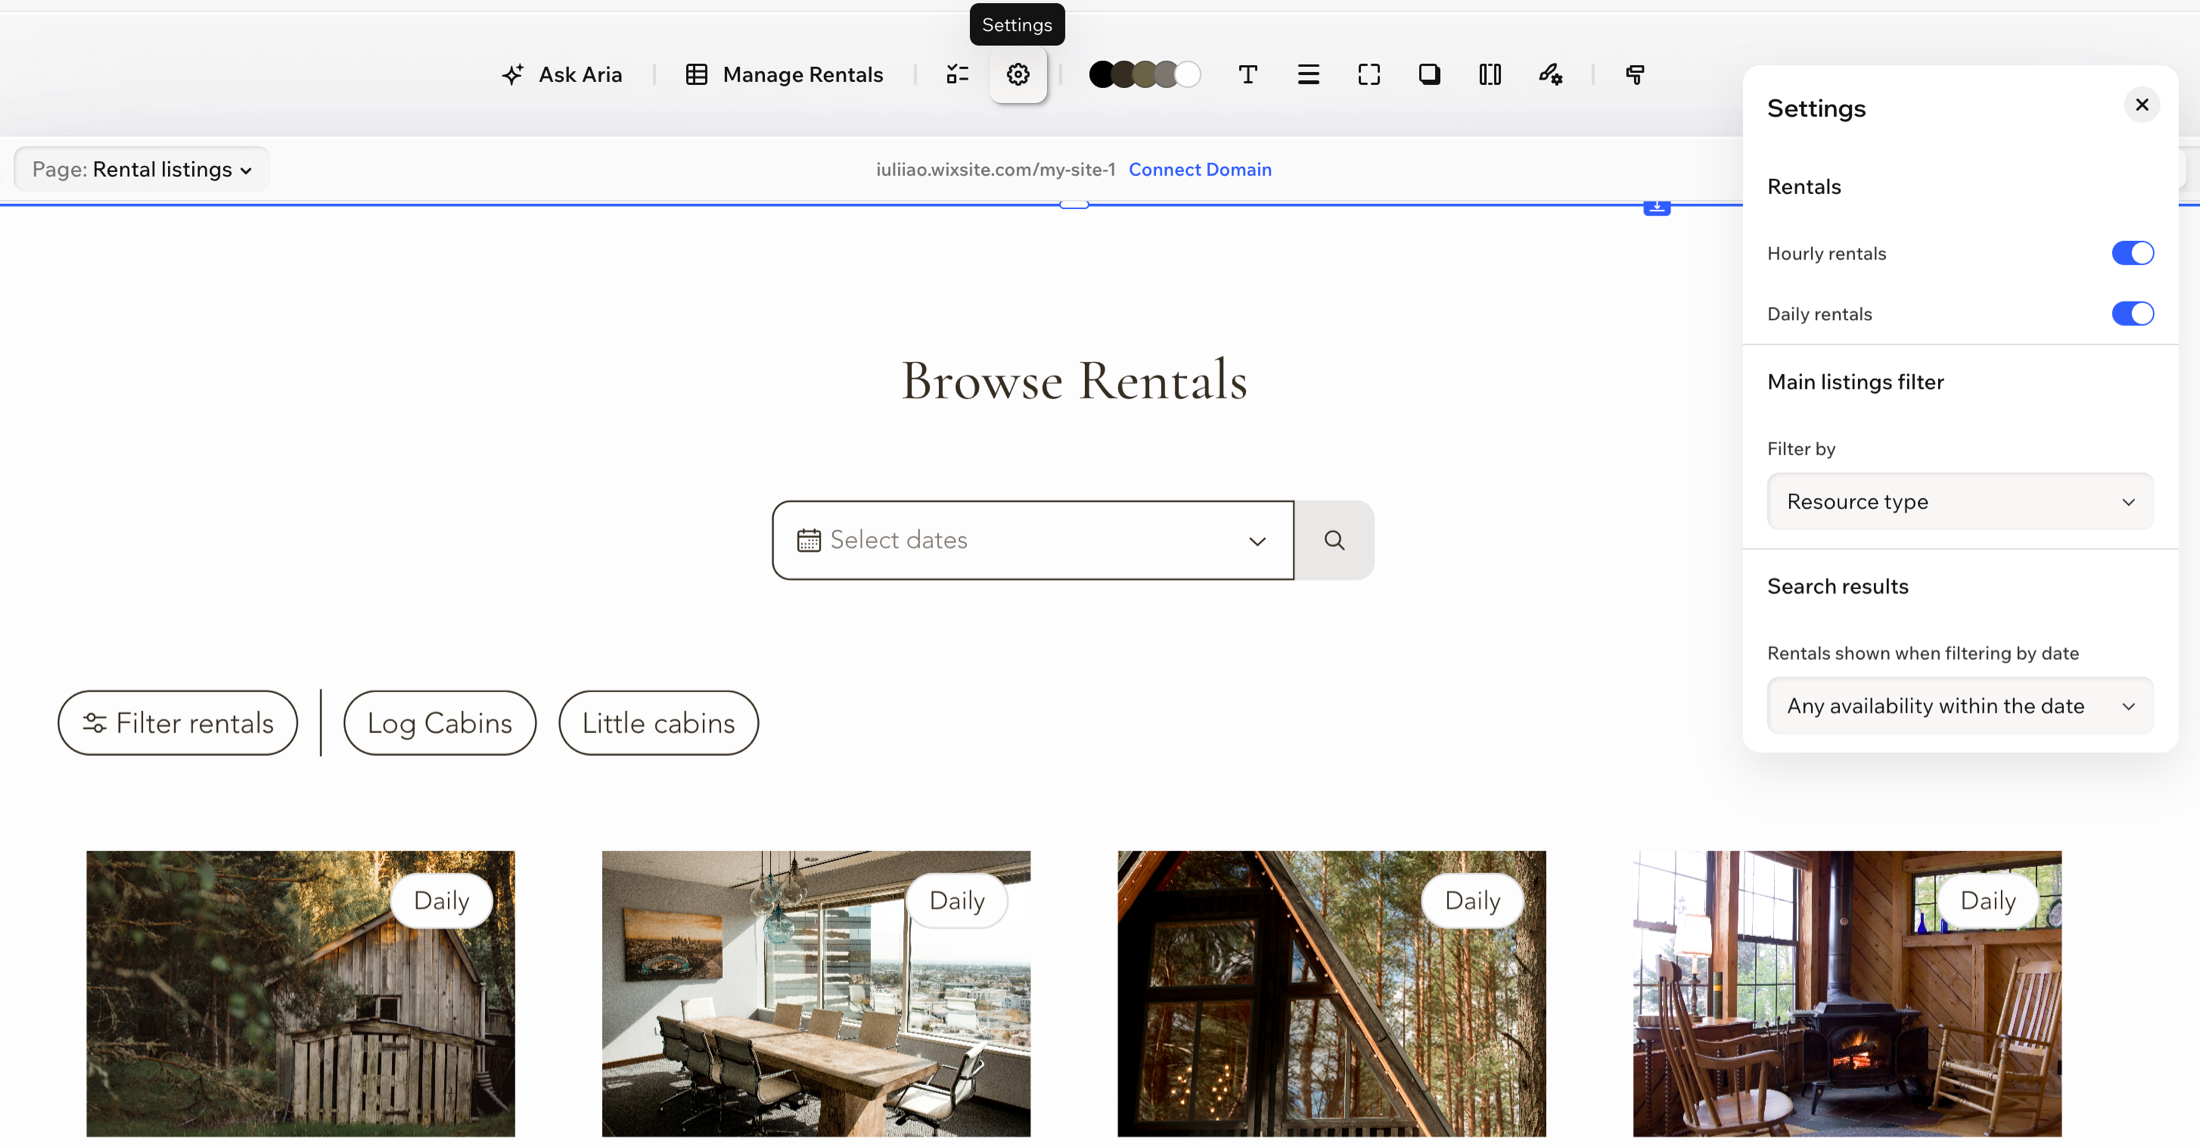
Click the Rentals List widget.
Click Settings on the action bar.
Under Rentals, enable the rental types you want to display:
Hourly rentals: Show listings that clients can book by the hour.
Daily rentals: Show listings that clients can book by the day.
Under Main listings filter, click the Filter by dropdown and choose how visitors filter the list:
Resource type: Visitors filter by the type of rental.
Location: Visitors filter by location.
Under Search results, click the Rentals shown when filtering by date dropdown and choose what the date search returns:
Any availability within the date: Shows rentals with any open slot in the date range.
Exact match only: Shows only rentals that are fully available for the entire date range.
Step 3 | Set your default business hours
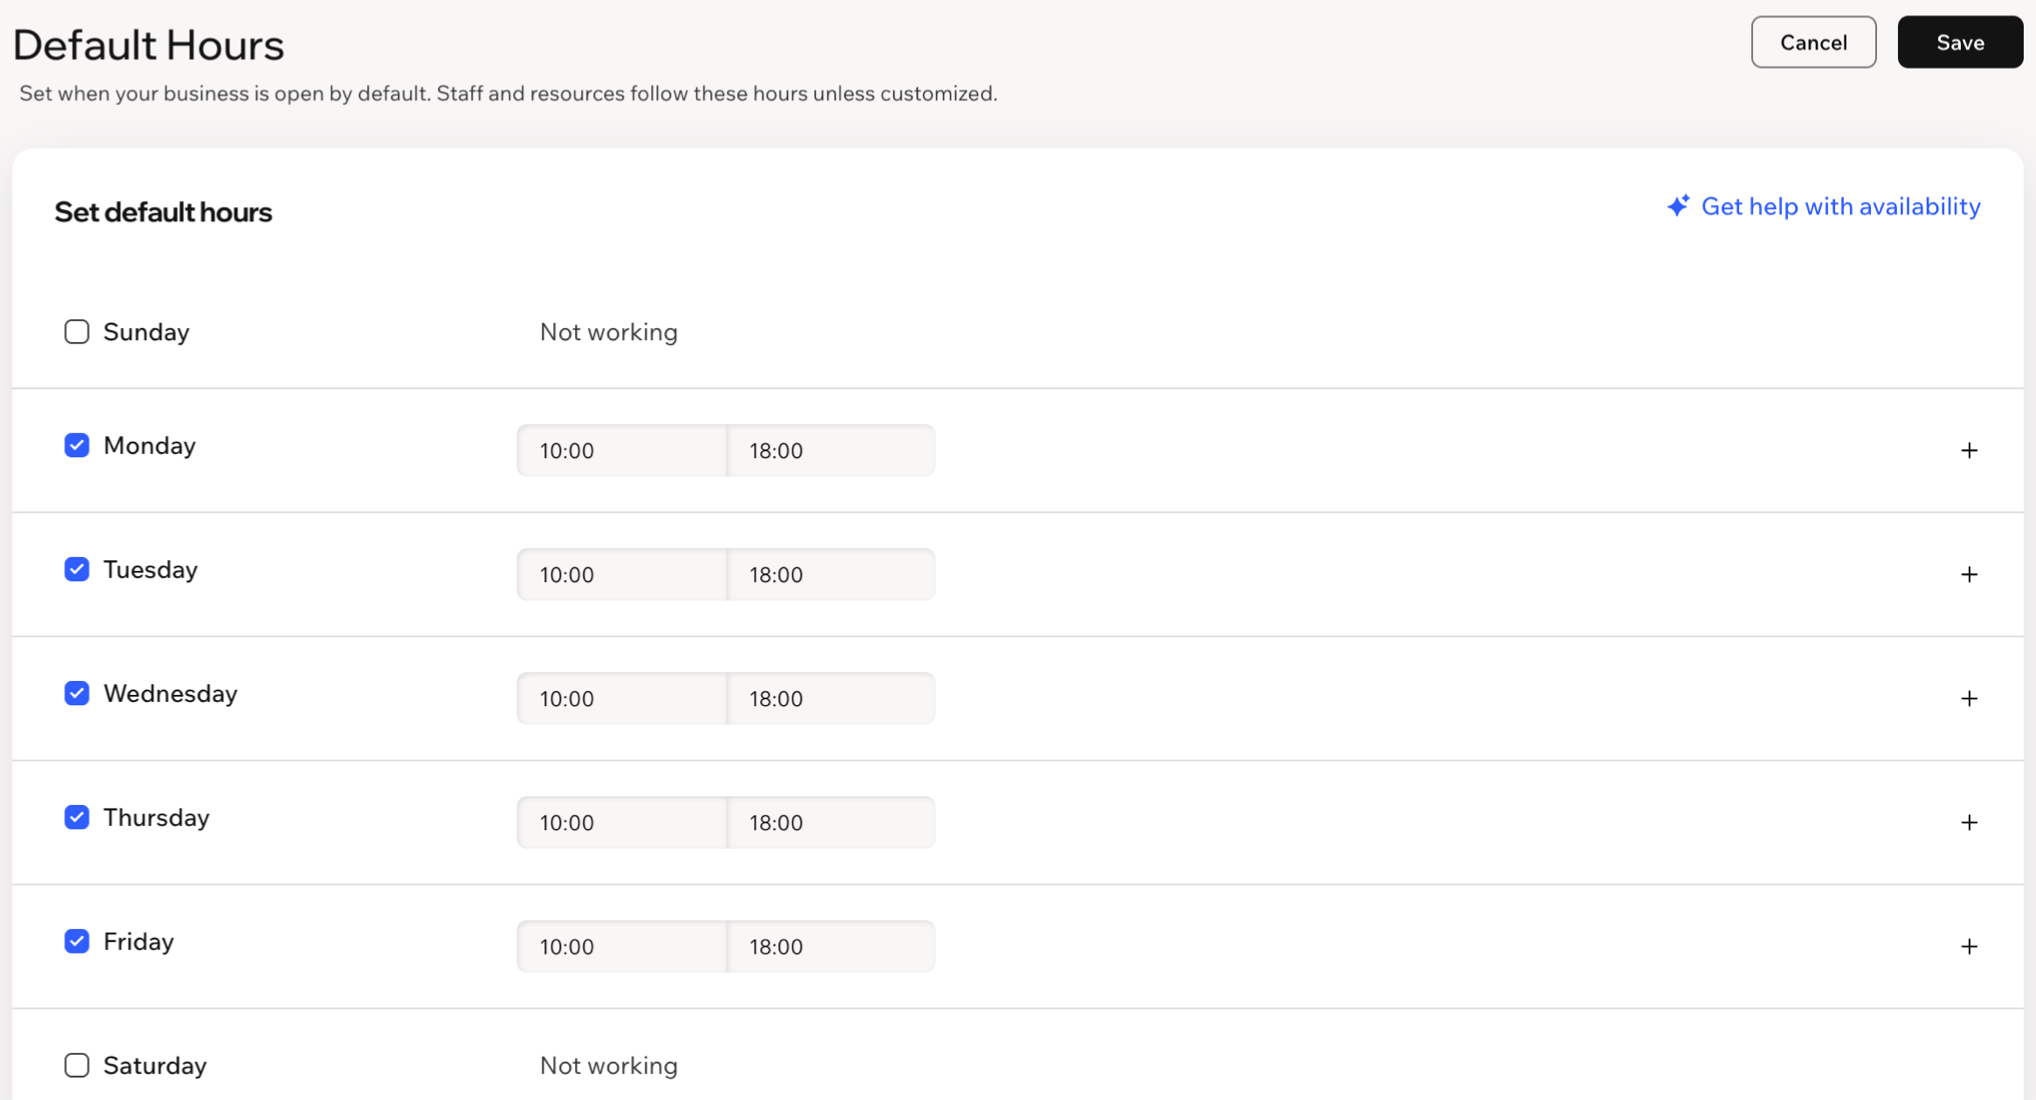
Your default business hours are the times your business is open. Resources with Default business hours availability can only be reserved during these times. Resources with 24/7 availability can be rented all day, including outside your default business hours.
To set your default business hours:
Go to Rentals in your site's dashboard.
Click Manage and select Default business hours.
Select the checkbox next to each day your business is open, then set the start and end times.
(Optional) To add more than one time range in a day, for example to leave a gap for lunch, click the Add hours icon
 next to that day and set the extra times.
Click Save.
If you split a day's working hours (for example, to leave a lunch gap), it affects daily reservations on resources with Default business hours availability. The reservation captures only the first session of the day and counts it as a full day.
Step 4 | Add your resources
A resource is the physical item you rent out, such as a room, court, studio, or piece of equipment. Resources prevent double-bookings by tracking when each item is reserved. You group resources into categories to keep similar items together — for example, a conference rooms category with Room 1 and Room 2. Categories also act as the default filters on your live site.
To create a resource category and add resources:
Go to Rentals in your site's dashboard.
Click Manage and select Resources.
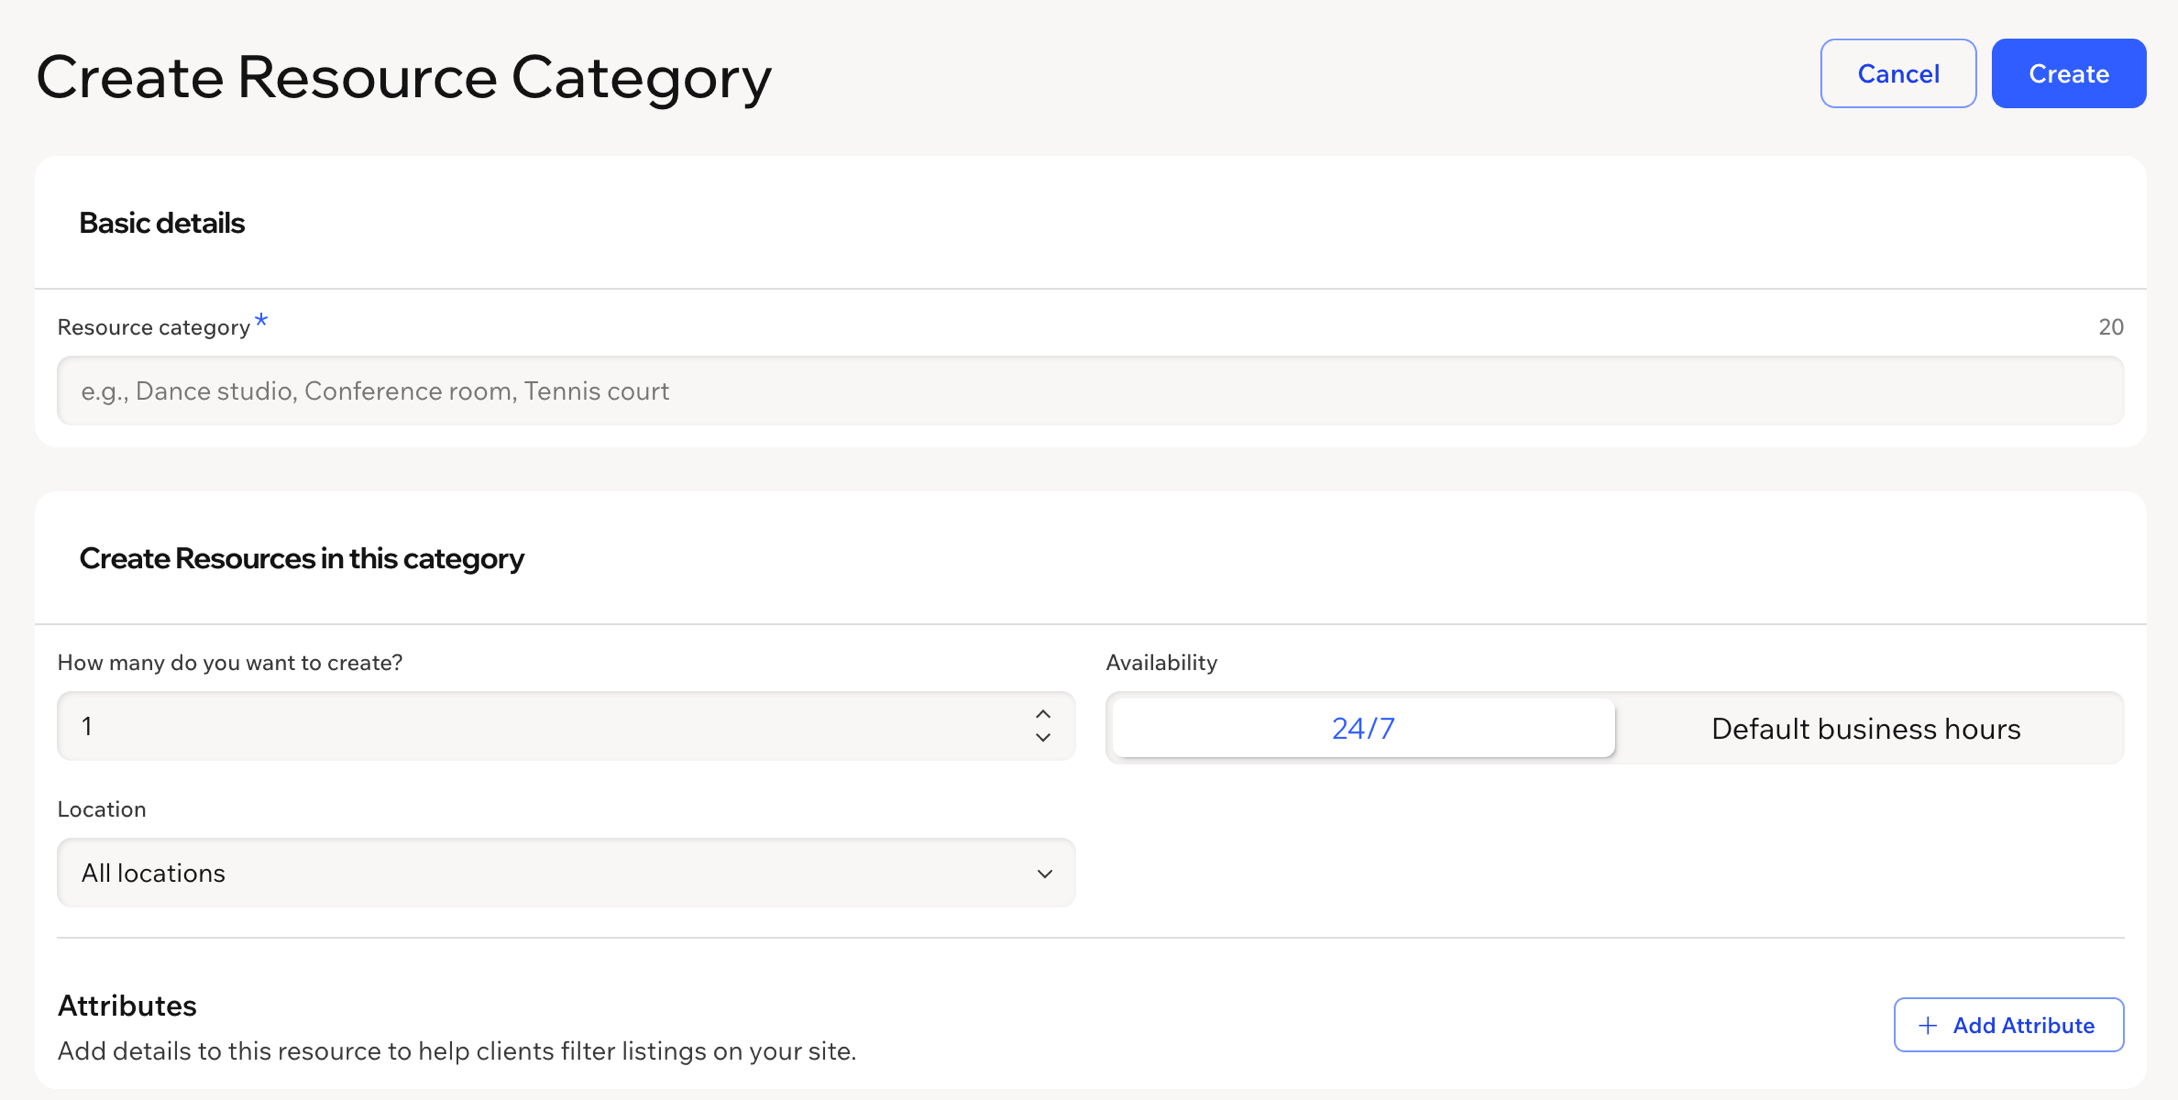
Click + Create Resource Category.
Enter a name for the Resource category (for example, "conference rooms").
Under Create Resources in this category, choose how many resources to create.
Choose the Availability:
24/7: Resources can be reserved at any time.
Default business hours: Resources can only be reserved during the hours you set (see Step 3).
Select the Location.
(Optional) Click + Add Attribute to add details such as parking, air conditioning, or capacity. Attributes appear as filters clients can use on your live site.
Click Create.
To add another resource to a category you already created, click Manage Category next to the category and select Add Resource.
New resources are set to 24/7 by default. You can also create a resource while you build a listing. Type a new name under Resource on the Listing details tab and select Add "[name]" to resources (see Step 5).
The default location is All Locations. We recommend creating a location and assigning it to your resource.
Step 5 | Create a listing
A listing is what clients see and reserve on your live site. You can generate a listing draft with AI, or build one from scratch.
To create a listing:
Go to Rentals in your site's dashboard.
Click + Create Listing.
Choose how to start:
Generate with AI: Under What do you want to list?, describe what you offer, then click Generate. AI-generated content may need review before you publish.
Build it yourself: Click Start from Scratch.
On the Listing details tab:
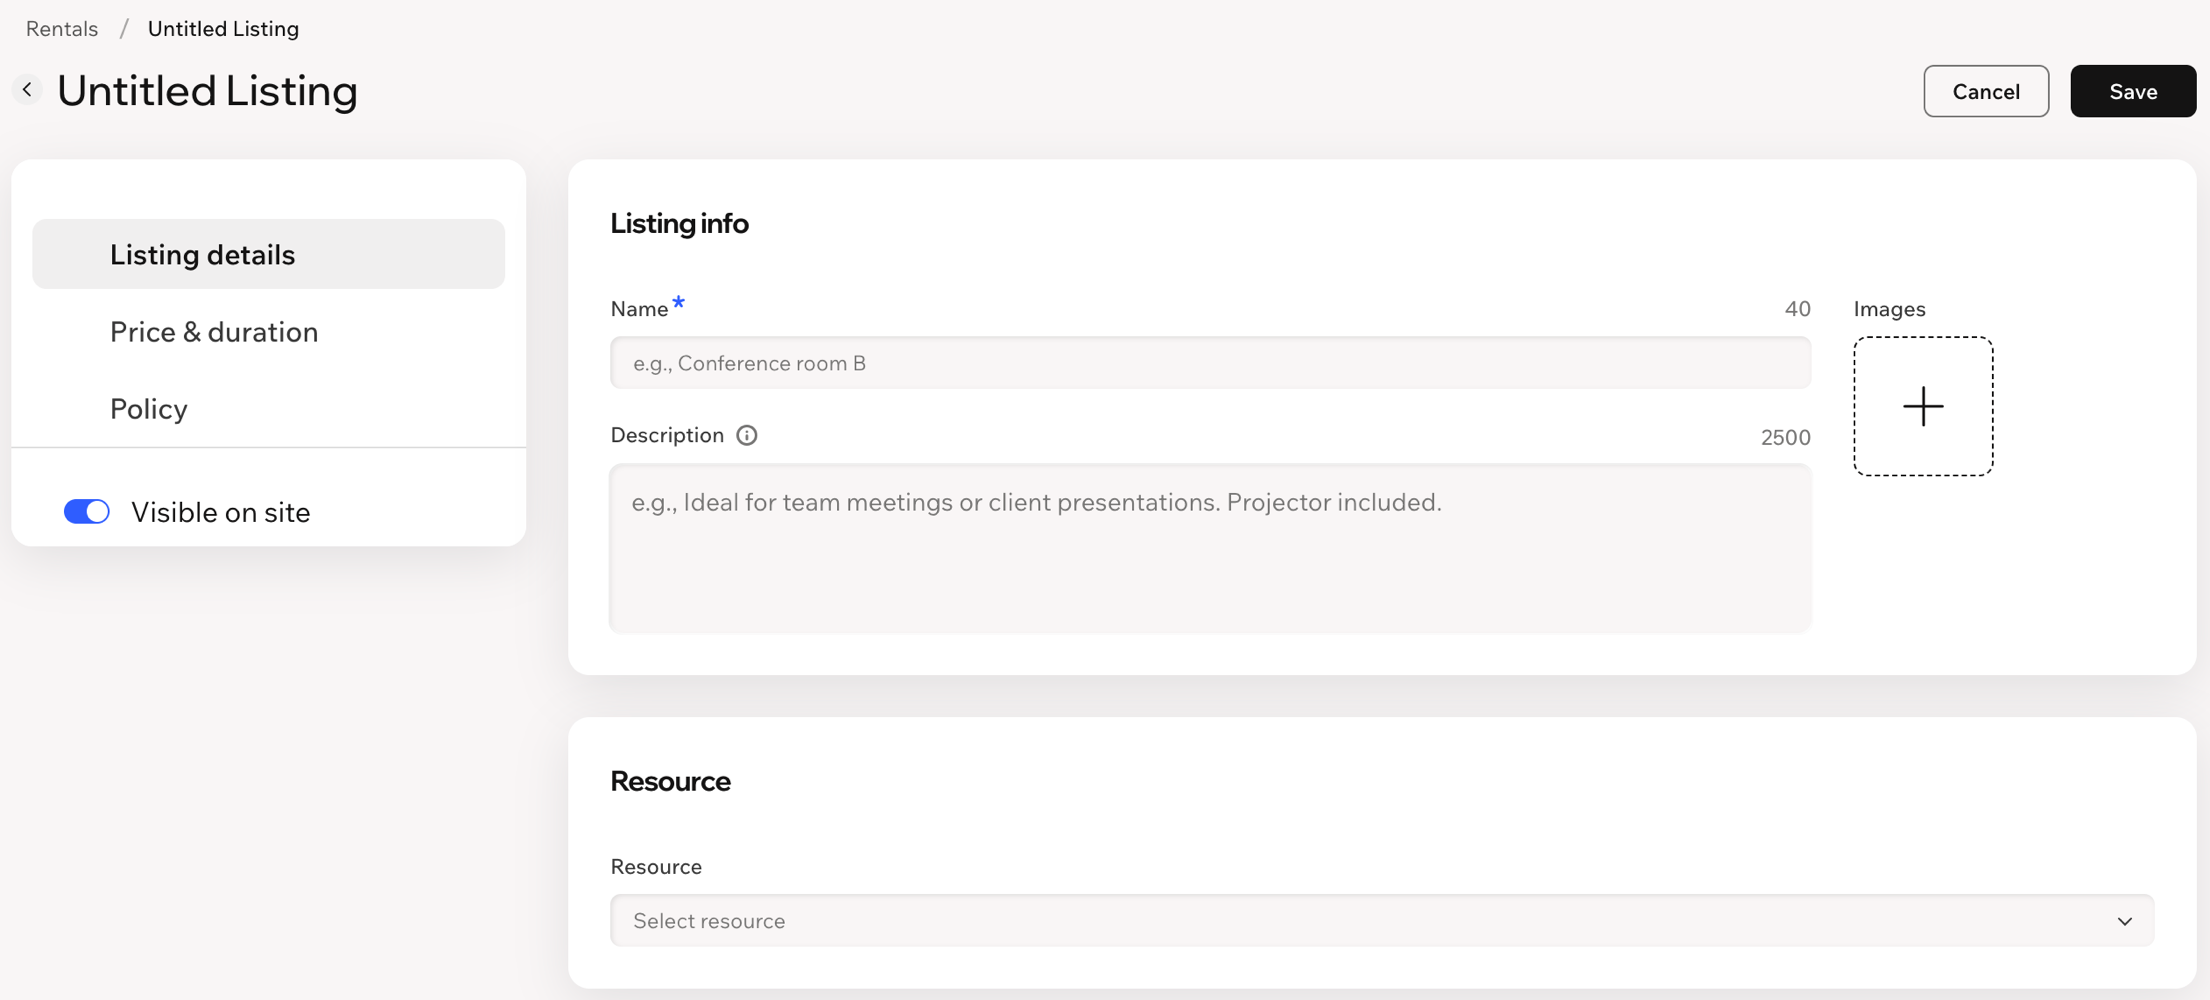
Enter the listing Name.
(Optional) Add a Description and upload Images.
Under Resource, select an existing resource. To create a new one, type its name and select Add "[name]" to resources.
(New resource only) Set the Location, Resource category, and Availability (24/7 or Default business hours). To add details clients can filter by, click Add Attributes.
On the Price & duration tab:
Enter the Price.
Set Charge per: Hour for hourly rentals, or Day for daily rentals.
Set the Minimum duration and Maximum duration.
(Optional) Select Buffer time to add a gap between reservations.
Under Charging preferences, choose how clients pay:
Collect full amount online: Clients pay in full at checkout.
Entire amount in person: Clients pay when they arrive.
Entire amount either online or in person: Clients choose at checkout.
On the Policy tab, the following settings are optional:
Add a Policy description to show your terms to clients.
Select Allow clients to cancel their own reservations and set when they can cancel.
Select Limit how early clients can reserve to control how far in advance clients can book.
Select Limit how late clients can reserve to prevent last-minute reservations.
Under Reservation requests, choose how reservations get confirmed:
Automatically accept all reservations when available: Reservations are confirmed as soon as a client books an available time slot.
Manually approve or decline reservation requests: Each reservation stays pending until you approve or decline it. Enable the Multiple clients can request the same time slot toggle to let more than one client request the same reservation, so you can choose who gets it.
Note: Online payments aren't available for manually approved reservations
Make sure the Visible on site toggle is on, then click Save.
Step 6 | Add attributes for clients to filter by
Attributes are details about a resource, such as its capacity, whether it has air conditioning, or accessories. They appear on the Rental page to help describe your resource, and when they're visible on your site clients can use them as filters. You can define all your attributes on your site and link them to resources as needed.
To create an attribute:
Go to Rentals in your site's dashboard.
Click Manage and select Resources.
Click Manage Attributes.
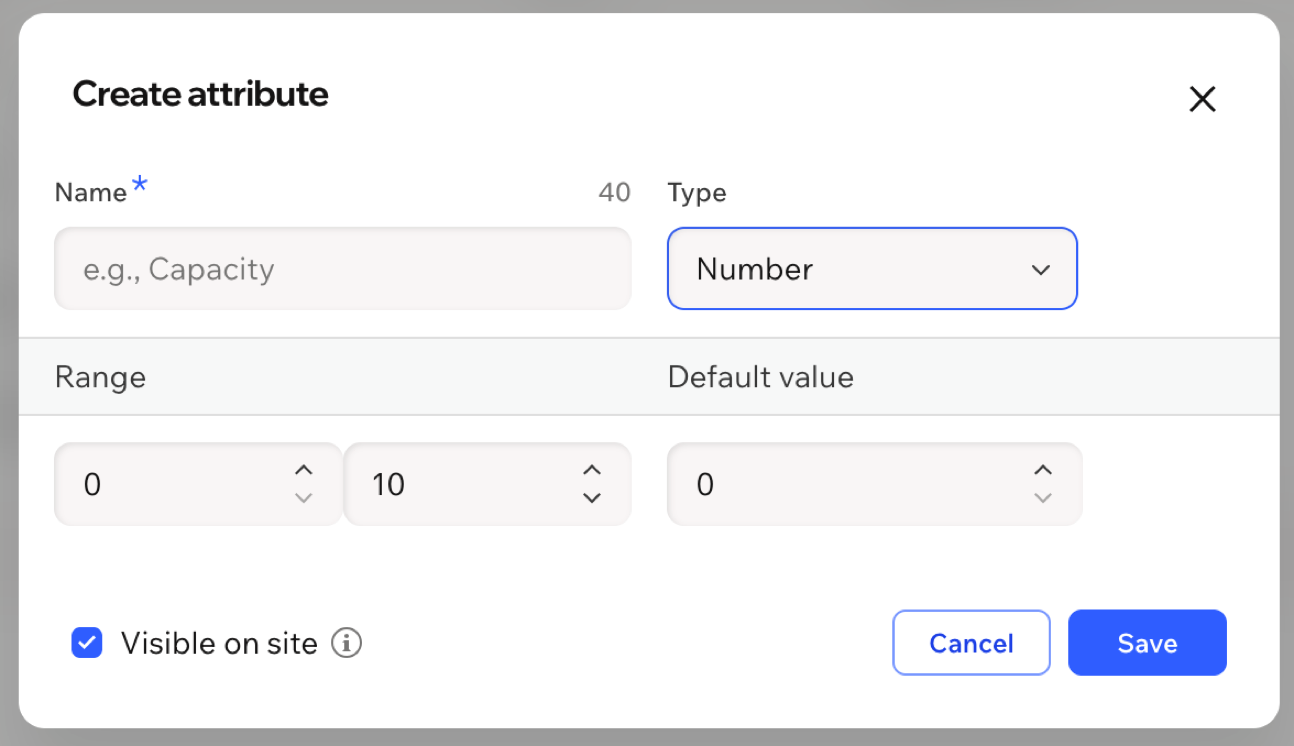
Click + Create New Attribute.
Enter a Name for the attribute.
Click the Type dropdown and select an option:
Number: A numeric value with a range, for example capacity from 0 to 10.
Options: A list of values clients choose from.
Yes / No: A simple yes or no value, for example whether a room has a whiteboard.
Set a Default value for the attribute.
Select the Visible on site checkbox so clients can filter by this attribute, then click Save.
Click Done.
Note: You can also add an attribute to a single resource from its settings when you create or edit it (see Step 4).
Step 7 | Create a reservation for your client
You can create a reservation for a client yourself, for example when they call or email to book.
To create a reservation:
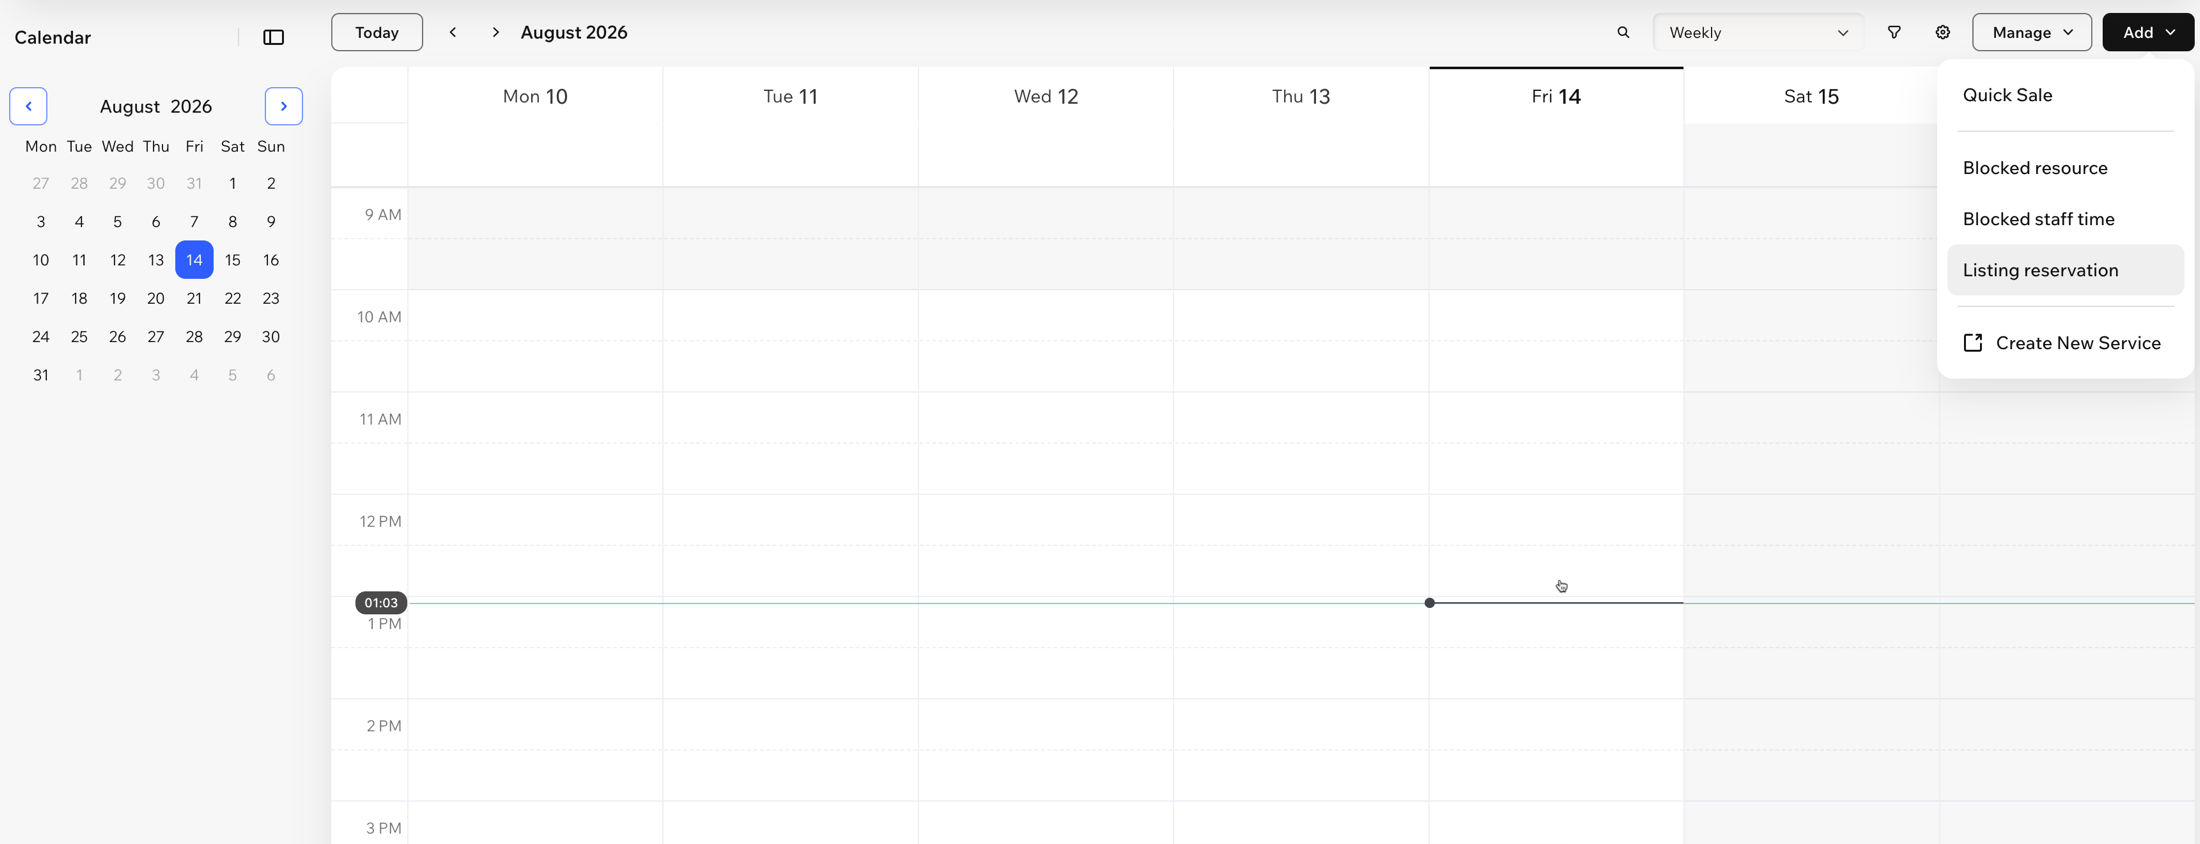
Go to Booking Calendar in your dashboard.
Click Add at the top right and select Listing reservation.
Select a contact, or click Add New Client to create one.
Select the listing you want to reserve.
Choose the date, then set the Start time and Duration.
Choose how to finish:
Reserve: Book the rental without taking payment now.
Reserve & Checkout: Book the rental and collect payment.
By default, Wix emails the client to confirm the reservation. To customize this email and your other reservation notifications, go to Rental Listings in your dashboard, click Manage and select Notifications.
FAQs
Click a question below to learn more about Wix Rentals.