Wix Pro Gallery: Customizing Your Gallery's Thumbnails
4 min
In this article
- Changing the size of the thumbnails
- Setting how thumbnails are resized
- Customizing the spacing between thumbnails
- Adjusting the thumbnail placement
In some layouts in the Wix Pro Gallery, your media appears as thumbnails that visitors can click to open or expand. You can customize the thumbnail sizes, spacing and proportions to suit your site's design.
Notes:
- Available thumbnail settings depend on the gallery layout you choose.
- Customize your thumbnail settings for your mobile site in the Mobile Editor.
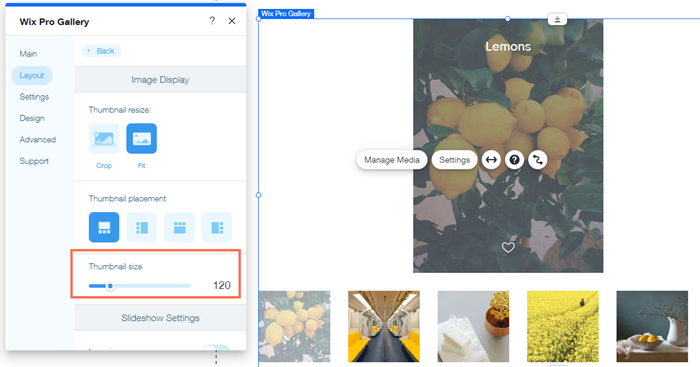
Changing the size of the thumbnails
You can control the size of the thumbnails to make them as big or as small as you like.
To change the size of the thumbnails:
- Go to your editor.
- Click the pro gallery element on your page.
- Click Settings.
- Click the Layout tab.
- Click Customize Layout.
- Drag the Thumbnail size slider to make the thumbnails larger or smaller.
Setting how thumbnails are resized
Media in the Pro Gallery is automatically resized when displayed as thumbnails. You can choose how they are resized:
- Crop: All thumbnails have the same ratio. Media items that don't fit the ratio may have some details cropped.
- Fit: The entire media item appears in the thumbnail. Items that have different proportions will vary in dimension and ratio.
To adjust the resize settings:
- Go to your editor.
- Click the pro gallery element on your page.
- Click Settings.
- Click the Layout tab.
- Click Customize Layout.
- Scroll down to Thumbnail Resize and choose from the following options:
- Crop: Items are all the same size and proportions as thumbnails. You can then choose the ratio for your thumbnails, such as 16:9, 1:1, or 4:3.
- Fit: Items are displayed with their original proportions as thumbnails.
Note: The Border width & color and Corner radius design options are only available in the Item Style section of the Design tab when you choose Crop as your thumbnail resize option.

Note:
Your Wix Pro Gallery behaves responsively when you choose certain layouts and set it to Full Width, using the Stretch icon  .
.
In order to fill the full width on a device screen, the gallery may change the position and size of your gallery items and / or the number of items per row.
. In order to fill the full width on a device screen, the gallery may change the position and size of your gallery items and / or the number of items per row.
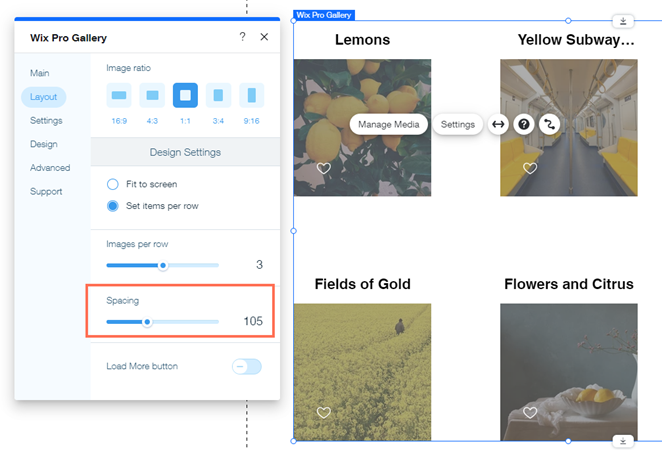
Customizing the spacing between thumbnails
Adjust the spacing between your gallery's thumbnails. Increase the spacing for a spacious, open layout, or decrease for a tighter look.
To customize the spacing between thumbnails:
- Go to your editor.
- Click the pro gallery element on your page.
- Click Settings.
- Click the Layout tab.
- Click Customize Layout.
- Drag the Spacing slider to increase or decrease the space between the thumbnails.
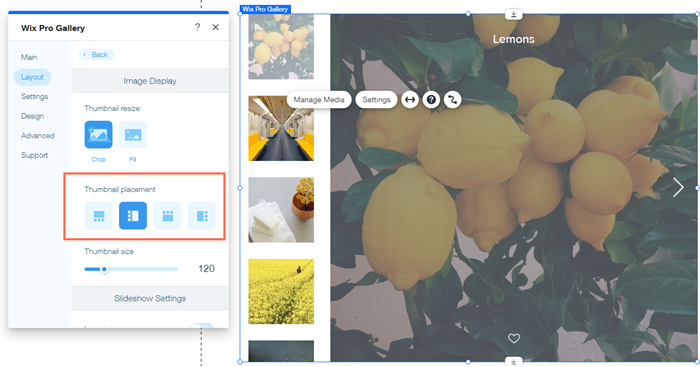
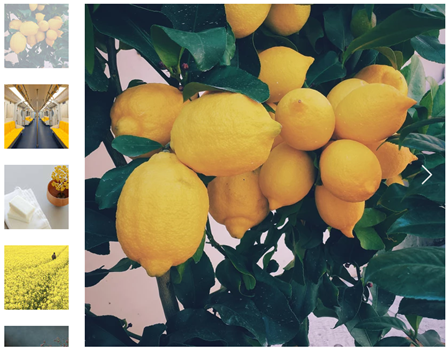
Adjusting the thumbnail placement
When a visitor is viewing a gallery item, they can see thumbnails of other items in your gallery for easy navigation. You can select where these thumbnails appear in reference to the item currently being viewed, for example to the left or below.
Note:
This option is only available in the Thumbnails layout.
To adjust the placement of the thumbnails:
- Go to your editor.
- Click the pro gallery element on your page.
- Click Settings.
- Click the Layout tab.
- Click Customize Layout.
- Click a position for the thumbnails under Thumbnail placement.