


Wix POS Register: Setting Up a Receipt Printer
In this article
- Setting up an Epson m30 Series Printer
- Setting up an HP terminal receipt printer
- FAQs
Important:
- This article is about the Wix POS Register for brick & mortar businesses.
- For info on using POS on a mobile device, click here.
Print customer receipts using a receipt printer. You can choose from the HP receipt printer or one of the Epson m30 series printers.
Setting up an Epson m30 Series Printer
After acquiring one of the Epson m30 series printers, you can connect it and start printing receipts at your point of sale.

Before you begin:
There are Epson m30 printers that connect via Bluetooth, WiFi, Ethernet, or USB. Additionally, some offer more than one connection option. Check your Epson user guide to see which options are available and decide how you want to connect.
To connect an Epson m30 series printer
How do I know if I'm using the New Wix POS or Wix POS Register?
This article will help you understand the differences between the New Wix POS and Wix POS Register.
New Wix POS
POS Register
Open the POS tablet.
Tap the Menu icon

Tap Settings, then select Manage Hardware.
Tap Connect next to Receipt printer.
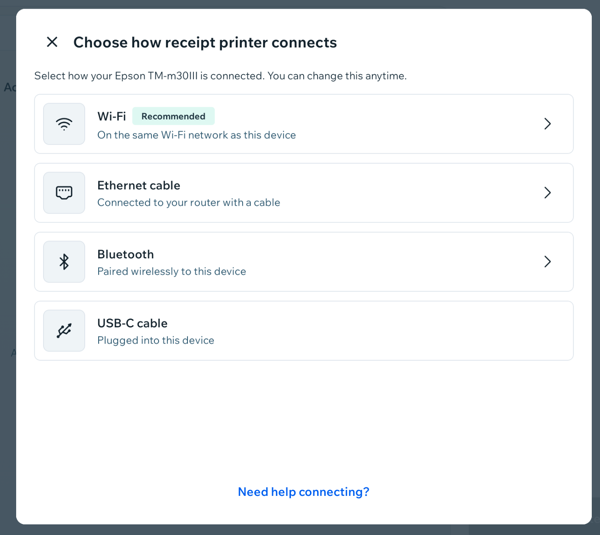
Select how your printer connects:
Wi-Fi
Ethernet cable
Bluetooth
USB-C cable
Setting up an HP terminal receipt printer
Note:
- It is no longer possible to purchase the HP receipt printer.
- The HP terminal receipt printer only works with Wix POS Register — it isn't compatible with the New Wix POS.
To set it up this printer, you just need to insert the paper and plug it in.

To set up an HP receipt printer:
- Insert the paper roll:
- Unplug the printer to turn it off.
- Turn the top of the printer counterclockwise and open the compartment cover.

- Place the paper roll in the compartment, with the thermal side facing up.
Important: Make sure the paper is tightly rolled. - Pull out a bit of paper so it sticks out, then close the compartment cover until it clicks into place.
- Turn the top of the printer clockwise.
- Connect the printer to the tablet and the cash drawer using the supplied cables.

- Open the POS tablet, tap the Menu icon
 , tap Settings, then select Manage Hardware.
 - Check the status next to Receipt Printer — it should read Connected.
Tip: The light on the printer should be green. - Press the paper feed button to prepare for printing.
FAQs
Click a question to learn more about receipt printers.
How can I customize my receipts?
What maintenance tasks can I perform on my HP terminal receipt printer?