

Wix Harmony Editor: Adding and Customizing Google Maps
6 min
In this article
- Adding Google Maps to your site
- Managing multiple locations on the same map
- Customizing your map settings
- FAQs
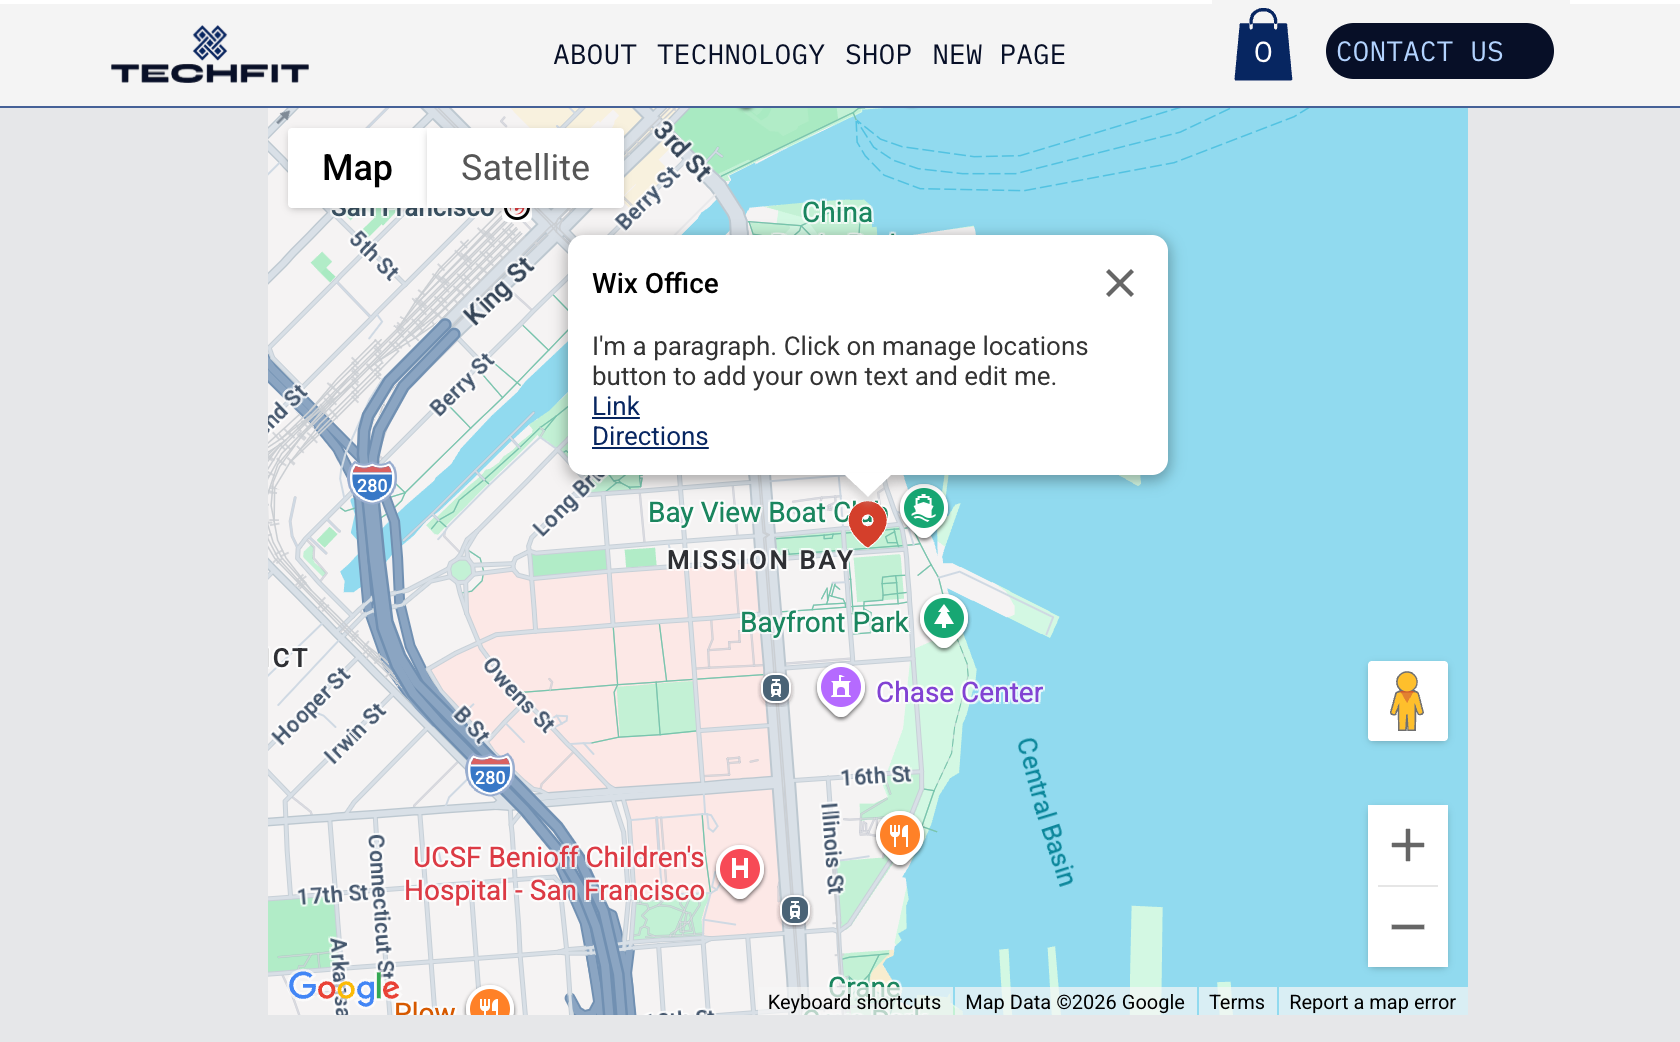
Make it easy for people to find you by adding a Google Maps element to your site. Highlight important spots like your storefront, event location, or office, so visitors always know where to go. With flexible options for single or multiple locations, you’re in control of how your map looks and works. Customize every detail to match your style and help visitors connect with your business at a glance.
Adding Google Maps to your site
Showcase your business locations, events, or meeting points directly on your site by adding a Google Maps element. Whether you have one location or several, you can customize each map pin to share all the essential details.
To add Google Maps:
- Go to your editor.
- Click + Add at the top left of the editor.
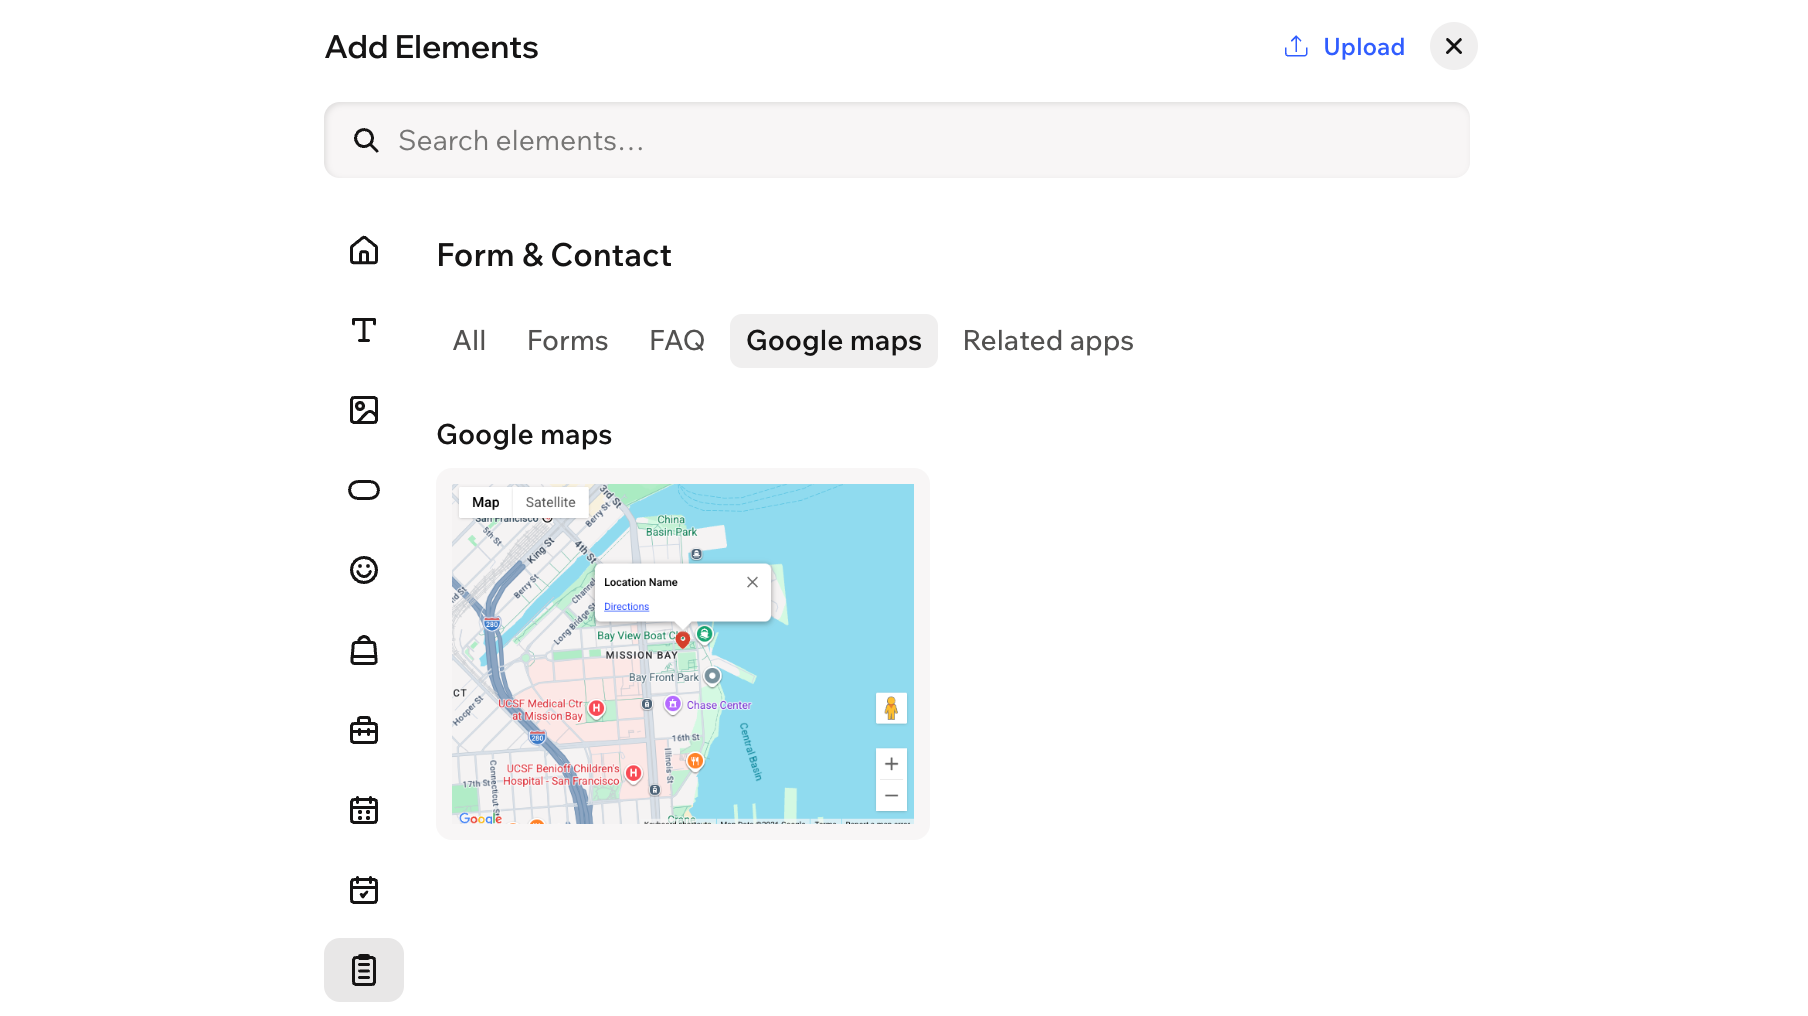
- Select Elements.
- Hover over the More Options icon
 , then scroll down and click Form & Contact
  .
. - Select the Google maps tab.
- Click the map or drag it to the relevant location on your page.
- Click Manage Locations on the action bar.
- Choose an how many locations you want to add to the map:
One location
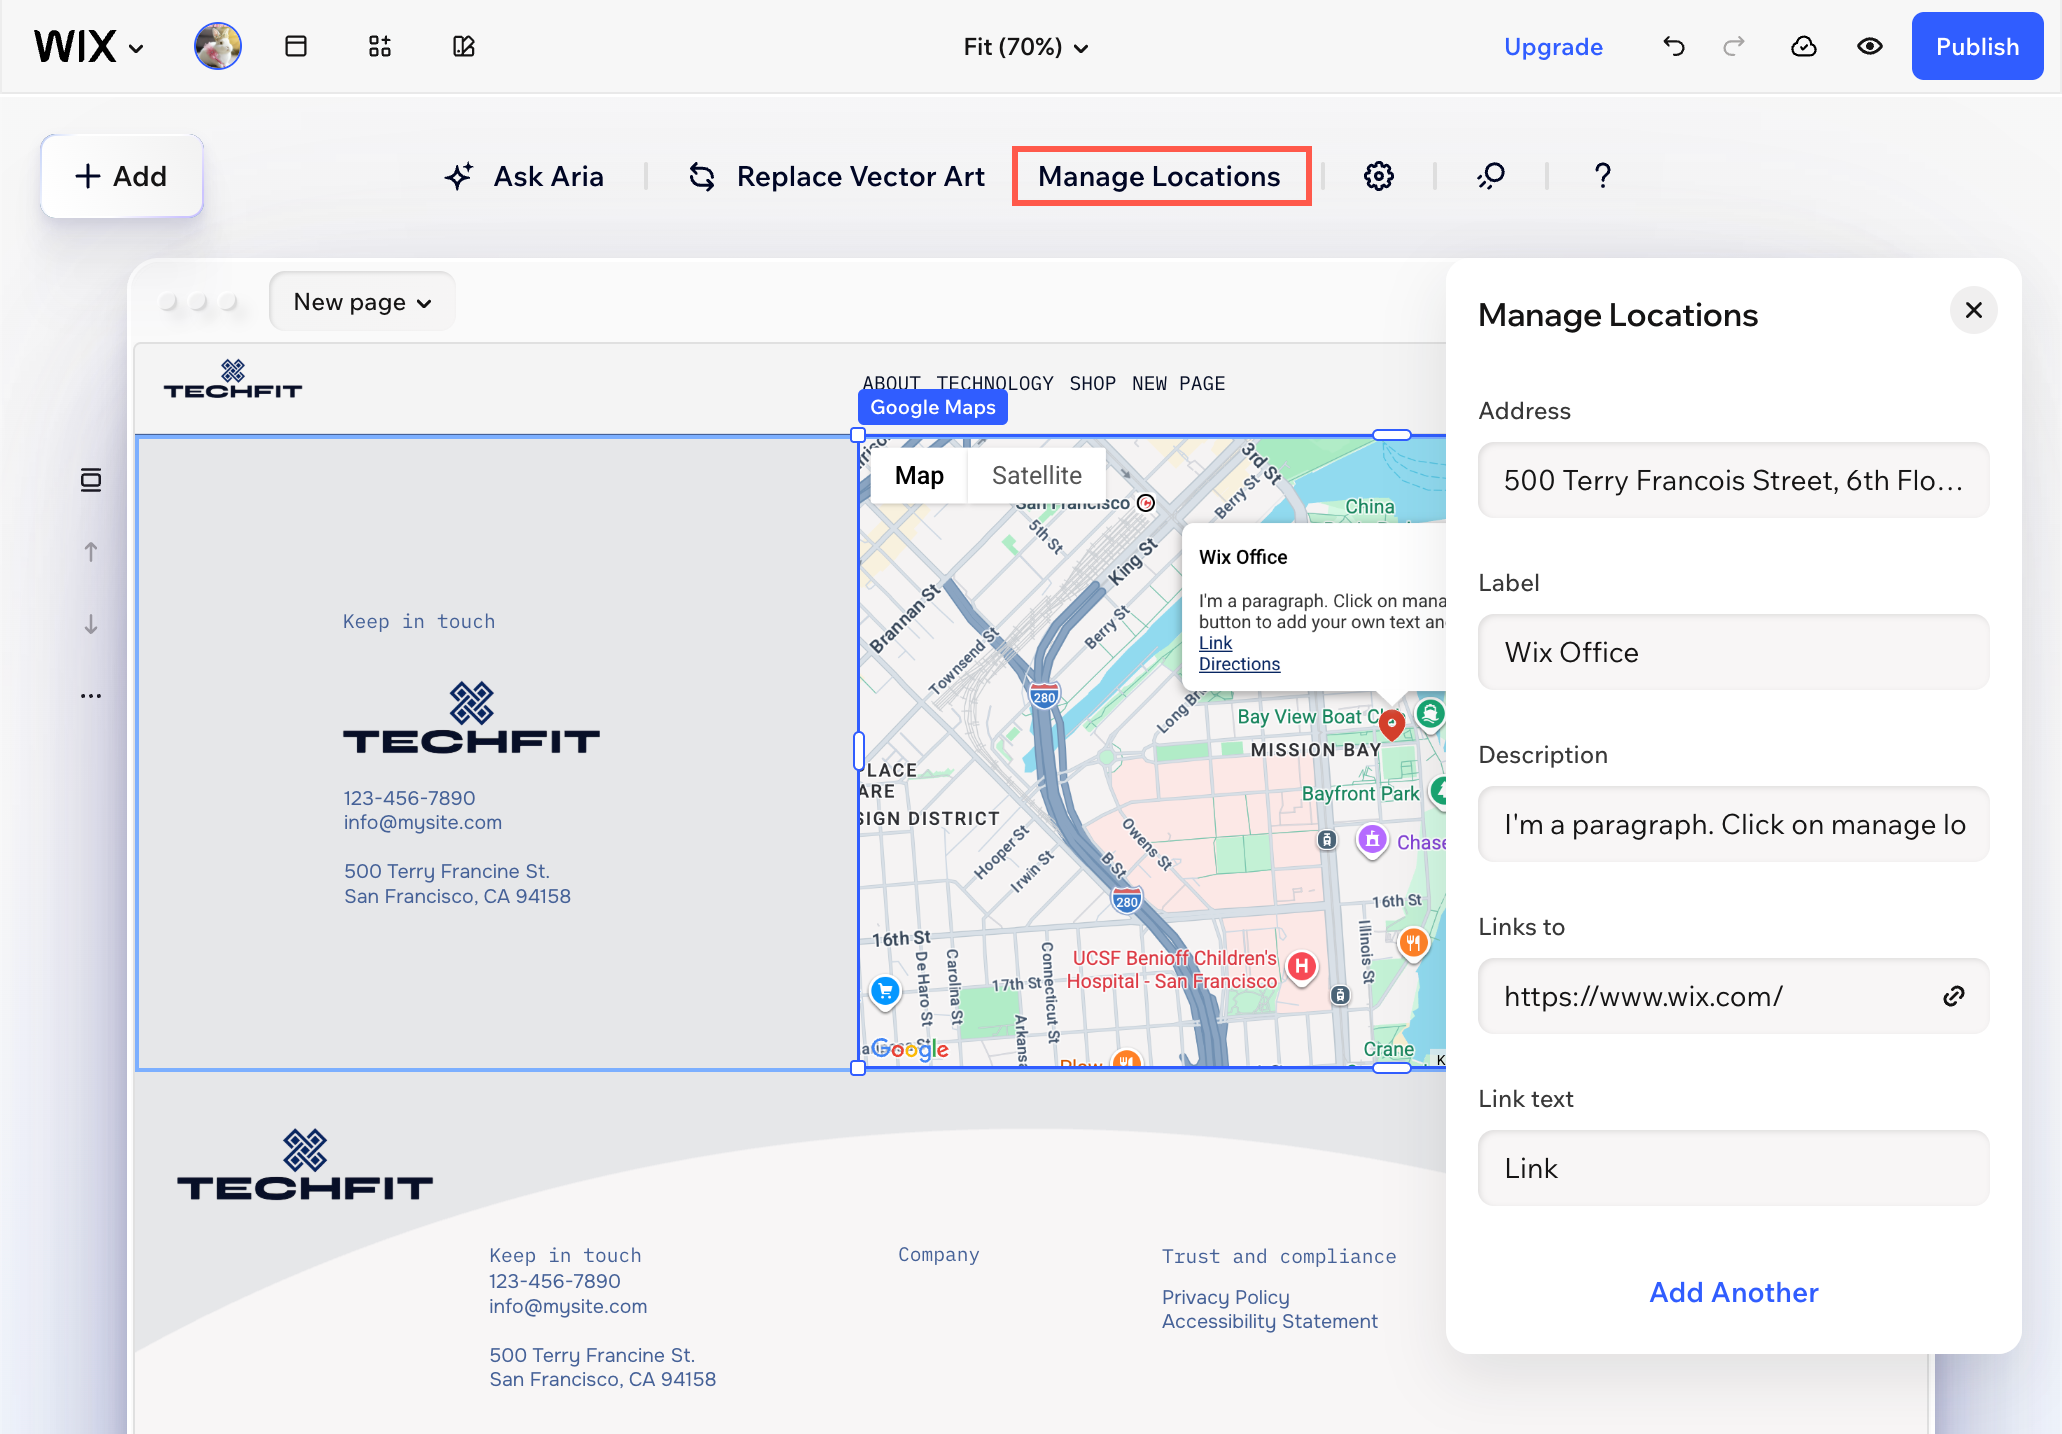
Multiple locations

Managing multiple locations on the same map
Keep all your important places visible by managing multiple locations on the same map. Add, edit, or remove spots as your business grows, or set a new center to show what matters most to your visitors.
To manage the locations:
- Go to your editor.
- Click the Google Map element.
- Click Manage Locations on the action bar.
- Choose what to do next:
- Add another location: Click Add Location at the bottom.
Tip: If you currently only have 1 location on the map, click Add Another. - Edit a location: Click the More Actions icon
 next to the location and select Edit.
 - Remove a location: Click the More Actions icon next to the location and select Delete.
- Change the center of the map: Click the More Actions icon next to the relevant location and select Recenter map.
- Add another location: Click Add Location at the bottom.
Customizing your map settings
Make your map work for you by choosing the settings that fit your needs. Adjust what visitors can see and do — let them get directions, explore with satellite view, and zoom in or out for a closer look at your locations. Every option helps you create a map that matches your style and gives your visitors the best experience.
To change the settings of your map:
- Go to your editor.
- Click the Google Map element.
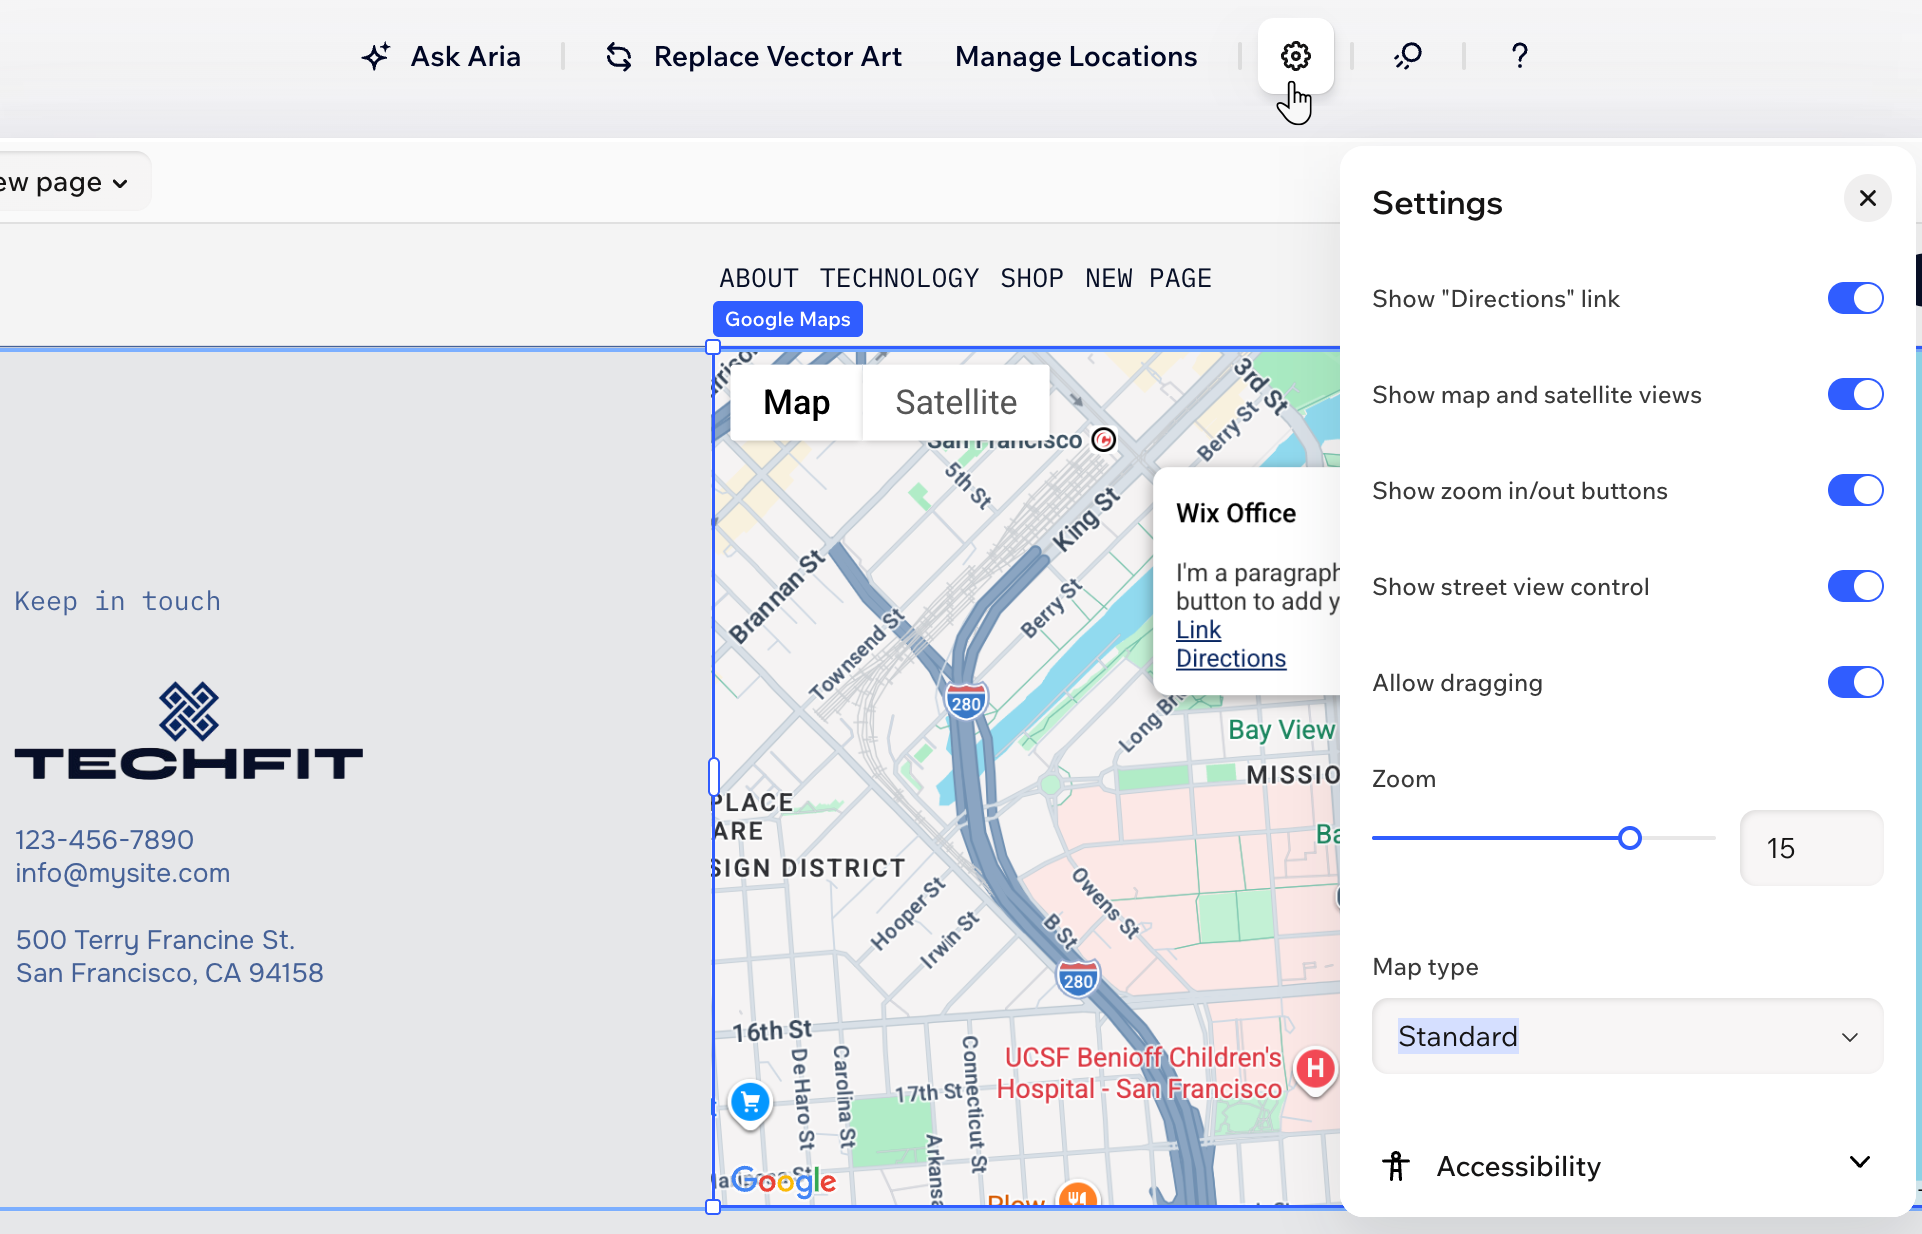
- Click the Settings icon
 on the action bar.
 - Customize the settings:
- Show "Directions" Link: Enable the toggle to display a link visitors can click to get directions to get to your location on Google Maps.
- Show map and satellite views: Enable the toggle to let visitors switch between the map and satellite views of your map.
- Show zoom in/out buttons: Enable the toggle to let visitors zoom in and out of the map.
- Show street view control: Enable the toggle to show the Google Street View tool.
- Allow dragging: Enable the toggle to allow visitors to move around your map by clicking and dragging with their mouse.
- Zoom: Choose the zoom of your map by dragging the slider. You may want to focus your map directly on your business location, or show where your business is located in relation to nearby cities.
- Map type: Choose the look of your map – Light, Dark, Standard or Satellite.
- Icon: Change the pin's default icon to something that fits your style, including any image from the Media Manager.
Tip: You can also quickly change the icon by clicking Replace Icon on the action bar. - Accessibility: Click to add an accessible name (alt text) that describes this map to search engines and screen readers.
FAQs
Click a question below to learn more about Google Maps.
My Google Maps is showing an incorrect address. How can I fix this?
My Google Maps looks different in Preview mode in comparison to the live version of my site. Why?
