
Wix Forms: Adding a File Upload Field
- Adding a file upload field to a site form
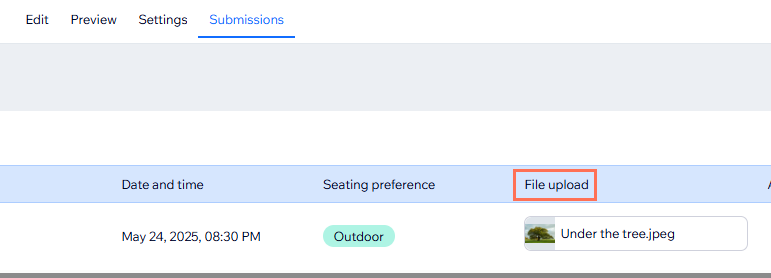
- Accessing uploaded files
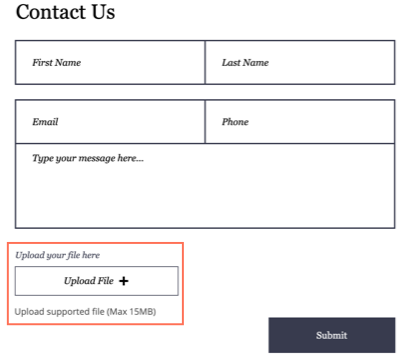
Adding a file upload field to a site form
- Click the relevant form in your editor.
- Click Edit Form to open the form builder.
- Click Add
 on the left side of the builder.
- Click General.
- Click File Upload and drag the form element onto the page.
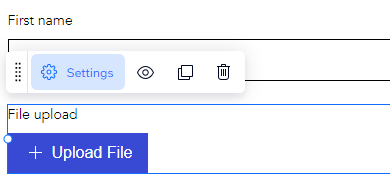
- Click the newly added field on your form and click Settings.
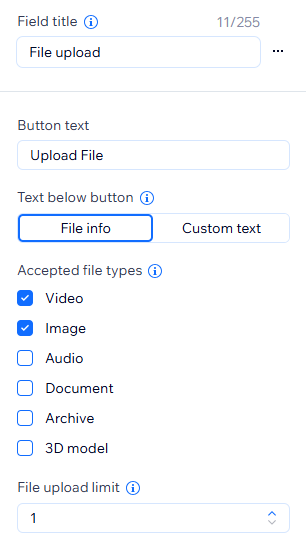
Choose from the following customization options:
Field title: Give a short title that tells people what you are asking for in the field.
Button text: Edit the text that appears on the upload button in the form e.g. 'Upload file'.
Text below button:
File info: Only the name of the file appears beneath the button after a visitor uploads a file.
Custom text: Custom text appears beneath the button after a visitor uploads a file e.g. 'Add up to 5 files.'
Accepted file types: Select the type of media people can upload (video, image, audio, document, archive, 3D model).
File upload limit: Choose the maximum number of files people can upload with a single form submission.
Note: The current maximum upload limit is 30 uploads per single form submission.Required field: Enable the toggle to make the upload file field mandatory (visitors cannot submit the form without uploading a file).
Field description: Enter text if your form needs additional explanation (e.g. terms and conditions or additional legal information)
Personal information PII: The toggle is enabled by default for any File upload field you add. When enabled, uploaded files are protected, there's no public link, and the file can only be downloaded. Disable the toggle for a field if you want public file links and previews instead. You can set this separately for each field.
Note: This default applies to all sites and to any File upload field added on or after September 22, 2026. Fields added before that date keep their existing setting. You can have fields with different settings in the same form.
If you add a file upload field to a payment form and use manual payments, you must update the order status to 'Paid' within 24 hours, or uploaded files will be lost. To help prevent this, we recommend connecting card payments to forms with file upload fields whenever possible.
Accepting archive files is a feature available only in new Wix Forms.
When the Personal information (PII) toggle is on for a field:
Uploaded files have no public link.
In your submissions table, files download instead of opening a preview.
Notification emails show only the file name, no link is included.
PDF exports show only the file name.
This applies to all sites, not only HIPAA-enabled sites. Learn more about storing personally identifiable information.
Accessing uploaded files
- Go to Forms & Submissions in your site's dashboard.
- Click the More Actions icon
 next to a form.
- Select View submissions.
- (Optional) Click the file under File upload to download it.