

Wix Events: Creating an Event Schedule in the Wix App
2 min
Let participants know what's happening at your event by creating an event schedule. Schedules are ideal for conferences, festivals, and more.

Before you begin:
Make sure to create and save your event. Learn more about the different types of events you can create.
To create an event schedule:
- Go to your site in the Wix app.
- Tap Manage
 at the bottom.
 - Tap Events.
- Select Published Events or Draft Events.
- Select the relevant event.
Note: For recurring events, you can add a schedule to an individual occurrence of an event. - Tap the Manage tab.
- Select Add-ons.
- Tap Add to Event under Schedule.
- Add the first schedule item:
- Enter the Item Name (e.g. Opening Session).
- Set the start and end dates and times.
- (Optional) Fill out the Item details:
- Enter the Place (e.g. Main Stage).
- (Optional) Click Add Tags to enter a tag and tap Done (Android) or Return (iOS) on your keyboard, and then tap Done at the top right.
Note: Tags are used to classify event sessions. For example, for a renewable energy conference, you might create tags for "Solar Energy", "Wind Energy", and "Electric Vehicles". Guests can filter the schedule to locate the events they're interested in. After you create a tag, apply it to other items of the same type.
- (Optional) Tap Add Description to enter a description of the schedule item and tap Done.
- Tap Save.
- Add more scheduled items:
- Tap Add New Item.
- Repeat step 9 above for each of the scheduled items in your event.
To hide, cancel, or delete an item: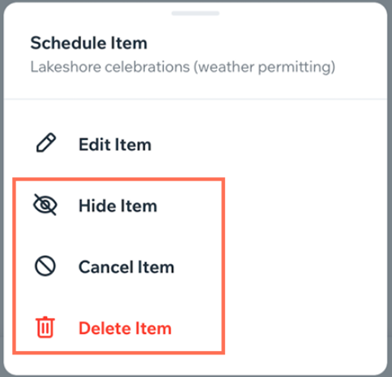
Tap the More Actions icon  next to the relevant item and select an option:
next to the relevant item and select an option: - Hide Item: Hide the item so you can display or edit it later.
- Cancel Item: Cancel the item and show in the schedule that the item has been canceled.
- Delete Item: Permanently delete the item and remove it from the schedule.
