Wix Editor: Using the Editor Tools in the Mobile Editor
5 min
In this article
- Using the Mobile Editor Toolbar
- Using the Layers panel
- Using the horizontal and vertical rulers
- Using gridlines
- Using the Snap to Objects tool
- Using the Auto Space on Drag tool
- Using the Spacing Guide tool
The Wix Mobile Editor offers several built-in tools to make your design process faster and more precise. You can find these features in the Tools panel at the top right of the editor.
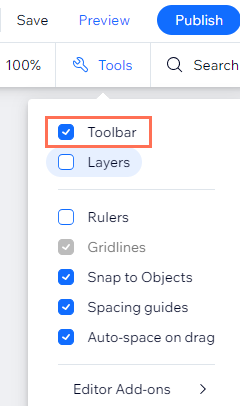
Using the Mobile Editor Toolbar
The Mobile Editor Toolbar helps you perform basic actions quickly. Use it to copy, paste, duplicate or delete elements on your page. You can also adjust element settings such as size, position and alignment.
After enabling the Toolbar from the Tools panel, you'll find it on the right side of the editor.
To enable the Toolbar:
- Click Tools
 at the top right of the Mobile Editor.
 - Select the Toolbar checkbox.
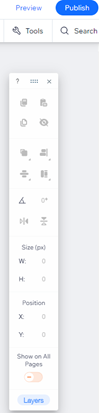
Using the Layers panel
The Layers panel shows you all of the elements on your page. The panel is divided by the main parts of your page (header, page and footer) so you can easily find the elements you need.
After enabling the Layers panel, it appears as a floating panel you can drag anywhere inside the Mobile Editor. You can enable it by clicking the Layers icon  at the bottom left of the editor.
at the bottom left of the editor.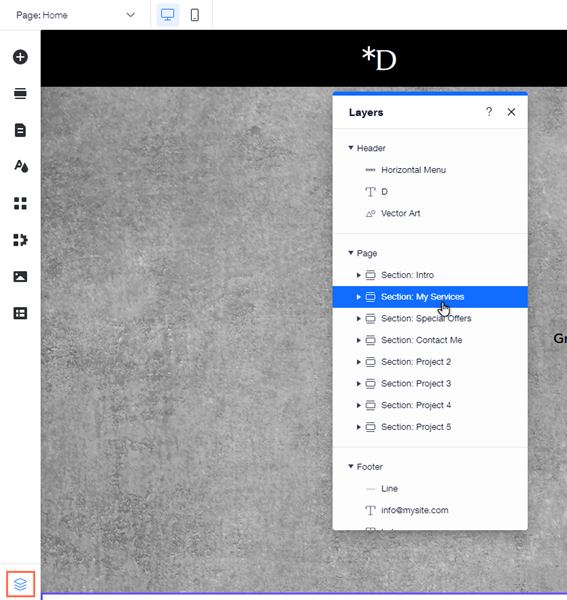
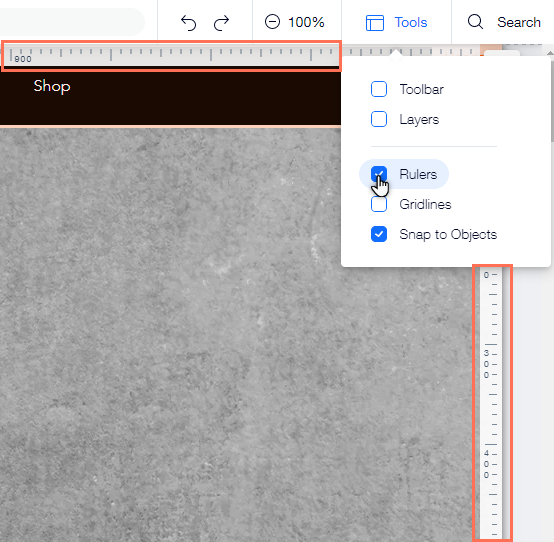
Using the horizontal and vertical rulers
Using the horizontal and vertical rulers, you can accurately place elements on your site. Position your elements in specific locations (in pixels) and add guides to help you mark these spots.
After enabling Rulers from the Tools panel, you can see the horizontal ruler along the top and the vertical ruler on the right side.
To enable the rulers:
- Click Tools
 at the top right of the Mobile Editor.
 - Select the Rulers checkbox.
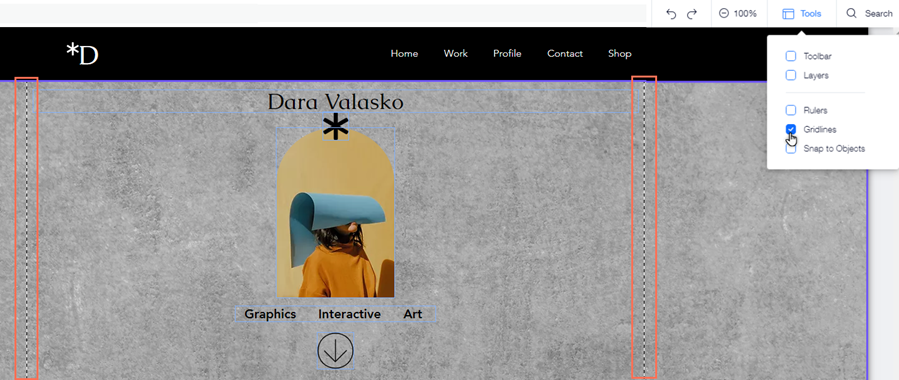
Using gridlines
Gridlines are the dotted lines inside your Mobile Editor that can help you build your site's layout correctly. The vertical gridlines are especially useful, as they show your page's maximum width on tablets and smaller devices.
Use the gridlines to ensure your content is visible on every possible screen size. Depending on your needs, you can enable and disable them at any point.
To enable gridlines:
- Click Tools
 at the top right of the Mobile Editor.
 - Select the Gridlines checkbox.
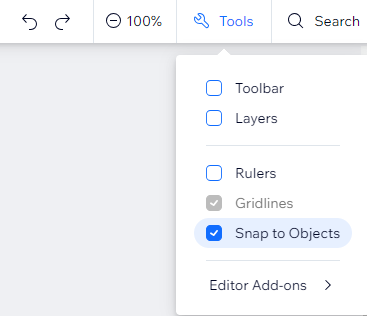
Using the Snap to Objects tool
The Snap to Objects tool helps you attach elements to one another with complete accuracy.
Once you drag an element, purple lines appear in order to mark the borders of other elements on that page. When you decide to drop the element you're dragging, it "snaps" to these markers within a 5 pixel range.
To enable Snap to Objects:
- Click Tools
 at the top right of the Mobile Editor.
 - Select the Snap to Objects checkbox.

Using the Auto Space on Drag tool
The Auto Space on Drag tool automatically adjusts the space between elements when you place an item in the gap between them. This allows you to reorder elements with one click, without affecting the overall design.
For example, you can hover over a button and drag it between two text elements. When a blue line appears, drop the button, and equal space will be created on either side of the two text elements.
Important:
This feature is not yet available for all users.
To enable or disable the Auto Space on Drag tool:
- Click Tools
 at the top right of the Mobile Editor.
 - Select the Auto Space on Drag checkbox.

Using the Spacing Guide tool
The Spacing Guide tool displays an adjustable blue bar which shows gap size in pixels and shows pink lines that indicate when the gap size is equal to other gaps on your section. This tool lets you make the spacing bigger and smaller while maintaining the spacing elsewhere in the section.
Make precise spacing decisions, swiftly.
Important:
This feature is not yet available for all users.
To enable or disable the Spacing Guide tool:
- Click Tools
 at the top right of the Mobile Editor.
 - Select the Spacing Guide checkbox.