Wix Editor: Stretching an Element to Full Width
3 min
In this article
- Stretching an element
- FAQs
Stretch your elements to full width to make your site more responsive. Stretched elements span the width of your browser, regardless of screen size.
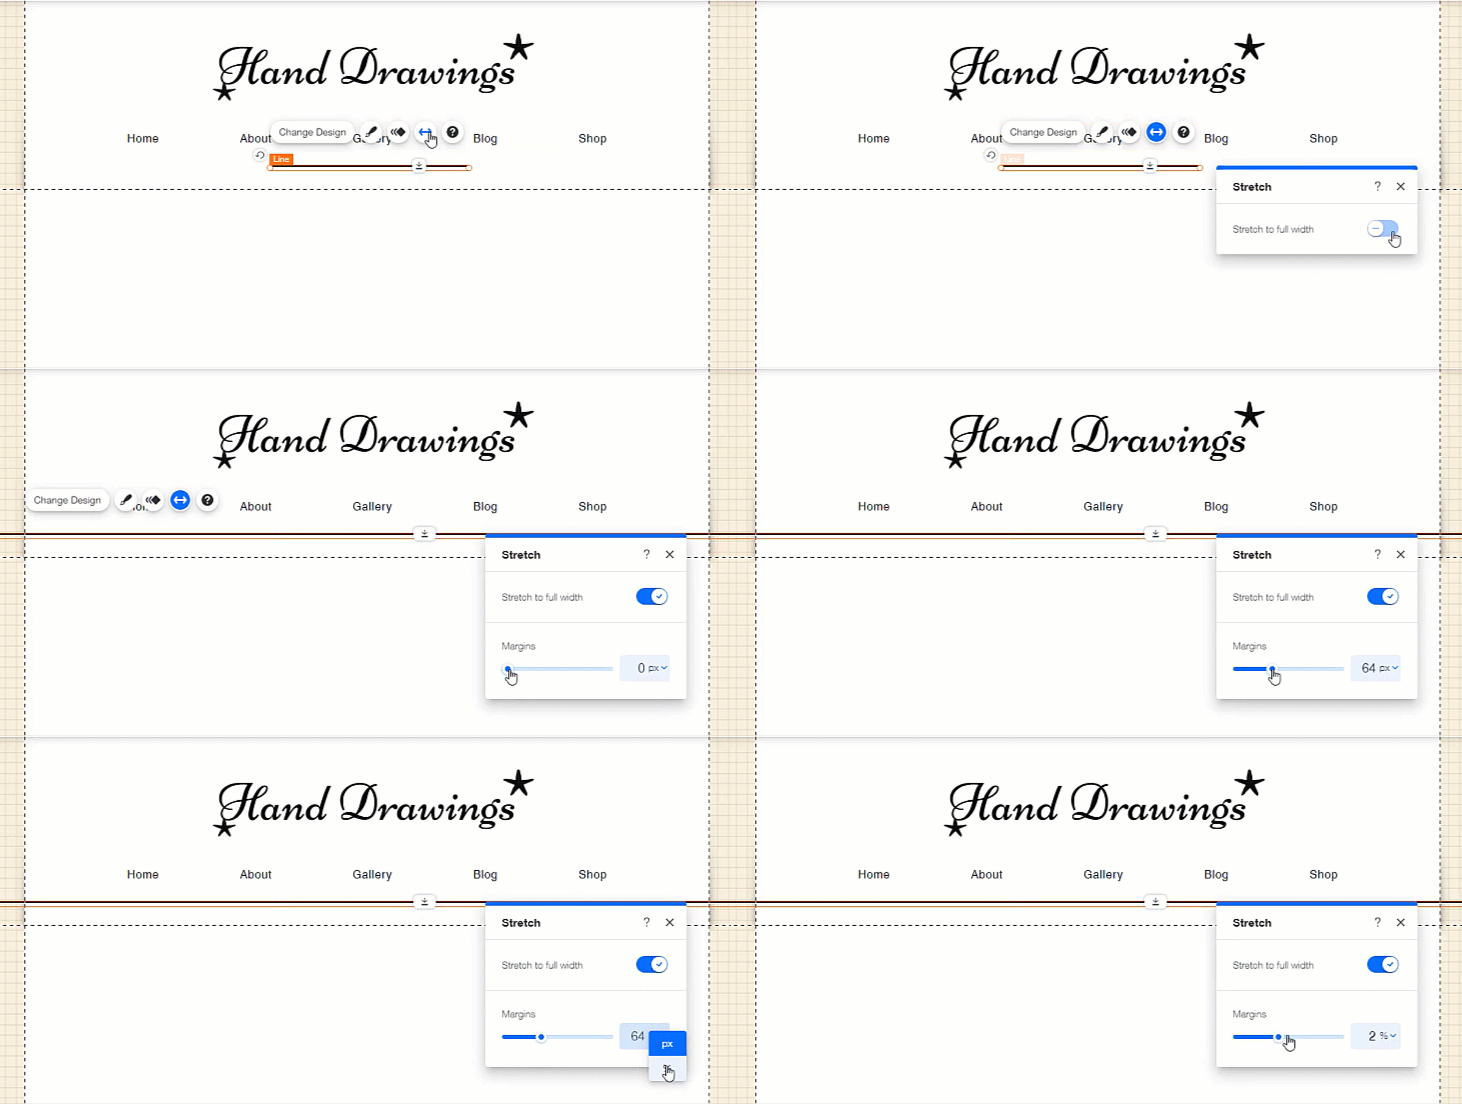
Once you've stretched an element you can add margins, creating space on its left and right. You can set the margins in pixels so they stay the same across all devices, or in percentage so they adjust to every visitor's browser.
The stretch option is only available for certain elements. See our FAQs for the full list.
Stretching an element
Stretch your elements to full width, and set the margins to display them exactly how you want.
To stretch an element:
- Click the element in the editor.
- Click the Stretch icon
 .
. - Enable the Stretch to full width toggle.
- (Optional) Set the margins:
- Click the number field to choose whether to set the margins by px (pixels) or % (percentage of browser width).
- Drag the slider to increase or decrease the size of the margins.
Notes:
- Certain elements only allow you to set the margins by pixels.
- The margin limit is 190 pixels, or 5% of the browser size.

FAQs
Click a question below to learn more.
What elements can I stretch?
Can I unstretch an element?
Is this the same feature as stretch handles?
How does it work on mobile?
Can I stretch a mobile-only element?
Note:
You may notice that when you stretch elements, a gap appears between the stretched element and the elements above / below. You can remove the gap by moving the elements, or using the Zoom Out and Reorder function


