

Wix Editor: Creating an AI-Generated Site
4 min
In this article
- Step 1 | Enter the details
- Step 2 | Generate a site with AI
- FAQs
Creating an AI-generated Wix site allows you to build a personalized site tailored to your business needs, with your specific brand and design guidelines. It simplifies the site creation process, saving you time and effort while ensuring your site looks professional and unique.
Step 1 | Enter the details
Get started by inputting the relevant details for your site. You can do this by logging in to your Wix account, or creating a new account.
To set up your site details:
- Go to the Wix AI Website Builder.
- Click Start Chat.
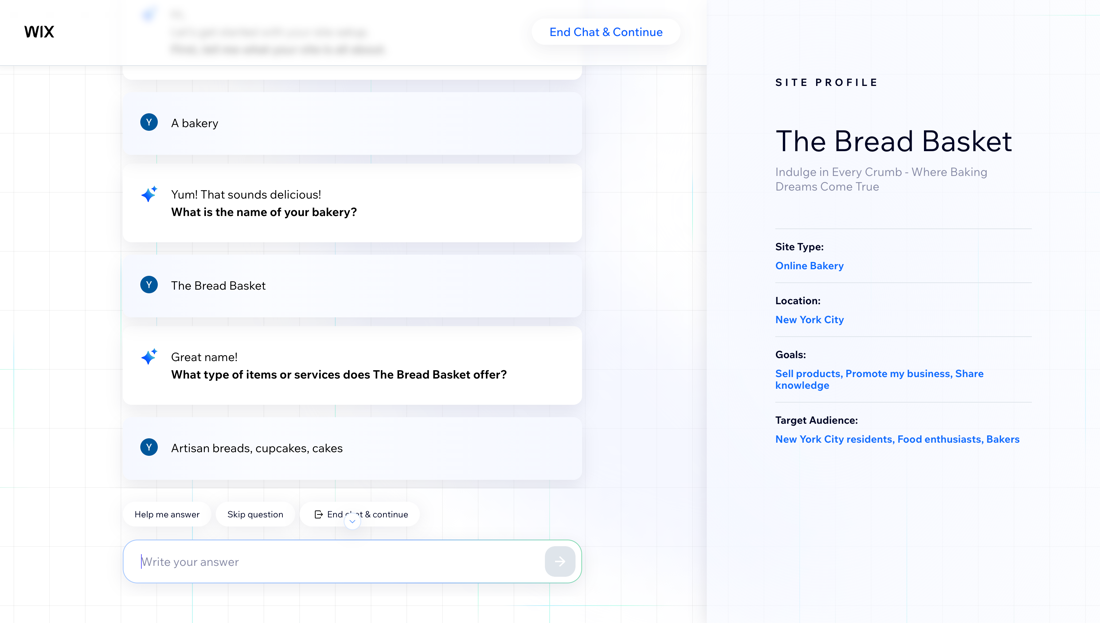
- Choose how to answer the generator's questions:
- Help me answer: Get suggestions from the AI chat.
- Skip question: Skip the current question without answering.
- End chat & continue: Exit the AI chat completely.
- Answer: Enter the details into the field.
- Click Go to Dashboard to finish setting up your site.
Step 2 | Generate a site with AI
After you've entered your site details, begin generating your site with AI. The look and content is based on your business information and needs, so you can create something personal to you and your business.
Once your site has been generated, you can adjust it as needed to ensure it looks the way you want. Continue with the design, make some small changes, or regenerate the site to start fresh.
To generate your site:
- (In the dashboard) Click Design Site.
- Click Generate a Design.
- Choose what you want to do with your AI-generated site:
- Regenerate Design: Start fresh, and generate a new site.
- Tweak Design: Generate a new theme and layout using the same brief for your site.
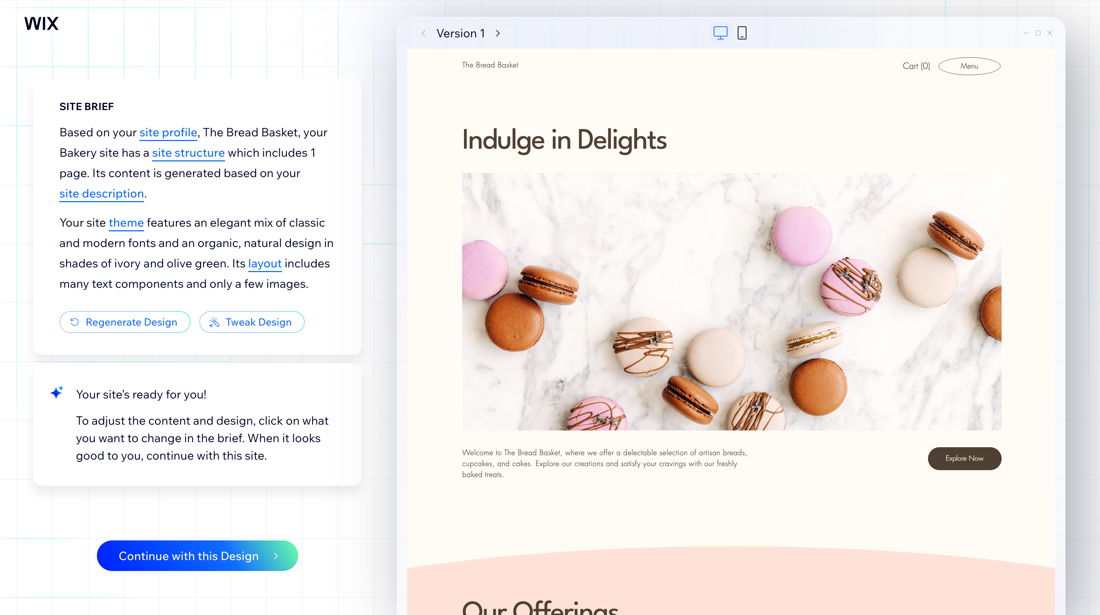
- Edit the site brief:
- Site profile and/or site description: Update your site or business details.
- Site structure: Select the checkboxes next to the sections and pages you want to add to your site.
- Theme: Enter the changes you want to make to your site's theme, font and colors.
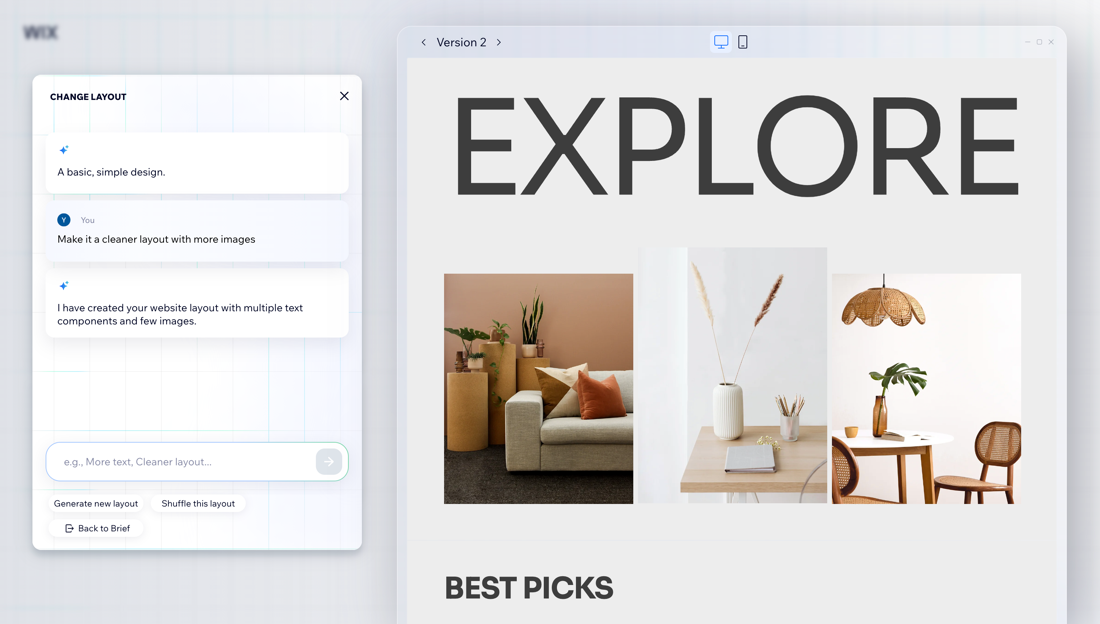
Tip: Click Generate new theme to change the elements or click Shuffle these colors to apply the same theme but switch the primary and secondary colors. - Layout: Enter the changes you want to make to your site's layout.
Tip: Click Generate new layout to change the whole design or click Shuffle this layout to apply a different variation of the layout.
- Once you're happy with the site design, click Continue with this Design.
- Decide how you want to continue:
- Get a domain: Click Let's Go to connect or purchase a domain.
- Continue to the Editor: Open your site in the Wix Editor.
- Set Up Your Business: Go to your dashboard.
Tip:
Learn more about the AI features that Wix offers for creating, managing, and growing your business online.
FAQs
Click a question below to learn more about generating a site with AI.
Can I redesign or edit my existing site with the AI Website Builder?
 on the left side of the editor.
How can I switch my AI-generated site to a regular template?
