Wix Editor: Adding and Setting Up Sections
4 min
In this article
- Adding a section to your site
- Naming your sections
- Adding sections to your menu
- Rearranging sections on your page
Sections are an easy way to organize and display content on your site.
Sections span the full width of your site, allowing you to space and customize its elements. They also adjust to your screen size, so visitors see all of your chosen content, whether on desktop or mobile.
You can build your site by adding as many sections as you like, and easily rearrange and edit them.
Adding a section to your site
Add a section to your site to begin structuring your pages and their content.
There are a range of pre-designed options available that include layouts and elements to help you build your site. You can also choose a blank section to build it from scratch.
To add a section:
- Go to your editor.
- Click Add a Section
 on the left side of the editor.
 - Click a category.
- Click your chosen section to add it to your page.
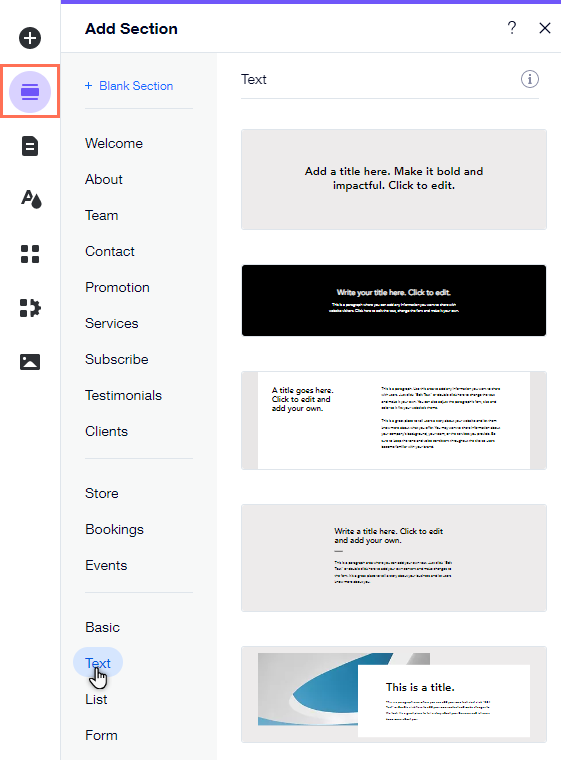
Did you know?
The panel may show section templates based on your site's business type (such as stores, blogs, etc.).
Naming your sections
Name your sections for quick and easy navigation. You can use section names to identify them in the layers panel.
If you choose to add a section to your menu, names are also a great way for your visitors to know what they're clicking on.
To name your section:
- Go to your editor.
- Hover over the relevant section.
- Click the More Actions icon
.
- Click Section Settings.
- Enter the section name into the field under What's this section's name?.
- Press the Enter key on your keyboard.
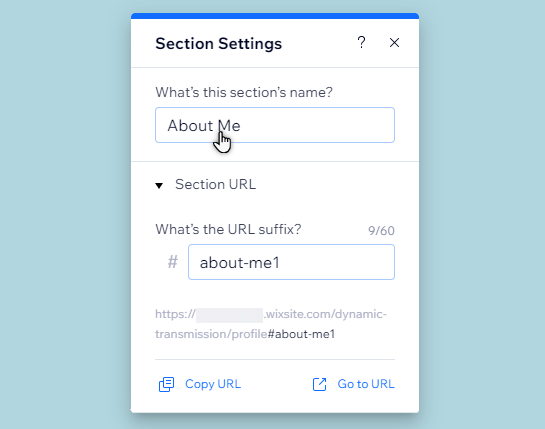
Note:
Section names are not visible to site visitors unless you add them to a menu.
Adding sections to your menu
Adding sections to your menu is a great way to help your visitors navigate your site, and direct them to the right content.
Making sections a menu item is also particularly useful if you have a one-page site that contains a lot of information, as visitors will be able to find what they're looking for without having to scroll.
To add a section to your menu:
- Go to your editor.
- Click the menu.
- Click Manage Menu.
- Click Add Menu Item at the bottom of the panel.
- (For advanced menus) Select Section from the list.
- (For site menus) Click Section or anchor.
- Select the page the section is on from the dropdown menu.
- Select the section from the dropdown menu.
- Click Done.
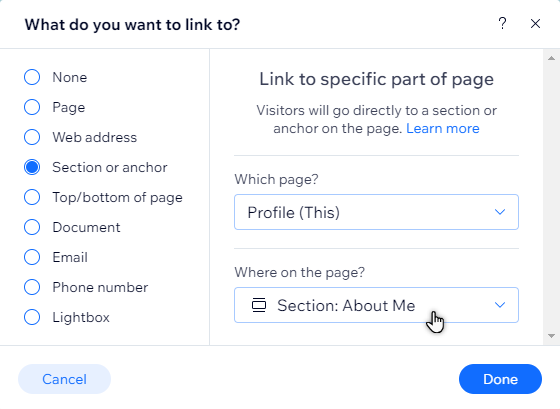
Did you know?
You can link elements to sections on your site, and create a unique link to your sections to share across external platforms.
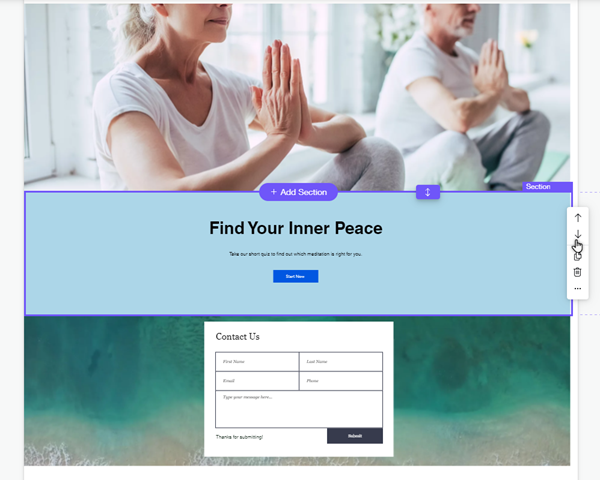
Rearranging sections on your page
You can easily adjust the layout of your site page by rearranging your sections. Move sections up or down to arrange your site content, and provide an aligned, easy experience for your visitors.
To move a page section:
- Go to your editor.
- Click the Zoom Out icon
on the top toolbar of the editor.
- Click the section, then click one of the arrows:
- Move section down
: Move the selected section below the section underneath it.
- Move section up
: Move the selection section above the section on top of it.
- Move section down