Wix Editor: Adding and Setting Up an In-Page Menu
In this article
- Step 1 | Set up sections and anchors on your site
- Step 2 | Arrange the anchors in the layers panel
- Step 3 | Add an in-page menu
- Step 4 | Manage the menu items
In-page menus are a handy, eye-catching way for visitors to navigate your site. In-page menus float on your page, and are therefore always visible to your visitors as they navigate the site. They are most useful on one-page sites with several sections and anchors.

Note:
In-page menus are not displayed on your mobile-friendly site.
Step 1 | Set up sections and anchors on your site
The first step in setting up an menu is to add anchors and sections across your site. Sections are the building blocks of your pages. Use them to organize and display your content and information.
Anchors are used to mark all other information that may not be in sections, such as galleries or videos. You can build your site with either sections or anchors, or both.
Click below to learn more.
Add a section
 on the left side of the editor.
 .
.
Add an anchor
 on the left side of the editor.
Important:
We recommend attaching no more than 1 anchor to a segment on your site. Attaching more than one may cause issues for visitors using screen readers or keyboards to navigate.
Step 2 | Arrange the anchors in the layers panel
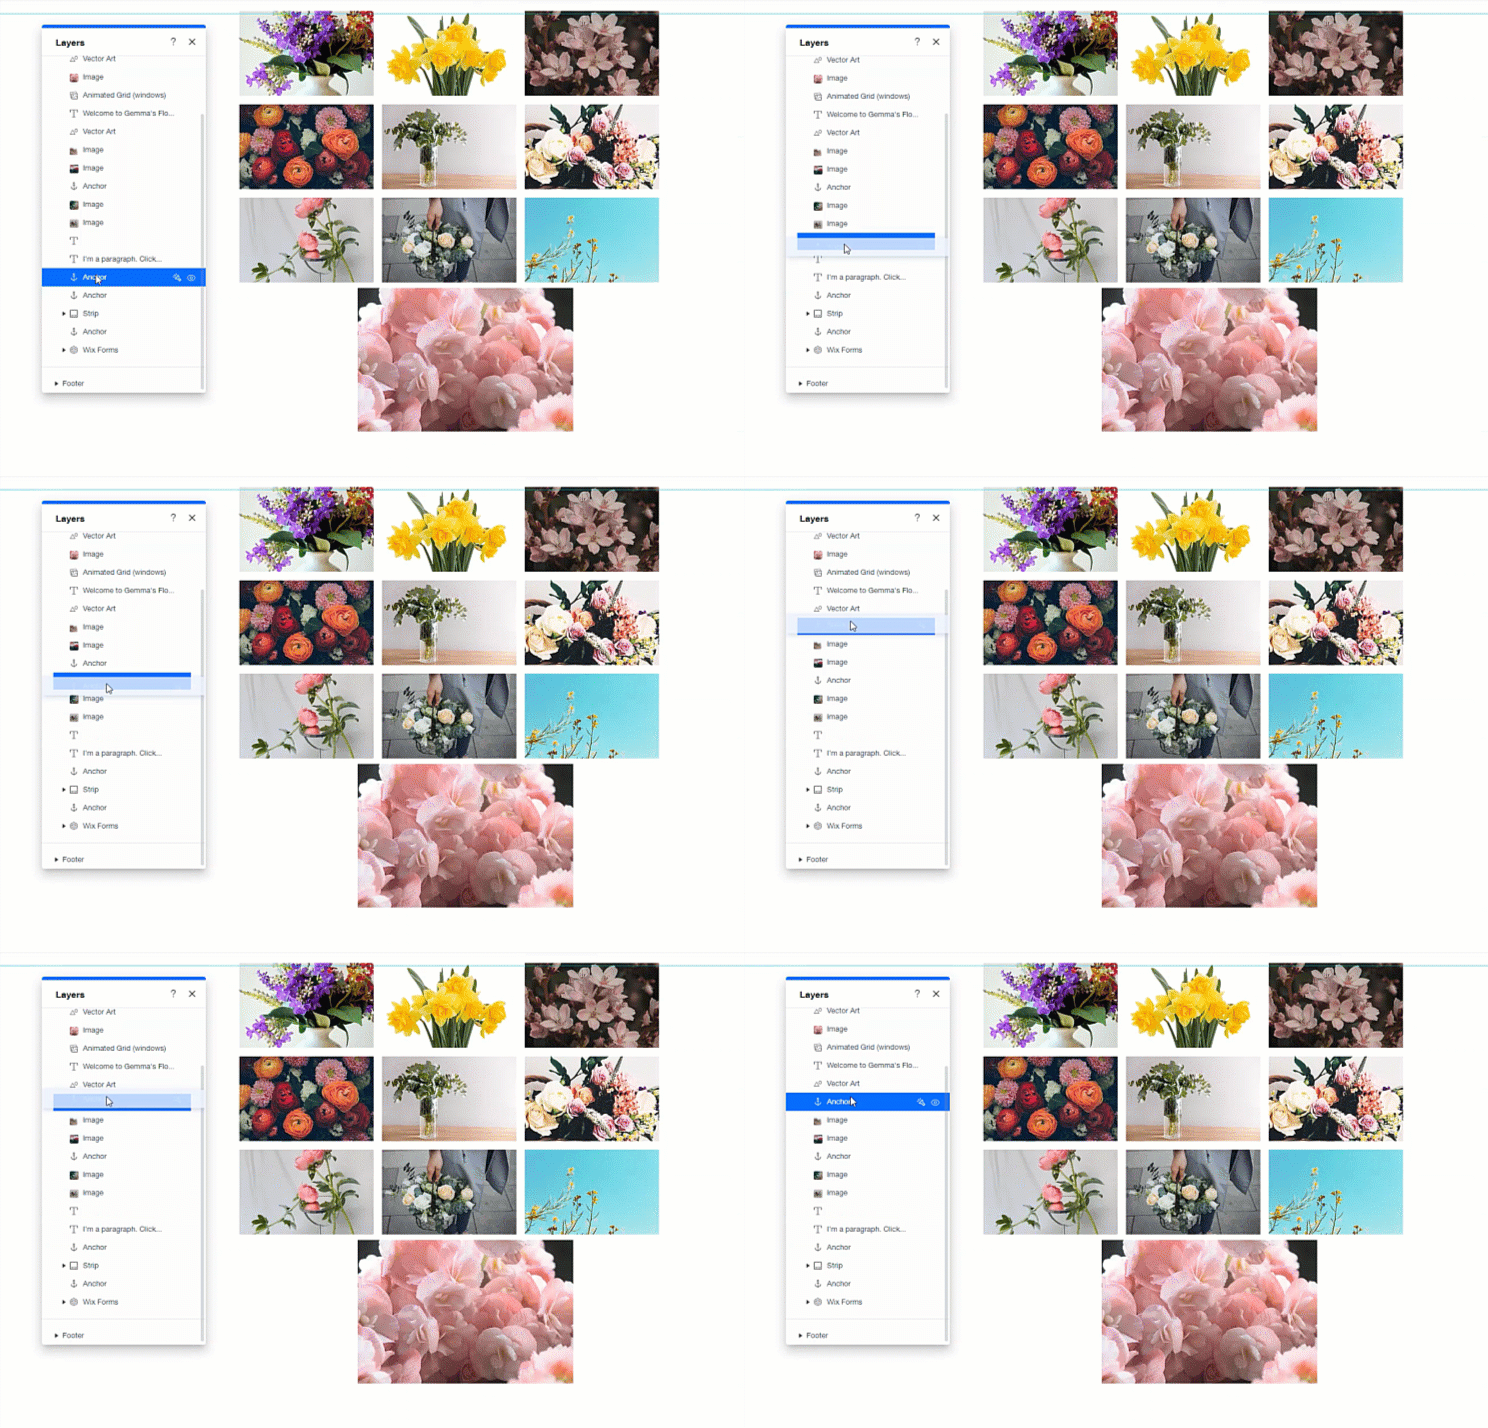
After placing anchors on your site pages, open the Layers panel to arrange them. Your anchors should be placed right above the relevant section, strip or element – this ensures that when visitors click them in the menu, they're brought to the correct content.
Want to re-order your sections?
Click the relevant section in the editor, then click the
Move up
 or
Move down
or
Move down
 icons to rearrange the sections on your page.
Learn more about reordering sections
icons to rearrange the sections on your page.
Learn more about reordering sections
or
Move down
icons to rearrange the sections on your page.
Learn more about reordering sections
To arrange your site anchors:
- Click the Layers icon
on the bottom left of the editor.
- Drag each anchor to so it appears right above the relevant section, strip or element.
Step 3 | Add an in-page menu
After adding anchors or sections to your site, add an in-page menu to display and list them. The menu is pinned to the screen, so it's always visible on your site. This makes navigating easy for your visitors, and you can always change the location of the menu as needed.
To add a menu:
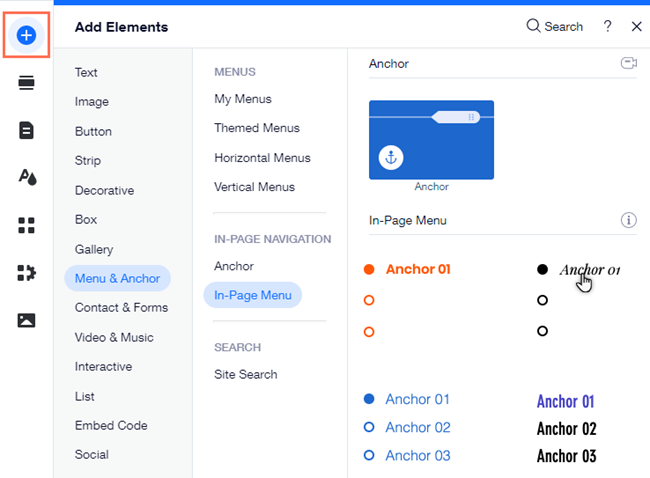
- Click Add Elements
on the left side of the editor.
- Click Menu & Anchor.
- Click In-Page Menu.
- Click or drag your chosen menu to add it to your site.
Step 4 | Manage the menu items
By default, all anchors and sections are displayed on your in-page menu. You can manage anchors and sections on your in-page menus by adding new items, or deleting them as needed.
Note:
Your anchors and sections are displayed on the menu in the order that they appear on the page (top to bottom). It is not possible to change the order of anchors / sections in an in-page menu.
To manage items in the in-page menu:
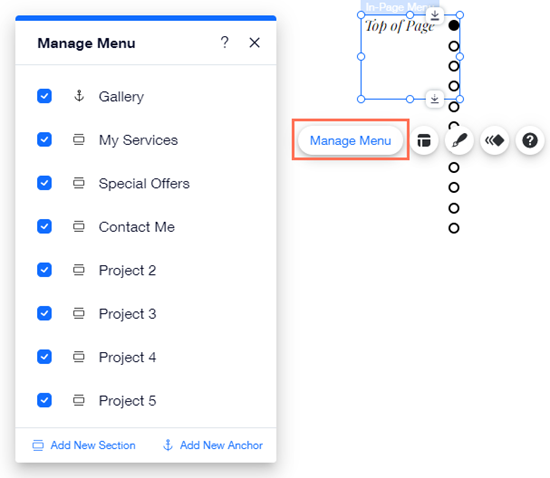
- Click the new in-page menu.
- Click Manage Menu.
- Choose how you want to manage your items:
- Show / hide an item: Select or deselect the checkbox next to the anchor / section to show or hide it.
- Add another anchor to the page: Click Add New Anchor to create a new anchor and display it in the menu.
Tip: New anchors are automatically added to the top of your page. You can adjust their position by dragging them. - Add another section to the page: Click Add New Section to create a new section and display it on the menu.