

Wix Editor: Adding and Setting Up a Video Mask
5 min
In this article
- Step 1 | Add a VideoBox or a Video Mask
- Step 2 | Select a Mask for Your VideoBox
- Step 3 | Customize Your VideoBox
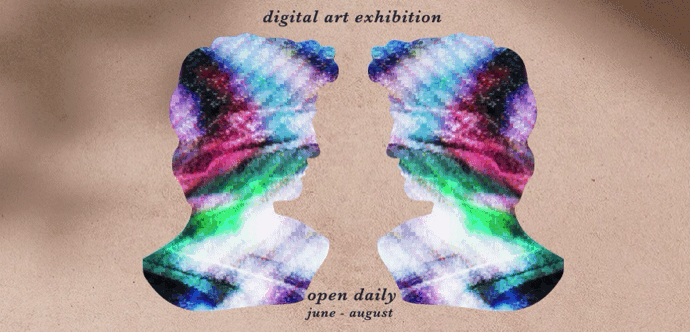
Give your VideoBox a unique shape and create a striking visual effect using video masks. Choose from thousands of shapes and vector art offered by Wix, or upload a shape of your own to cut out your video.
Step 1 | Add a VideoBox or a Video Mask
To get started, open the Add Elements panel and select a video from the VideoBox / Video Mask section. You can click More Videos to view hundreds of videos offered by Wix, or upload a video of your own.
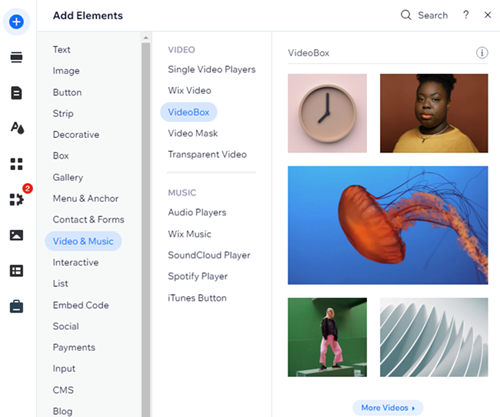
To add a VideoBox:
- Go to your editor.
- Click Add Elements
 on the left side of the editor.
 - Click Video & Music.
- Add a video to your page in one of the following ways:
- Drag a video to your page from the VideoBox/ Video Mask section.
- Click More Videos to view more videos offered by Wix, or upload your own from the Media Manager.
Tips:
- The VideoBox and Video Mask suggestions in the Add Elements panel are fully customizable. You can change the video, choose a different mask, adjust the design and behavior as needed.
- You can also add a Video Mask directly to your site by clicking here.
Step 2 | Select a Mask for Your VideoBox
After adding a VideoBox, apply a mask to cut it into a cool shape. Choose one from the list or click the  icon to see more suggestions. Wix offers loads of shapes in different styles and themes, some are geometric (e.g., square, triangle, diamond) and others completely abstract.
icon to see more suggestions. Wix offers loads of shapes in different styles and themes, some are geometric (e.g., square, triangle, diamond) and others completely abstract.In addition to the shapes, you can use any vector art illustration to mask your video, or even your own SVG file to give it a brand new look.
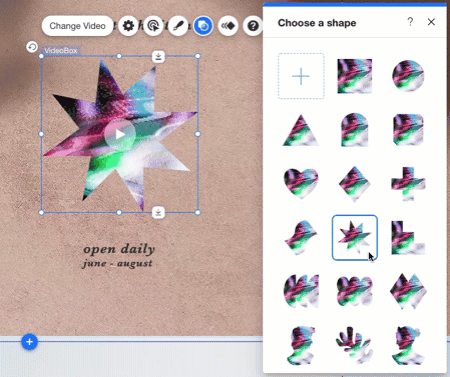
To add a mask to your VideoBox:
- Click your VideoBox in your editor.
- Click the Mask icon
 .
. - Choose a shape for your VideoBox in one of the following ways:
- Select a shape from the list.
- Click the Add icon
 to view more shapes and vector art in the Media Manager. You can also upload your own SVG file from here.
Need a different video?
Click your VideoBox and click Change Video to access the Media Manager. You can choose a free video offered by Wix or use a video from your site files.
Step 3 | Customize Your VideoBox
After masking your VideoBox, use the available settings to customize it further. Add shadow or a pattern overlay, pick a cover image and design the button that visitors click to play the video.
Next, manage the behaviors of your VideoBox so it achieves the desired effect. Choose how your video plays and stops, make it loop continuously and more.
To customize your VideoBox:
- Click the VideoBox in your editor.
- Do one of the following:
- Click the Settings icon
 to preview your video, replace it or reset the VideoBox to default settings. You can also add alt text to improve your site's SEO and accessibility.
 - Click the Behaviors icon
 to choose how your video starts (e.g., automatically, on click) and whether or not visitors can pause it. You can also enable sound and slo-mo when supported.
 - Click the Design icon
 to choose a cover image, apply a pattern overlay and more.
 - Click the Big Play Button on your VideoBox to customize its design or choose a different button.
- Click the Settings icon
Note:
The Big Play Button appears on your live site only if you set your video to start when visitors click it.
Tip:
Certain videos offered by Wix were captured in slow motion. In those cases, you can choose whether to play them at normal speed or slo-mo using the Play in slo-mo toggle.
