Wix Editor: Adding and Setting Up a Text & Icon Button
2 min
In this article
- Step 1 | Add your button
- Step 2 | Set up your button
Text and icon buttons are a great way to encourage site interaction from your visitors. With a range of options available, you can choose a catchy call-to-action, a striking icon, or even a button that displays both.
Step 1 | Add your button
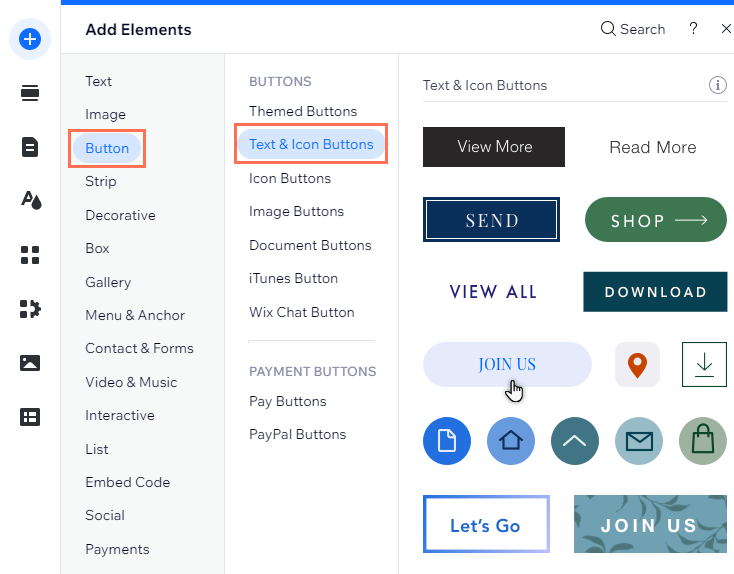
You can add a button from the Add Elements panel on the left side of the editor. There are several different options available, with a range of layouts.
To add a button:
- Click Add Elements
on the left side of the editor.
- Click Button.
- Click Text & Icon Buttons.
- Click or drag your chosen button to add it to the page.

Step 2 | Set up your button
There are many different ways that you can customize your button. Choose what you want to display, and adjust the settings as needed.
To finish setting up, add a link to your button to direct your visitors to the relevant location. You can link to many different places, such as site pages, external web addresses, or documents.
Note:
The available options depend on what you choose to display on the button (text, icon, etc.).
To set up your button:
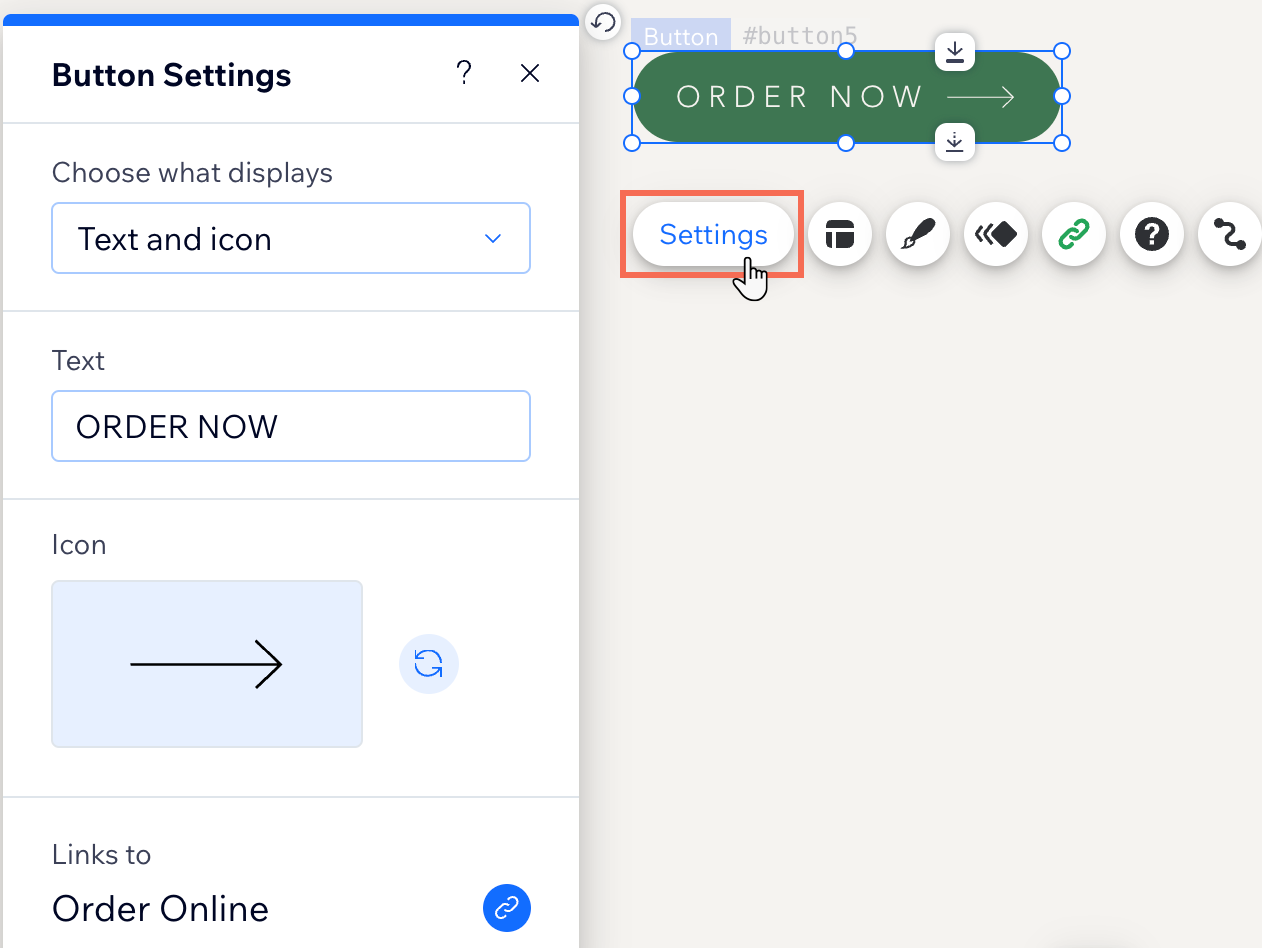
- Click the button in your editor.
- Click Settings.
- Select an option under Choose what displays:
- Text and icon: Both text and an icon appear on the button.
- Icon only: The button only shows an icon.
- Text only: The button only shows text.
- Nothing: The button is blank.
- Change the button settings using the available options:
- What does it say?: Enter your chosen button text into the field.
- Choose icon: Choose what kind of icon you want to use:
- Click Media from Wix to choose from a variety of free icons offered by Wix.
- Click + Upload Media to upload and use your own vector art files.
- Set up the button link:
- Click the Link
icon under Links to.
- Select a link type on the left.
- Enter the link details and click Done.
- Click the Link

What's next?
Customize your text and icon button to make it look how you want.


