

Wix Editor: Adding and Managing a Logo
4 min
In this article
- Creating and adding a logo in the Wix Editor
- Adding an existing Wix Logo to your site
- Uploading a site logo
- FAQs
Logos are the face of your business and with the Wix Logo Maker, you can create personalized branding. Add logos you create directly from the Wix Editor, or use the element to create a new logo.
You can also upload existing logo files (created with the Logo Maker or elsewhere), and add them to your site.

Creating and adding a logo in the Wix Editor
You can create a new logo from inside your site's editor. The Wix Logo Maker generates eye-catching logos for your business, which you can customize to build personalized, unique branding.
To create a new logo:
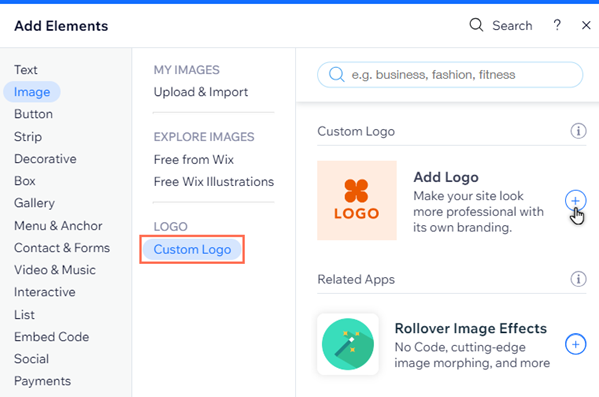
- Open your site in the Wix Editor.
- Click Add Elements
on the left menu.
- Select the Image tab.
- Select Custom Logo. Note: If you've already created a logo with the Wix Logo Maker, it will be displayed here.
- Click Add Logo.
- Select the logo.
- Click Manage Brand.
- Add the relevant information, and select a design from the options available. Learn more about creating a logo with the Wix Logo Maker

Tip:
- If you have not purchased a logo, you can create one and utilize the 200x200 free sample file to display it on your site. If you need higher resolution logo files, you can purchase them by upgrading to any of the Logo packages.
- If you've already purchased your logo with the Wix Logo Maker, it will be displayed when you add the logo to your site.
Adding an existing Wix Logo to your site
If you've already created and purchased your logo with the Wix Logo Maker, you can add the element to quickly display it on your site.
To add an existing Wix Logo:
- Open your site in the Wix Editor.
- Click Add Elements
- Select the Image tab.
- Select Custom Logo.
- Click Add Logo.
Uploading a site logo
You can upload logos you've made externally and add them to your site.
Upload it to your site's Business Info in your site's dashboard, or upload it inside the Editor to use it on your site pages.
Note:
If you upload your own logo inside the editor, it is not automatically added to your site's Business Info. You need to add it from your site's dashboard.
Wix Editor
Dashboard
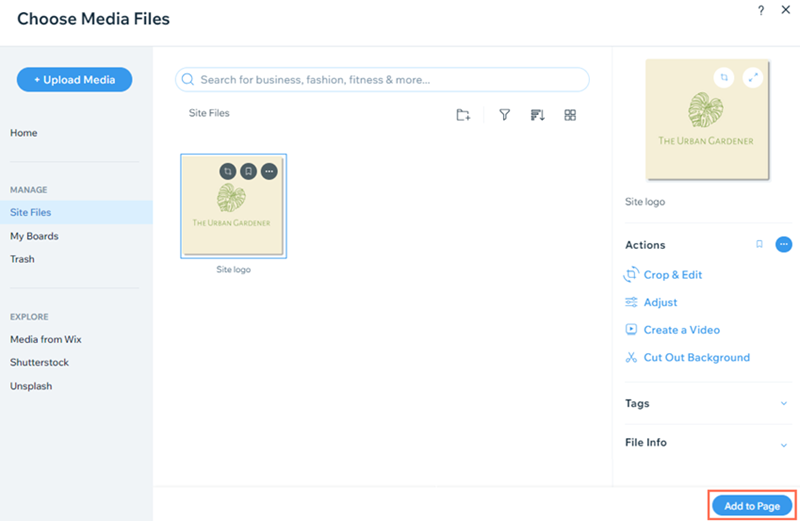
- Open your site in the Wix Editor.
- Click Add Elements
- Select Image.
- Select Upload Images.
- Select where you want to add the media from with the available options.
- Choose the image you want.
- (Optional) Select the file and click Add to Page to add it to your site.
Tip: To create an image with a transparent background, upload a .png file.
FAQs
Select from the following options to learn more about logos on your site.
When are logos added to my site's Business Info?
Where are logos displayed on my site?
Do I need to pay to create a logo with Wix?
What are the recommended ratios for logos I upload?
