

Wix Blog: Creating Recipe Cards
7 min
In this article
- Step 1 | Add the Blog Recipes app to your site
- Step 2 | Create a recipe
- Step 3 | Link recipes to specific blog posts
- Step 4 | Customize the app settings
- FAQs
Creating recipe cards in Wix Blog is a popular way for food bloggers and businesses to share recipes in an attractive, readable, and interactive format. Recipe cards help organize ingredients, steps, and photos, making your recipes more appealing and accessible for readers.
Step 1 | Add the Blog Recipes app to your site
Wix Blog offers you a built-in third-party app that lets you easily create and add professional recipe cards to your posts. You can add this directly from the post composer.
To add the Blog Recipes app:
- Go to Blog in your site's dashboard.
- Click + Create New Post or open an existing post.
- Click Apps in the panel on the left.
- Click View app to view the Blog Recipes app.
- Click Agree and Add.
- Click Apps in the panel on the left.
- Click Open App.
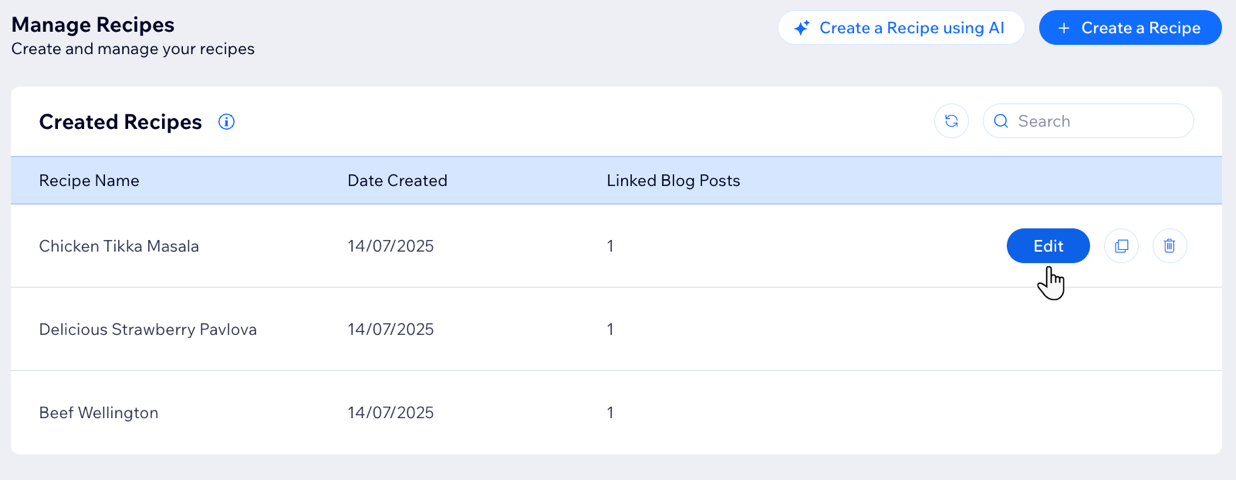
- Click Manage Recipes.

Step 2 | Create a recipe
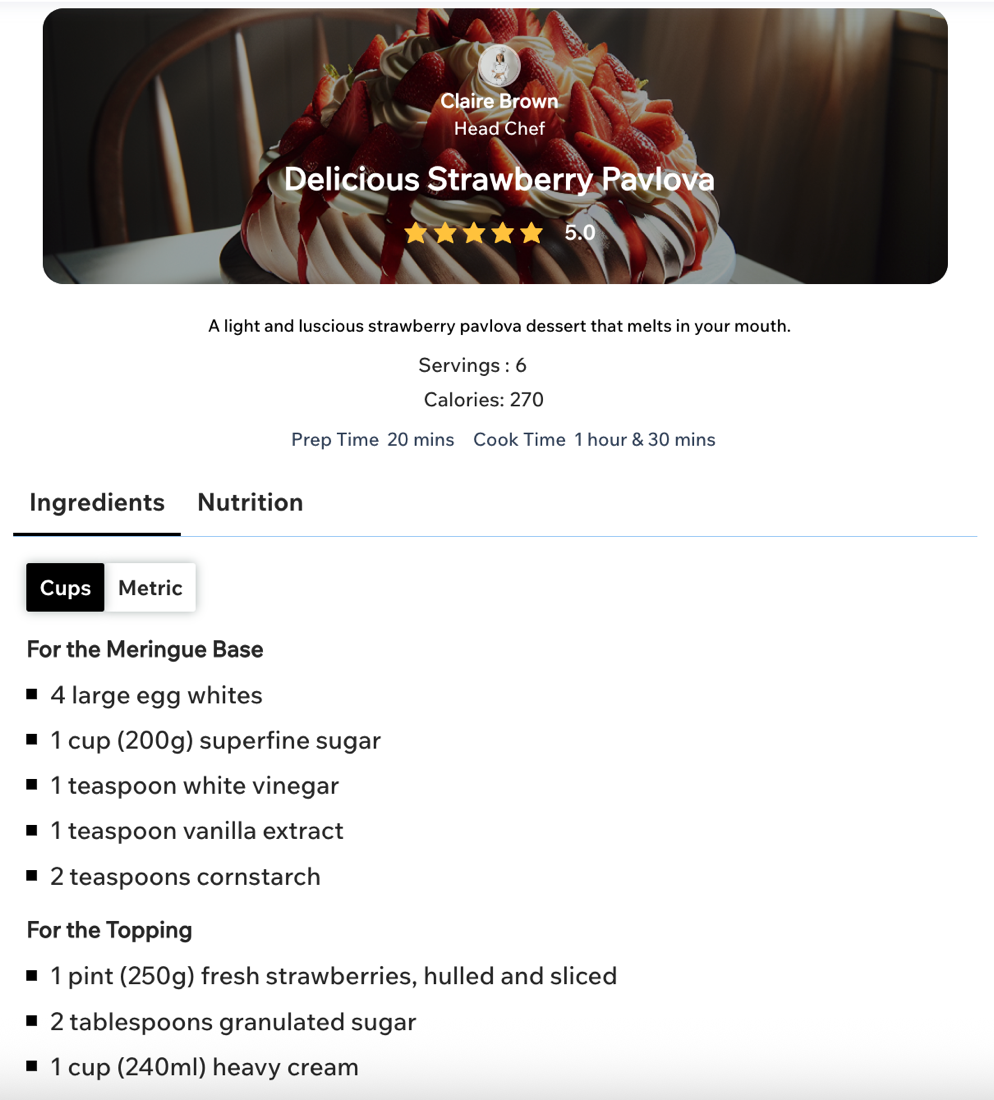
Once the app is installed, you can start creating your recipe card. This card gives your recipe a clear and structured layout that’s easy for readers to follow and for search engines to understand. Begin by opening the app and filling out each section of the recipe card.
To create a recipe:
- Choose if you want to create your recipe manually or using AI:
- Create manually:
- Click +Create a Recipe.
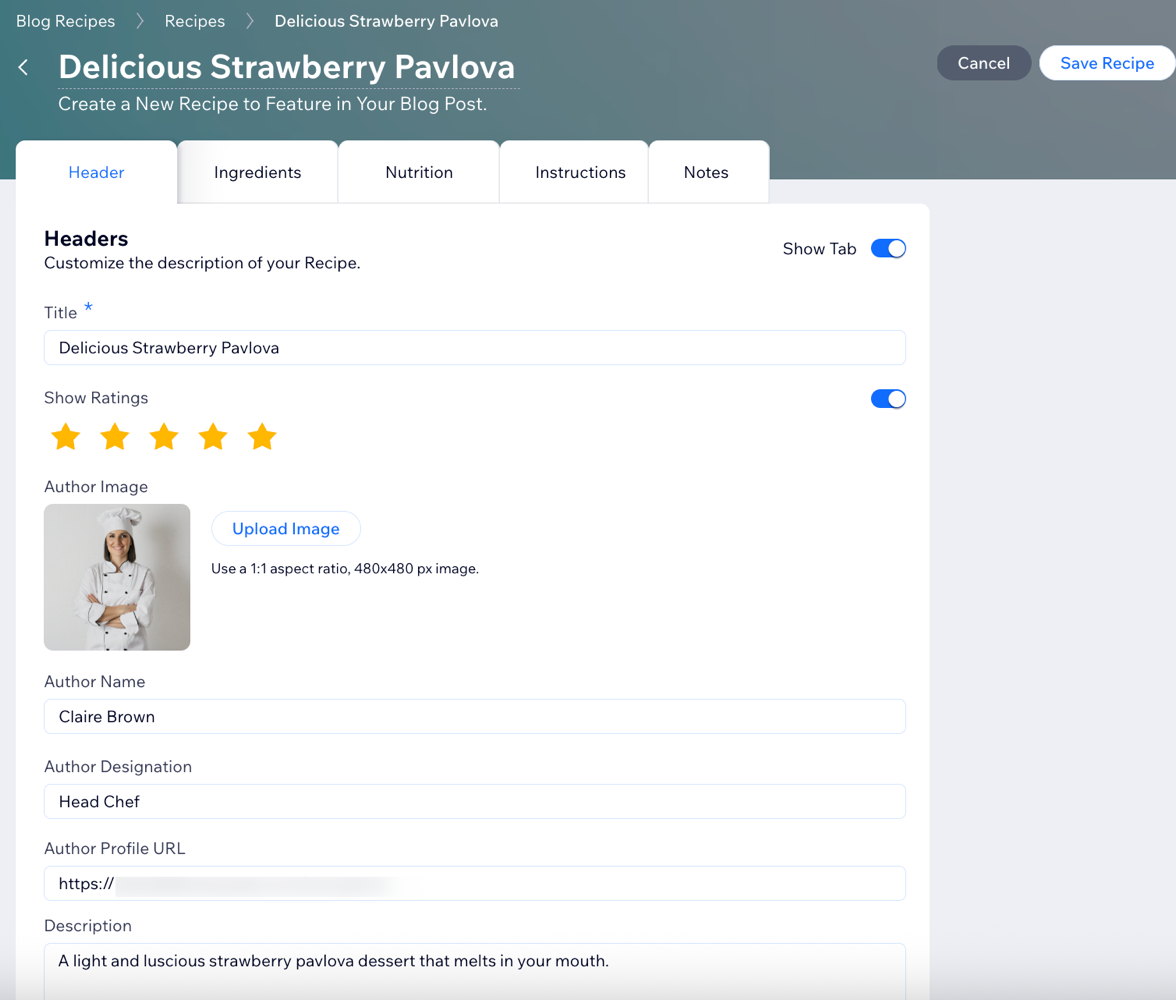
- Customize the following tabs:
Note: You have the option to show or hide any of the tabs by enabling or disabling the Show tab toggle.- Header: Add a title for your recipe, and include information about the author, a URL to your profile and a description of the recipe.
- Ingredients: Choose how you want to measure the ingredients and add section titles and the ingredients required in each section.
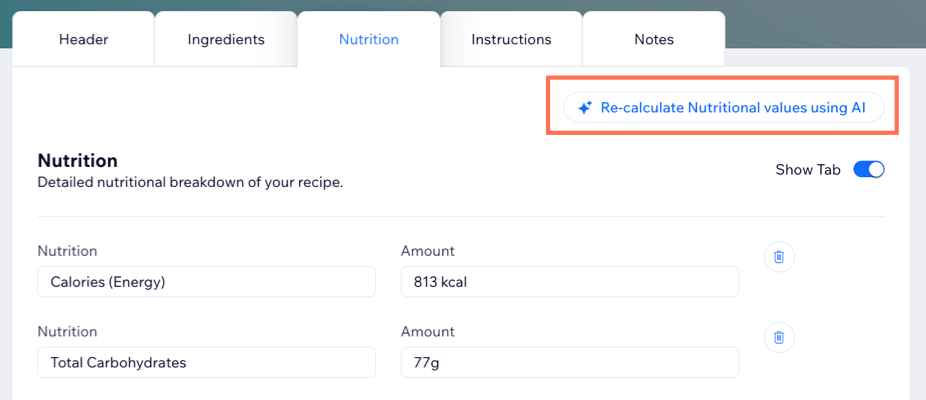
- Nutrition: Enter the nutritional details for your recipe.
- Instructions: List the instructions for each step of your recipe. Include any relevant images to help show each stage of preparation.
- Notes: Add any relevant notes or tips to help with more complex dishes e.g. sear for 2 minutes on each side.
- Click Save Recipe.
- Create using AI:
- Click Create a Recipe using AI.
- Enter information about your recipe in the Describe Recipe field.
- Click Generate Recipe.
- Review the information in each tab and make any relevant changes.
- Click Save Recipe.
- Create manually:
Step 3 | Link recipes to specific blog posts
To display your recipe within your blog post, link the recipe card to that specific post. This connection ensures your readers see your recipe exactly where you want it. When you link a recipe to a post, it appears in your blog. If you skip this step, the recipe stays in your recipe list but doesn’t appear in your blog.
To link recipes to posts:
- Go to Manage Apps in your site's dashboard.
- Click Open next to the Blog Recipes app.
- Click the Blog Posts tab.
- Click the Recipe Template drop-down next to each post.
- Select the relevant recipe.
- Enable/disable the toggle to show or hide the recipe on your post.
- Click Live Preview to preview the recipe in the post.
- Publish your site.

Step 4 | Customize the app settings
Next, tailor your recipe cards to match your blog’s style. Choose from 3 layout templates to find the look that fits best with your content.
Wix Editor
Studio Editor
- Go to your editor.
- Go to your Post page:
- Click Pages & Menu
 on the left side of the editor.
 - Click Blog Pages.
- Click Post.
- Click Pages & Menu
- Click the recipe card element on your post page.
- Click Blog Recipes Settings Panel.

- Customize the layout for each section in your recipe card.
- Click the Animation and Effects icon
 .
. - Select an animation from the options available.
- Click Customize and use the options to adjust your animation:
- Preview: Click Preview to view how the animation looks when applied to the recipe card.
- Duration: Drag the slider to adjust how long you want the animation to play for.
- Delay: Drag the slider to increase or decrease the delay between the page loading and the animation beginning.
- Number of parts: Drag the slider to increase or decrease the number of parts the image is broken into.
- Direction: Click the drop-down and select the direction the animation starts from.
- Motion style: Click the drop-down and select the motion for the animation.
- Shape: Select a shape from the options available.
- Spin: Drag the slider to increase or decrease the number of spins.
FAQs
Click a question below to learn more about creating recipe cards for your blog.
Can I edit a recipe after I create it?
I made changes to the recipe, how can I check the nutritional information is correct?
Can I duplicate a recipe I've already created?
 next to the relevant recipe.
 What happens to my recipe if I unpublish a post?
Is there a limit to the amount of recipes I can create and store in the app?
Can I earn revenue from my recipe cards?
