


Wix Apps: Connecting a Pricing Plan to a File Share Folder
In this article
- Connecting from your Pricing Plans dashboard
- Connecting from the File Share app in your site's dashboard
- Connecting from the File Share app on your live site
With Wix File Share, you can restrict access to certain folders by placing your files behind a paywall. This means that only the people that have purchased the plan can access the folder and its contents. Adding a paywall can enhance engagement and boost your monetization efforts.
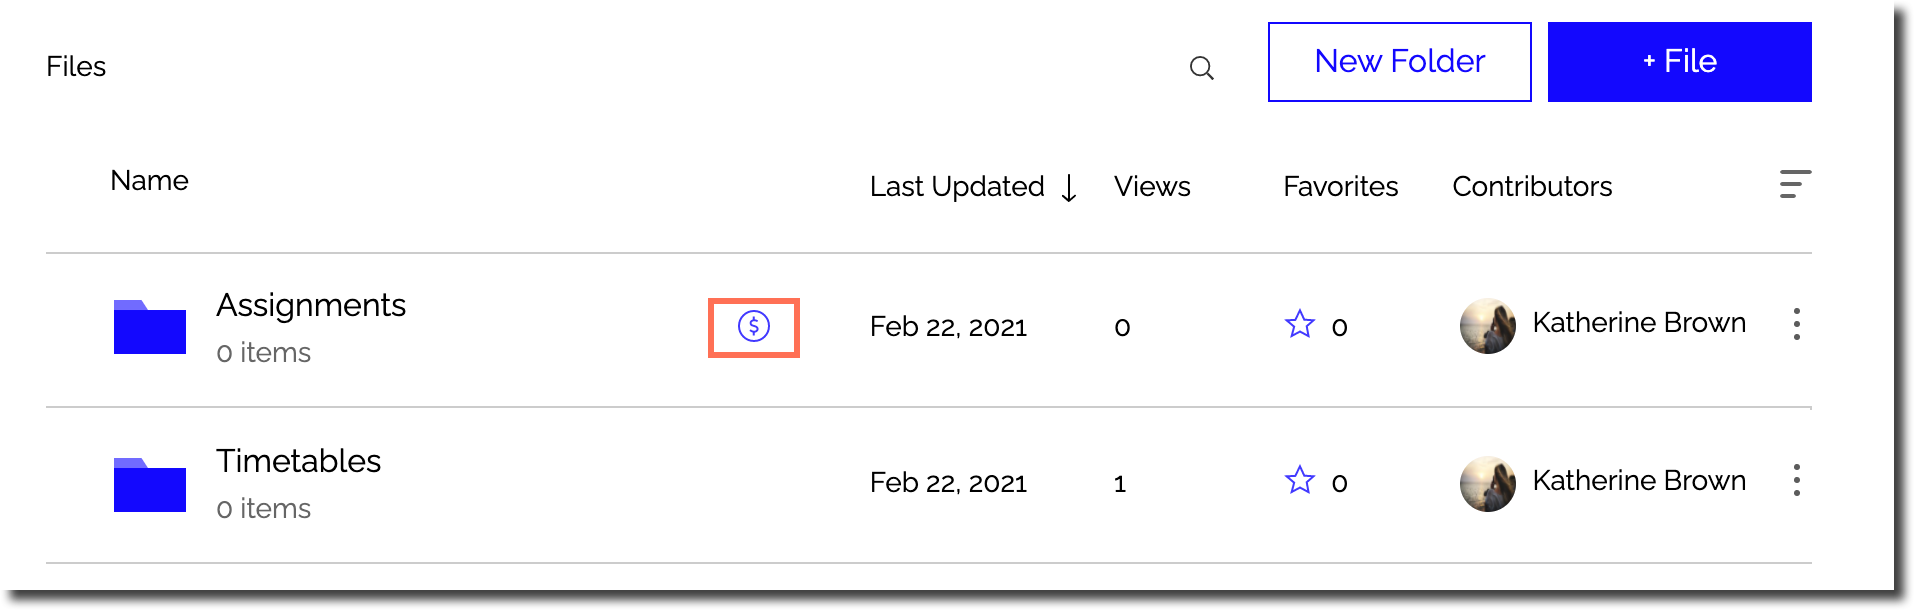
You can connect pricing plans from your Pricing Plans dashboard, your live site, or from your site's editor.
Important:
- Before you connect a pricing plan to a folder, you need to install the Wix Pricing Plans app and create a plan. Learn how to create a plan
- When you connect a folder to a pricing plan, the folder is automatically set to private so only plan subscribers can access it.
Connecting from your Pricing Plans dashboard
Manage and connect your Pricing Plan in your dashboard.
To connect a Pricing Plan from your dashboard:
- Go to Pricing Plans in your site's dashboard.
- Choose the plan you want to use under Active Plans.
- Select File Share Subscriptions under Connect & Manage Benefits.
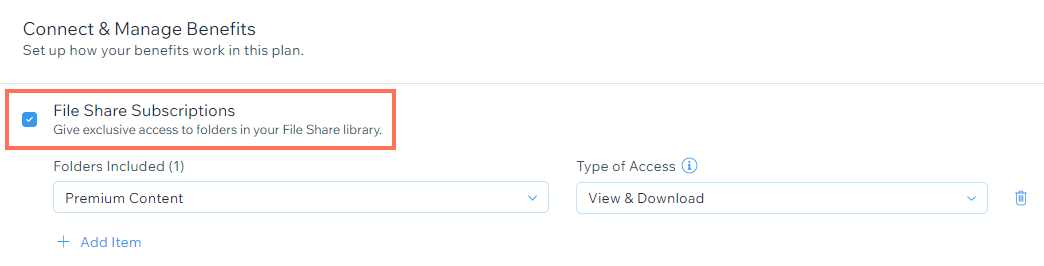
- Select the folder you want to include and the type of access to grant using the drop-down menus.
- Click Add Item if you need to connect another folder to the pricing plan.
- Click the Remove icon
 if you need to remove a folder from the plan.
Connecting from the File Share app in your site's dashboard
Set up your Pricing Plan from the File Share app in your site's dashboard.
To connect a Pricing Plan from the File Share app:
- Go to File Share in your site's dashboard.
- Click New Folder or click the More Actions icon
 next to an existing folder.
 - Click Permissions.
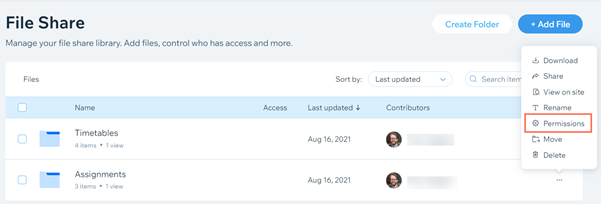
- Click the drop-down beside any unwanted groups and select Remove to remove them.
- Search for the name of your pricing plan in the search bar.
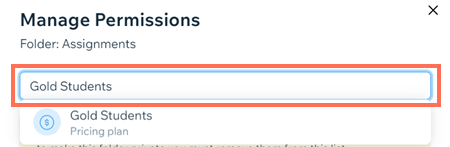
- Click the dropdown on the right to assign permissions.
- (Optional) Select the Notify members checkbox to notify the members you are giving permissions to.
- Click Add & Notify.
- Click Done.
Connecting from the File Share app on your live site
Set up your Pricing Plan in your live site.
To connect Pricing Plan on your live site:
- Go to the File Share app on your live site.
- Log in using the email address associated with your Wix account.
- Click New Folder or click the More Actions icon next to an existing folder.
- Click Permissions.
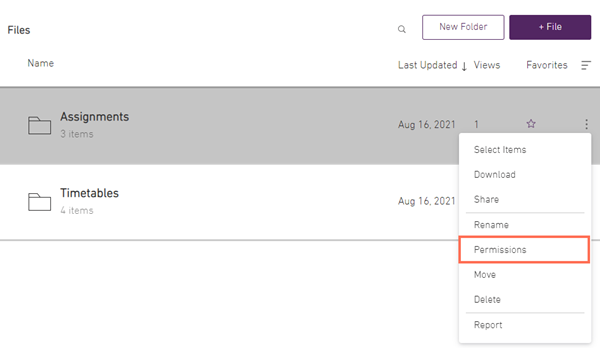
- Click the drop-down beside any unwanted groups and select Remove to remove them.
- Search for the name of your pricing plan in the search bar.
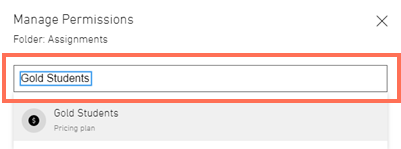
- Click the dropdown on the right to assign permissions.
- (Optional) Select the Notify members checkbox to notify the members you are giving permissions to.
- Click Add & Notify.
- Click Done.
