Wix Analytics: Adding and Setting Up Session Recordings
6 min
In this article
- Adding Session Recordings to your site
- Configuring your recording settings
- Customizing your privacy settings
- Managing your session recordings
- FAQs
Record and review real visitor sessions on your site using Session Recordings in Wix Analytics. By understanding exactly how visitors interact with your site, you can identify areas for improvement and enhance the user experience.
Focus on the use-cases that interest you the most by defining which sessions to record, filter, and analyze. For example, if you notice that visitors frequently abandon their carts on a specific page, you can review their session recordings to pinpoint the issue.

Important:
You must upgrade your site to add Session Recordings.
Adding Session Recordings to your site
Go to your site's dashboard to add Session Recordings. Choose a data privacy mode and a plan according to the number of sessions you want to record each month.
To add Session Recordings:
- Go to Analytics in your site's dashboard.
- Click Session Recordings on the left.

- Click Get Session Recordings.
Note: If you already have the Twipla app installed from the Wix App Market, click Enable Session Recordings. - Click Agree & Add in the window.
- Choose a data privacy mode:
Note: You can always change this setting later.- Light Privacy: Offers minimal visitor anonymity, displaying all visitor information and site data insights.
- Medium Privacy: Offers medium visitor anonymity, displaying all site data insights except for visitors' IP addresses.
- GDPR Privacy: Offers high visitor anonymity and reduced site data insights.
- Maximum Privacy: Offers the highest visitor anonymity and disables most site data insights.
- Click Choose and Continue.
- Click Select under the plan you would like to purchase:
- Pro Plus: 10,000 new monthly session recordings.
- Pro: 2,000 new monthly session recordings.
- Basic: 500 new monthly session recordings.
- Free: 10 new monthly session recordings.
Tip: Choosing this plan does not require payment, which means you can skip steps 8-10.
- Select a billing cycle (yearly or monthly) and click Continue to Checkout.
- Enter your payment details and click Submit Purchase.
- Click Let's Go.
Configuring your recording settings
Define the conditions for which visitor sessions should be recorded. This way you only receive relevant recordings and collect the data you need.
To configure your settings:
- Go to Analytics in your site's dashboard.
- Click Session Recordings on the left.
- Click the General Settings tab.
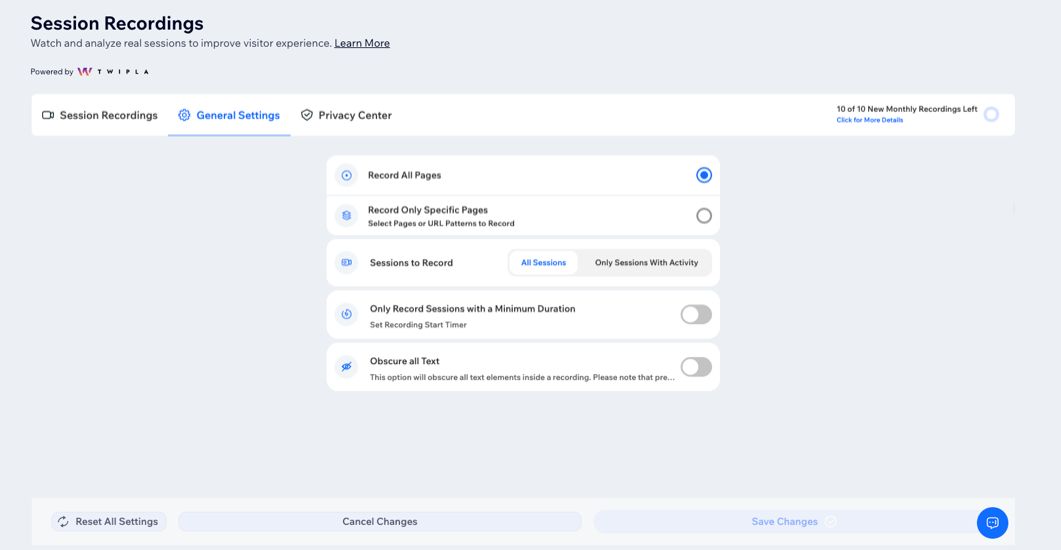
- Configure your settings using the following options:
- Choose if to record all pages or record only specific pages:
- Record All Pages: Capture sessions for every visitor navigating any page on your site.
- Record Only Specific Pages: Only visits to your defined pages within your site will be recorded.
- Sessions to Record: Choose between recording All Sessions or Only Sessions With Activity.
- Only Record Sessions With a Minimum Duration: Define the minimum session length, so you can avoid recording short sessions. Click the toggle to enable it and enter the duration (in seconds) in the Recording Duration Limit field.
- Obscure All Text: Enable the toggle to obscure all text elements in a recording to enhance privacy and data security.
- Choose if to record all pages or record only specific pages:
- Click Save Changes.

Tip:
Click Reset All Settings at the bottom to reset any changes you made.
Customizing your privacy settings
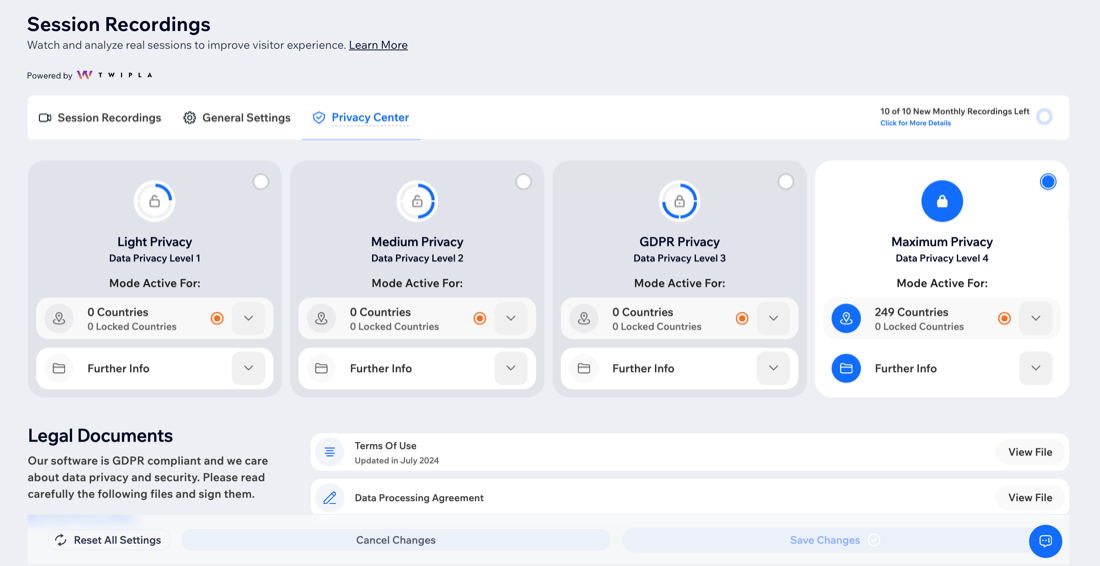
Customize your privacy settings to control how much visitor information your site collects and displays. On this page you can adjust your data privacy mode, set country-specific preferences, and review legal documents.
To customize your privacy settings:
- Go to Analytics in your site's dashboard.
- Click Session Recordings on the left.
- Click the Privacy Center tab at the top.
- Choose what to do:
Select a data privacy mode
Change a country status
Review legal documents

Managing your session recordings
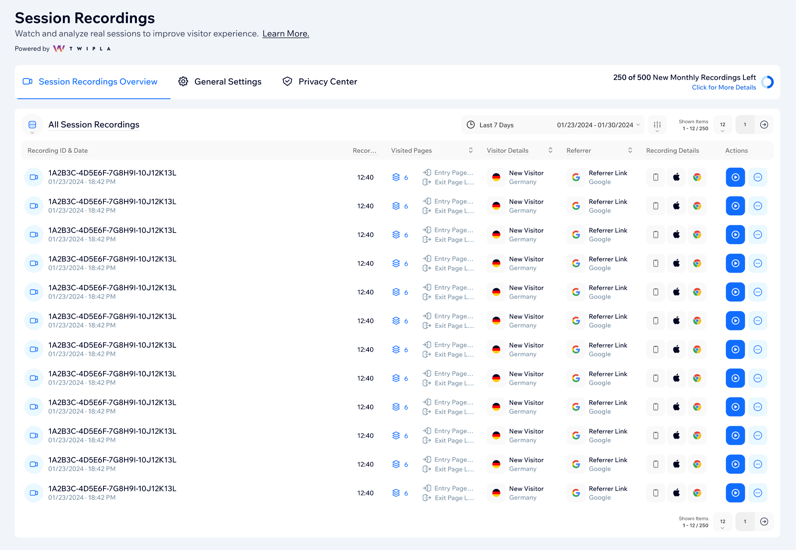
Managing your recordings helps you efficiently organize and utilize the session data collected from your site visitors. You can view and manage all your session recordings on this page, and then start analyzing each recording to collect insights.
To manage your session recordings:
- Go to Analytics in your site's dashboard.
- Click Session Recordings on the left.
- Choose what to do:
- View your recordings: See all your visitors' session recordings and information on each. Find the recordings you need by changing the date range, adding filters, switching the view, and more. Learn more about the Session Recordings page.
- Manage your recordings: Manage your recordings in the Actions column. For example, mark a recording as unwatched or delete a recording.
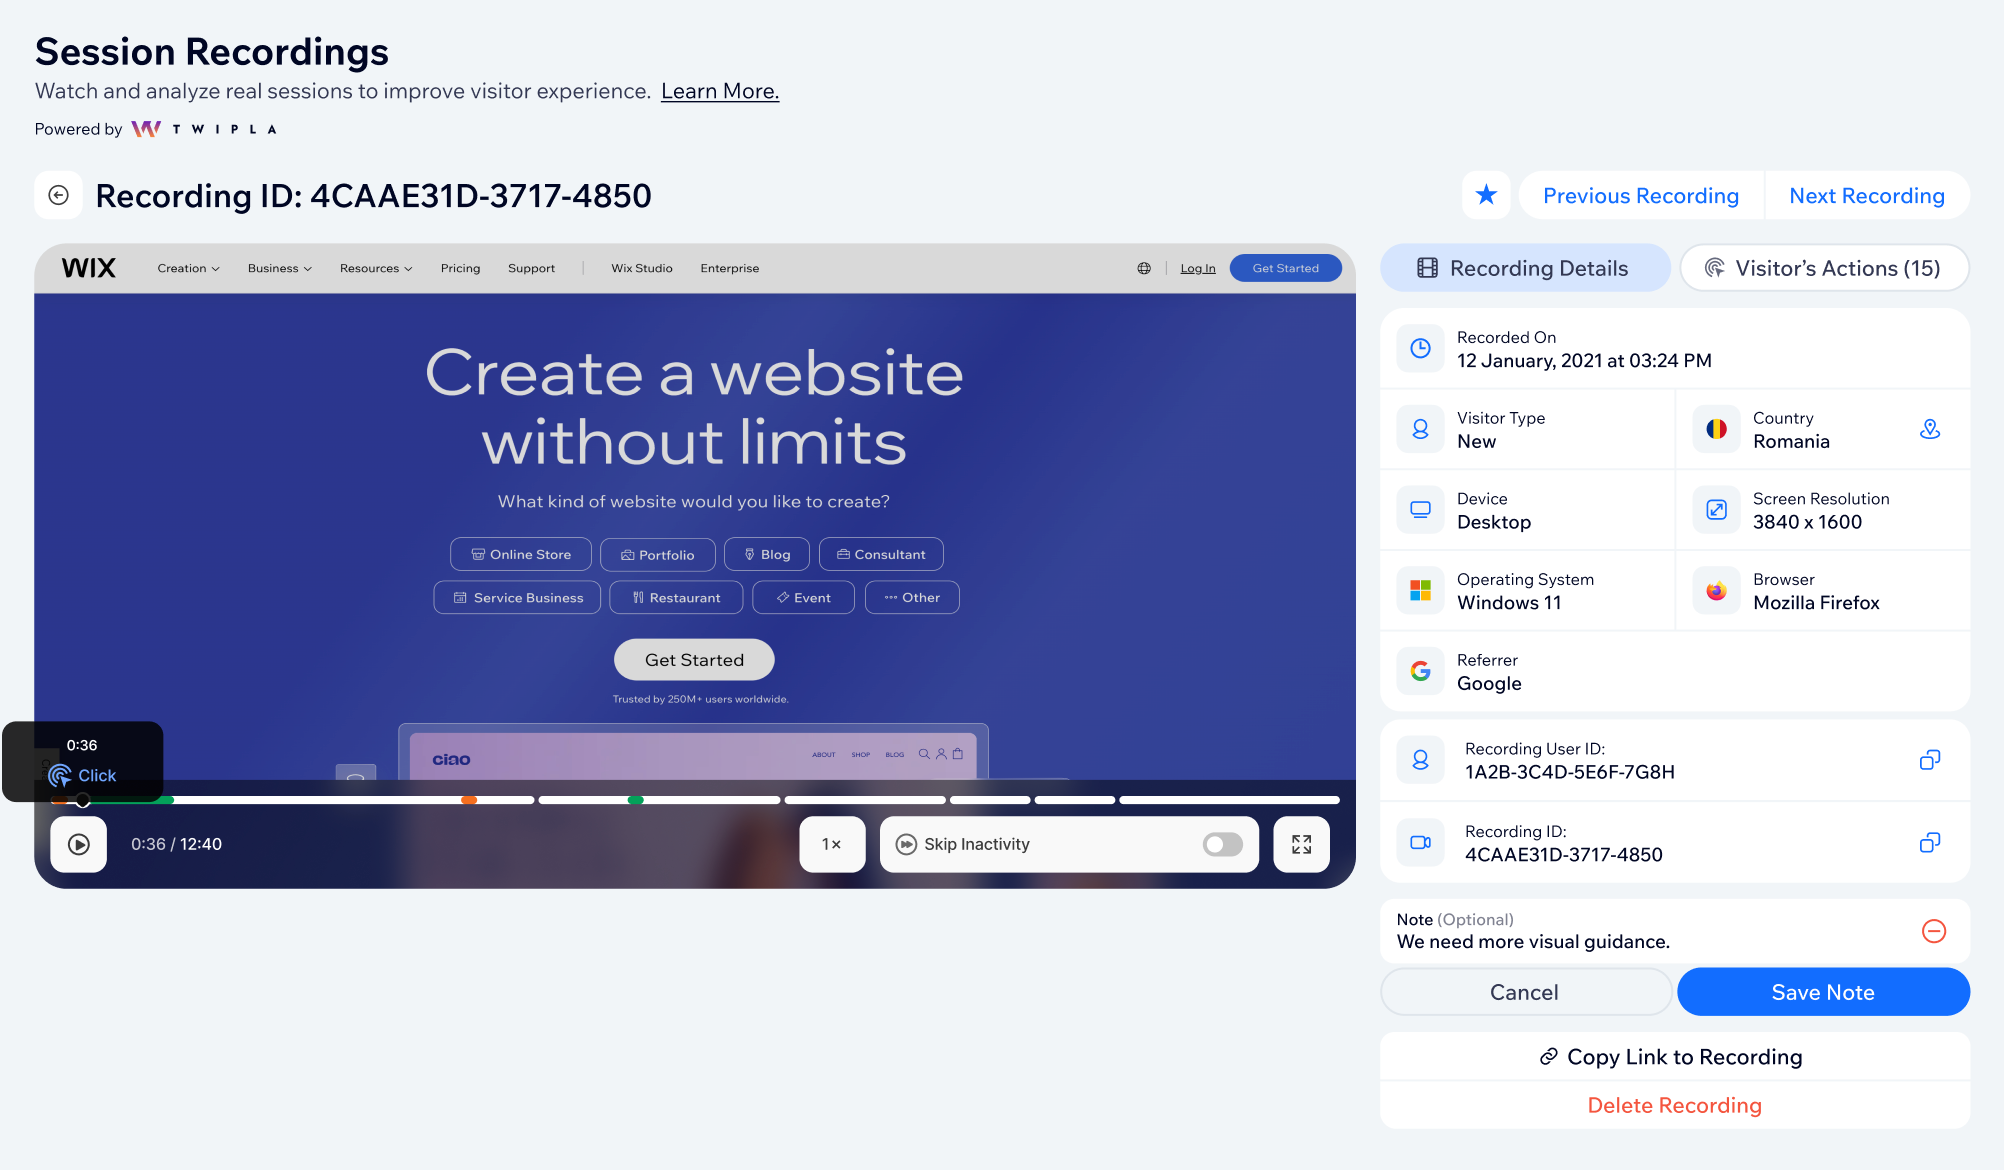
- Analyze a recording: Select a recording to open the detail page to watch it, review its details (e.g. visitor type, device), and analyze the visitor's actions on your site. This is where you can identify how to improve your site, based on scrolling, mouse clicks, and more.

FAQs
Click a question below to learn more about session recordings.
How can I see how many recordings I have left?
How long are recordings saved for?
I'm already using the Twipla app. Do I still need to purchase a plan?
Why is the number of recordings I have different than the number of sessions on my site?
I'm having issues with Session Recordings.


