Upgrading Universal Analytics to Google Analytics 4 (GA4)
5 min read
In this article
- Step 1 | Create your Google Analytics 4 property
- Step 2 | Add your Google Analytics 4 property to your site
- Using UA and GA4 properties at the same time
You can track information in Google Analytics about your site visitors using either a Google Analytics 4 (GA4) property or a Universal Analytics (UA) property.
Follow the steps below if you're already using Universal Analytics with your site and want to upgrade to Google Analytics 4.
Important:
- From July 1, 2023, UA properties will stop collecting data from your website. After you upgrade to GA4, we recommend continuing to use both properties. Learn how to use both
- By using this service, you are engaging directly with a third-party service provider. We recommend reviewing the service provider's Privacy Policy and Terms of Use prior to your use of such third-party service. You acknowledge that we are not liable for any loss or damage resulting from your use of such third-party service, including any liability arising from any personal data exchanged between you and such third-party.
Step 1 | Create your Google Analytics 4 property
Use the GA4 Setup Assistant in your Google Analytics account to create and set up a new Google Analytics 4 property.
To create a GA4 property:
- Sign in to your Google Analytics account.
- Click the Admin icon
at the bottom left of the page.
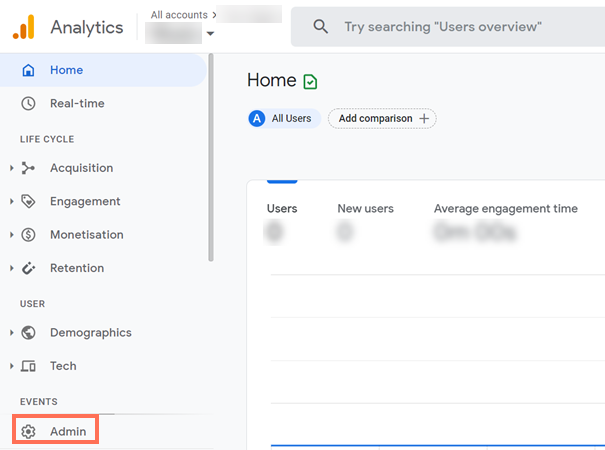
- Select GA4 Setup Assistant.
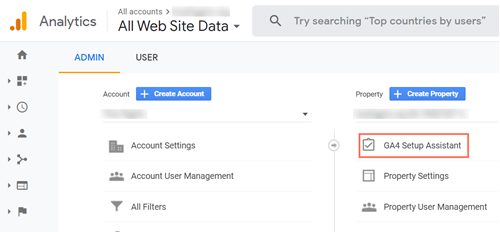
- Click Get Started under I want to create a new Google Analytics 4 property.
- Click Create property.
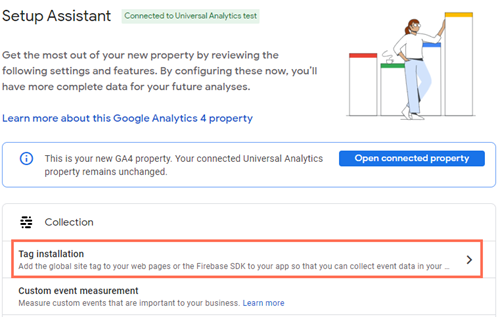
- Click See your GA4 property under Explore and set up your GA4 property.
- Select Tag installation.
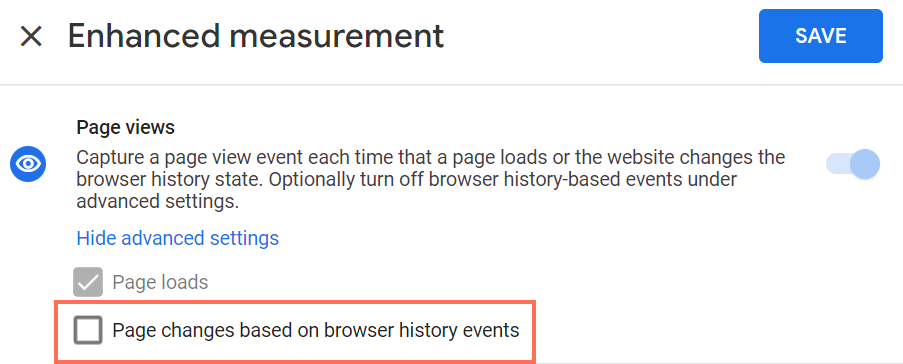
- Select your stream under Data Streams.
- Click the Settings icon
.
- Click Show advanced settings under Page views.
- Deselect the Page changes based on browser history events checkbox.
- Disable the Site search toggle.
- Click Save.
Step 2 | Add your Google Analytics 4 property to your site
Add your new property to Google Analytics in Marketing Integrations in your site's dashboard to complete the upgrade.
To add your GA4 property:
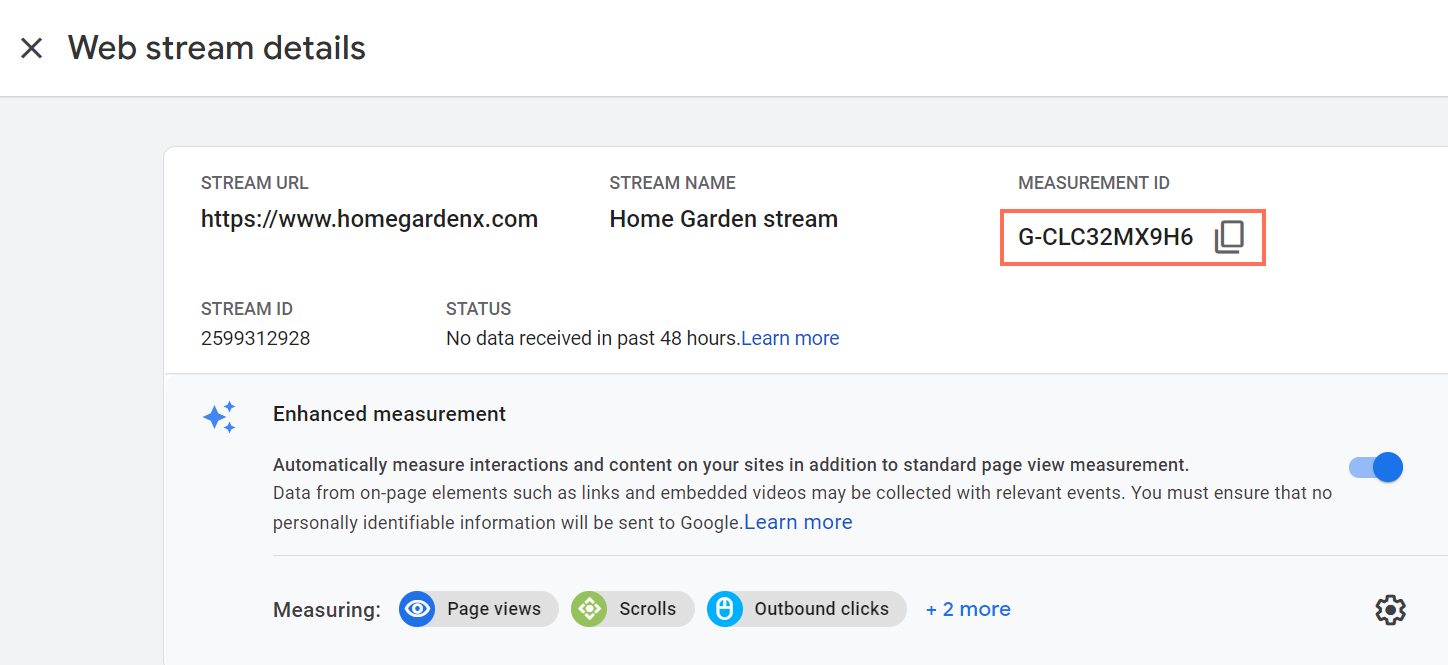
- Copy your measurement ID under Web stream details.
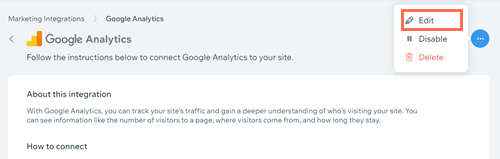
- Go to Marketing Integrations on your site's dashboard.
- Click View under Google Analytics.
- Click the Show More icon
in the top right corner.
- Click Edit.
- Paste your Google Analytics 4 measurement ID in the pop-up.
Note: Make sure that there are no extra spaces before the code.
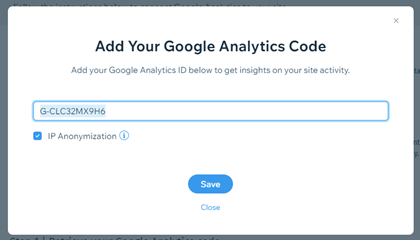
- (Optional) Select the IP Anonymization checkbox if you want to hide your site visitors’ IP addresses from Google.
- Click Save.
Using UA and GA4 properties at the same time
After you upgrade to GA4, we recommend continuing to use both properties. This ensures continuity in the data you collect and gives you time to learn more about the data you can collect with a GA4 property.
Note:
Your UA property will stop collecting data after July 1, 2023.
You can enable tracking using both properties in the Admin section of your Google Analytics dashboard.
To use both properties:
- Sign in to your Google Analytics account.
- Click the Admin icon

- Select the UA property that you want to connect from the drop-down under Property.
- Select Property Settings.
- Copy the property's tracking ID.
- Select the GA4 property that you want to connect from the drop-down.
- Select Data Streams.
- Select the data stream that you want to connect.
- Select Manage connected site tags under Additional Settings.
- Add your UA tracking ID under Enter ID of tag to connect.
- (Optional) Add a nickname for your connected tag.
- Click Connect.
Tip:
You can disconnect your properties if you need to by clicking the More Actions icon  beside the tag and selecting Remove tag.
beside the tag and selecting Remove tag. 