

Studio Editor: Working with Overflow Content
4 min
In this article
- Setting overflow content in sections and containers
- Setting overflow content on pages
- FAQs
Some site elements and content may be too large for their page, section, or container, and flow outside the edges. You can set how overflow content behaves on specific sections or containers, or on an entire page.
Using Safari as your browser?
Hiding overflow content from your container, section or page is only supported from version 16 and up.
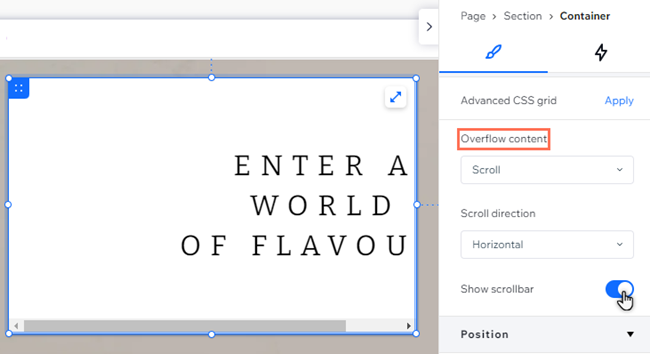
Setting overflow content in sections and containers
Choose how you want overflow content to look on page sections and containers. You can hide /show the content, or set the overflow to show on scroll.
To set your overflow content in sections and containers:
- Click the relevant container or section.
- Click the Open Inspector icon
 at the top right of the editor.

- Scroll down to Layout.
- Select the relevant option under Overflow content:
- Show: Overflow content is displayed on your client's site, even if it is too large for the page. A scroll bar is automatically added so visitors can see the rest of the content.
- Hide: Overflowing elements are clipped to maintain the page's edges.
- Scroll: Visitors can view the overflow content by scrolling.
- Scroll direction: Select whether visitors can view the content by scrolling horizontally, vertically, or both.
- Show scrollbar: Click the toggle to show / hide the scrollbar on your client's site.
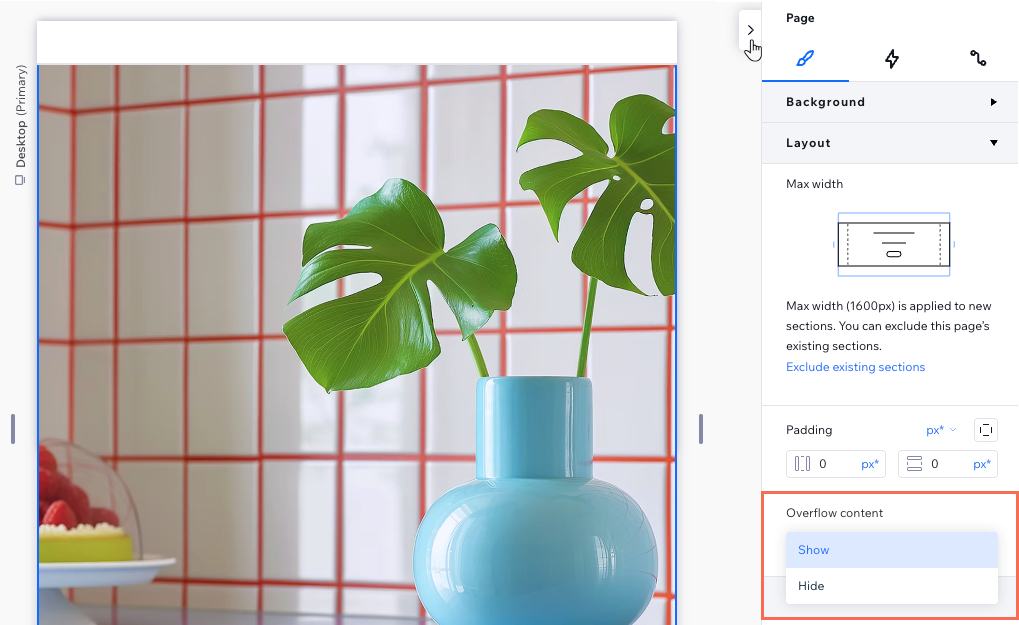
Setting overflow content on pages
You can hide or show content overflow on your site page to suit your design needs. As the content flows outside the page edges, a scrollbar is automatically added.
To set your overflow content on pages:
- Select the page layer from either:
- The Layers
 panel.
 - The breadcrumbs at the bottom left of the editor.
- The Layers
- Click the Open Inspector icon at the top right of the editor.
- Scroll down to Layout.
- Select the relevant option under Overflow content:
- Show: Overflow content is displayed on your client's site, even if it is too large for the page. A scroll bar is automatically added so visitors can see the rest of the content.
- Hide: Overflowing elements are clipped to maintain the page's edges.
FAQs
Select a question to learn more about overflow content
Is my overflow content automatically set?
What happens if I display page overflow content?
Can I choose the overflow settings for different breakpoints?
Why is there a horizontal scroll bar appearing on mobile?
