Studio Editor: Troubleshooting Images That Appear Cropped
3 min
In this article
- Step 1 | Check the image's positioning
- Step 2 | Reset the image to match the bounding box
- Step 3 | Adjust the focal point of the image
- Video tutorial
- FAQs
If an image appears cropped after adding it in the Studio Editor, it could be due to the image's positioning, or a mismatch between the image's aspect ratio and the bounding box settings.
For example, in the screenshot below, the middle image appears cropped as it has a different image ratio to the bounding box.

Follow the steps below to troubleshoot and fix the issue.
Step 1 | Check the image's positioning
While an image may be positioned inside a section, its edges could still cross the page's boundaries, making the image look cropped. Hover over the relevant image to see its bounding box– if it's overflowing, move or resize as needed.
In addition, check for negative or excessive margins in the Inspector panel, as they may restrict the image's visibility.

Step 2 | Reset the image to match the bounding box
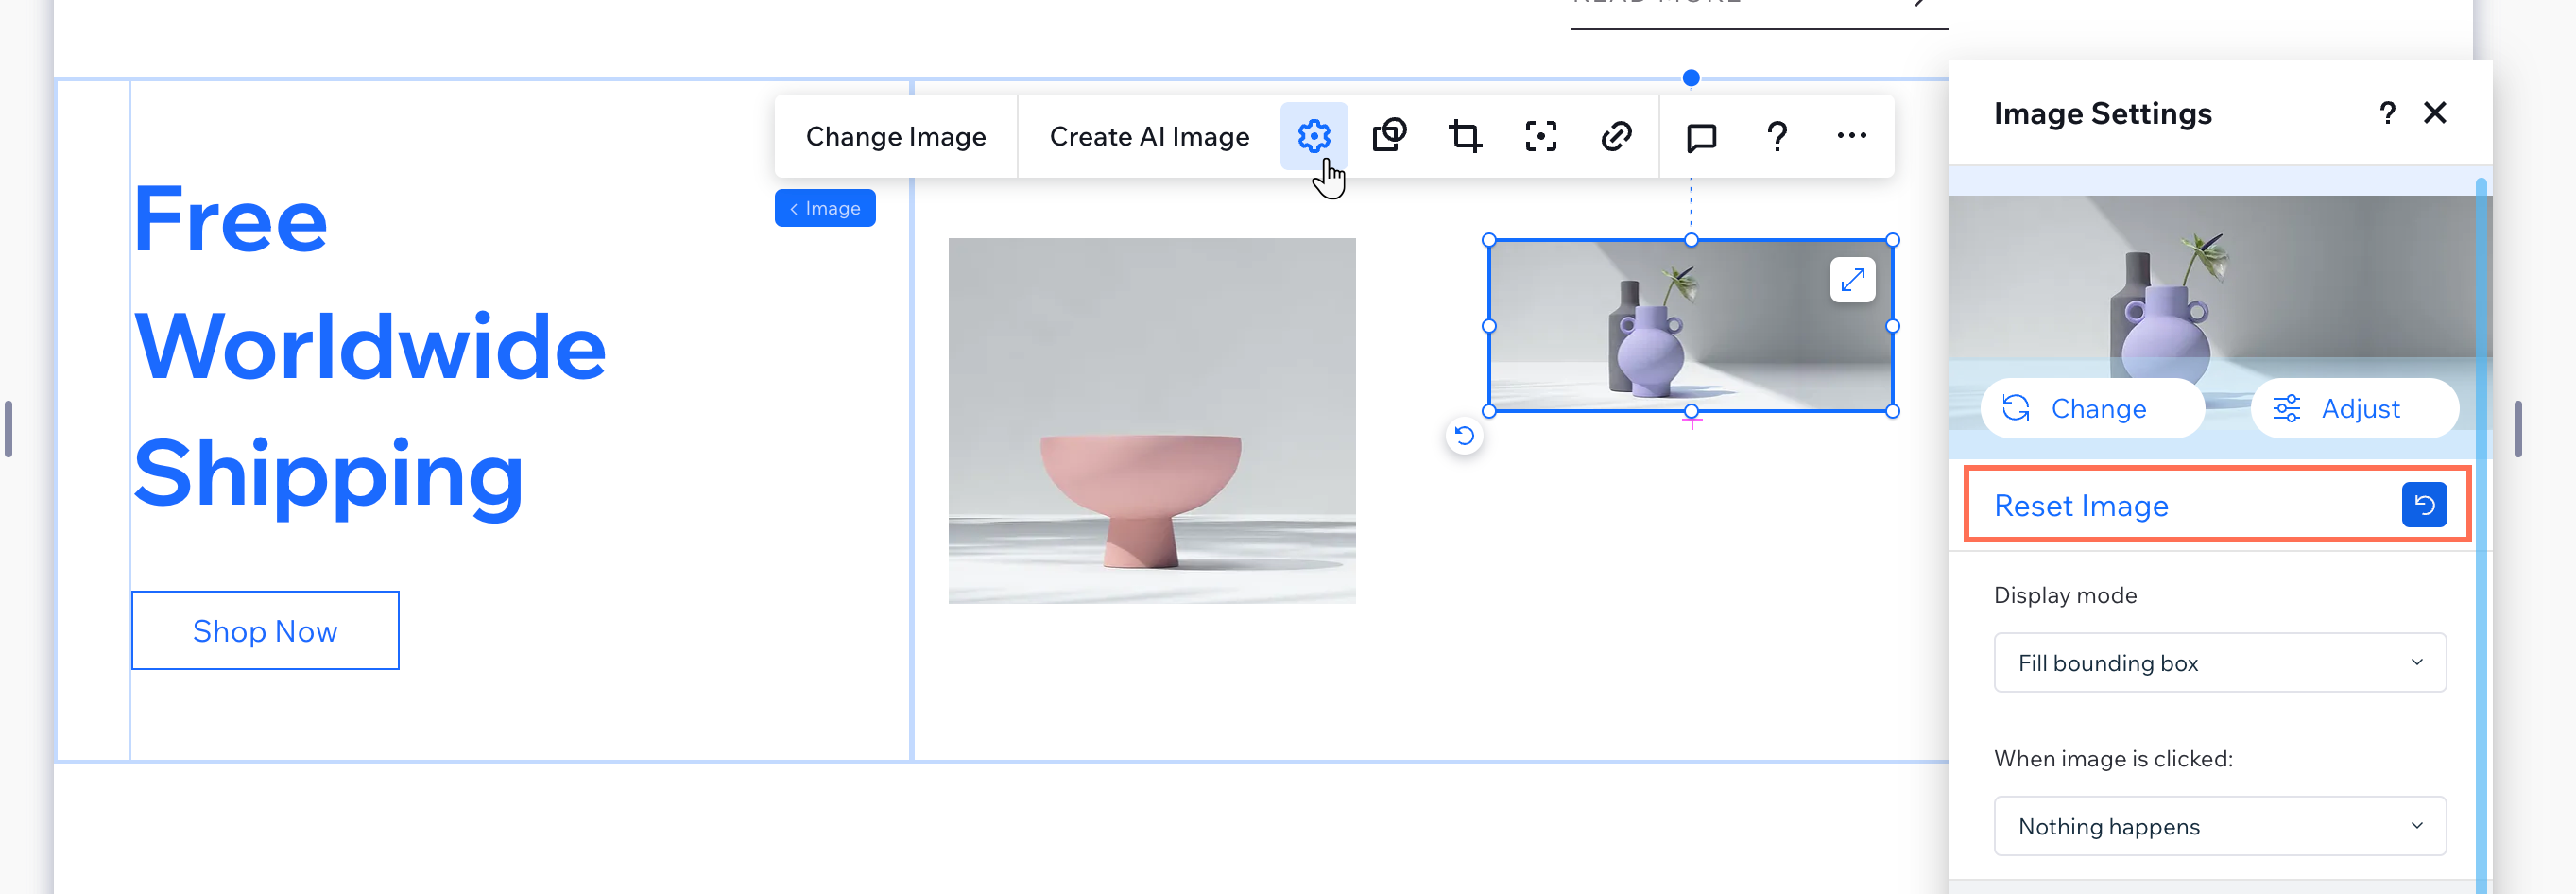
When you upload an image, it might crop because the aspect ratio of the image doesn't match the ratio of the bounding box. You can reset the image to adjust the bounding box to match the original aspect ratio of the uploaded image, ensuring it fits without cropping.
To reset the image:
- Select the image in your editor.
- Click the Settings icon
 .
. - Click Reset Image.

Tip:
You might also want to play around with the Display mode options in the Settings panel to see which fits your image best.
Step 3 | Adjust the focal point of the image
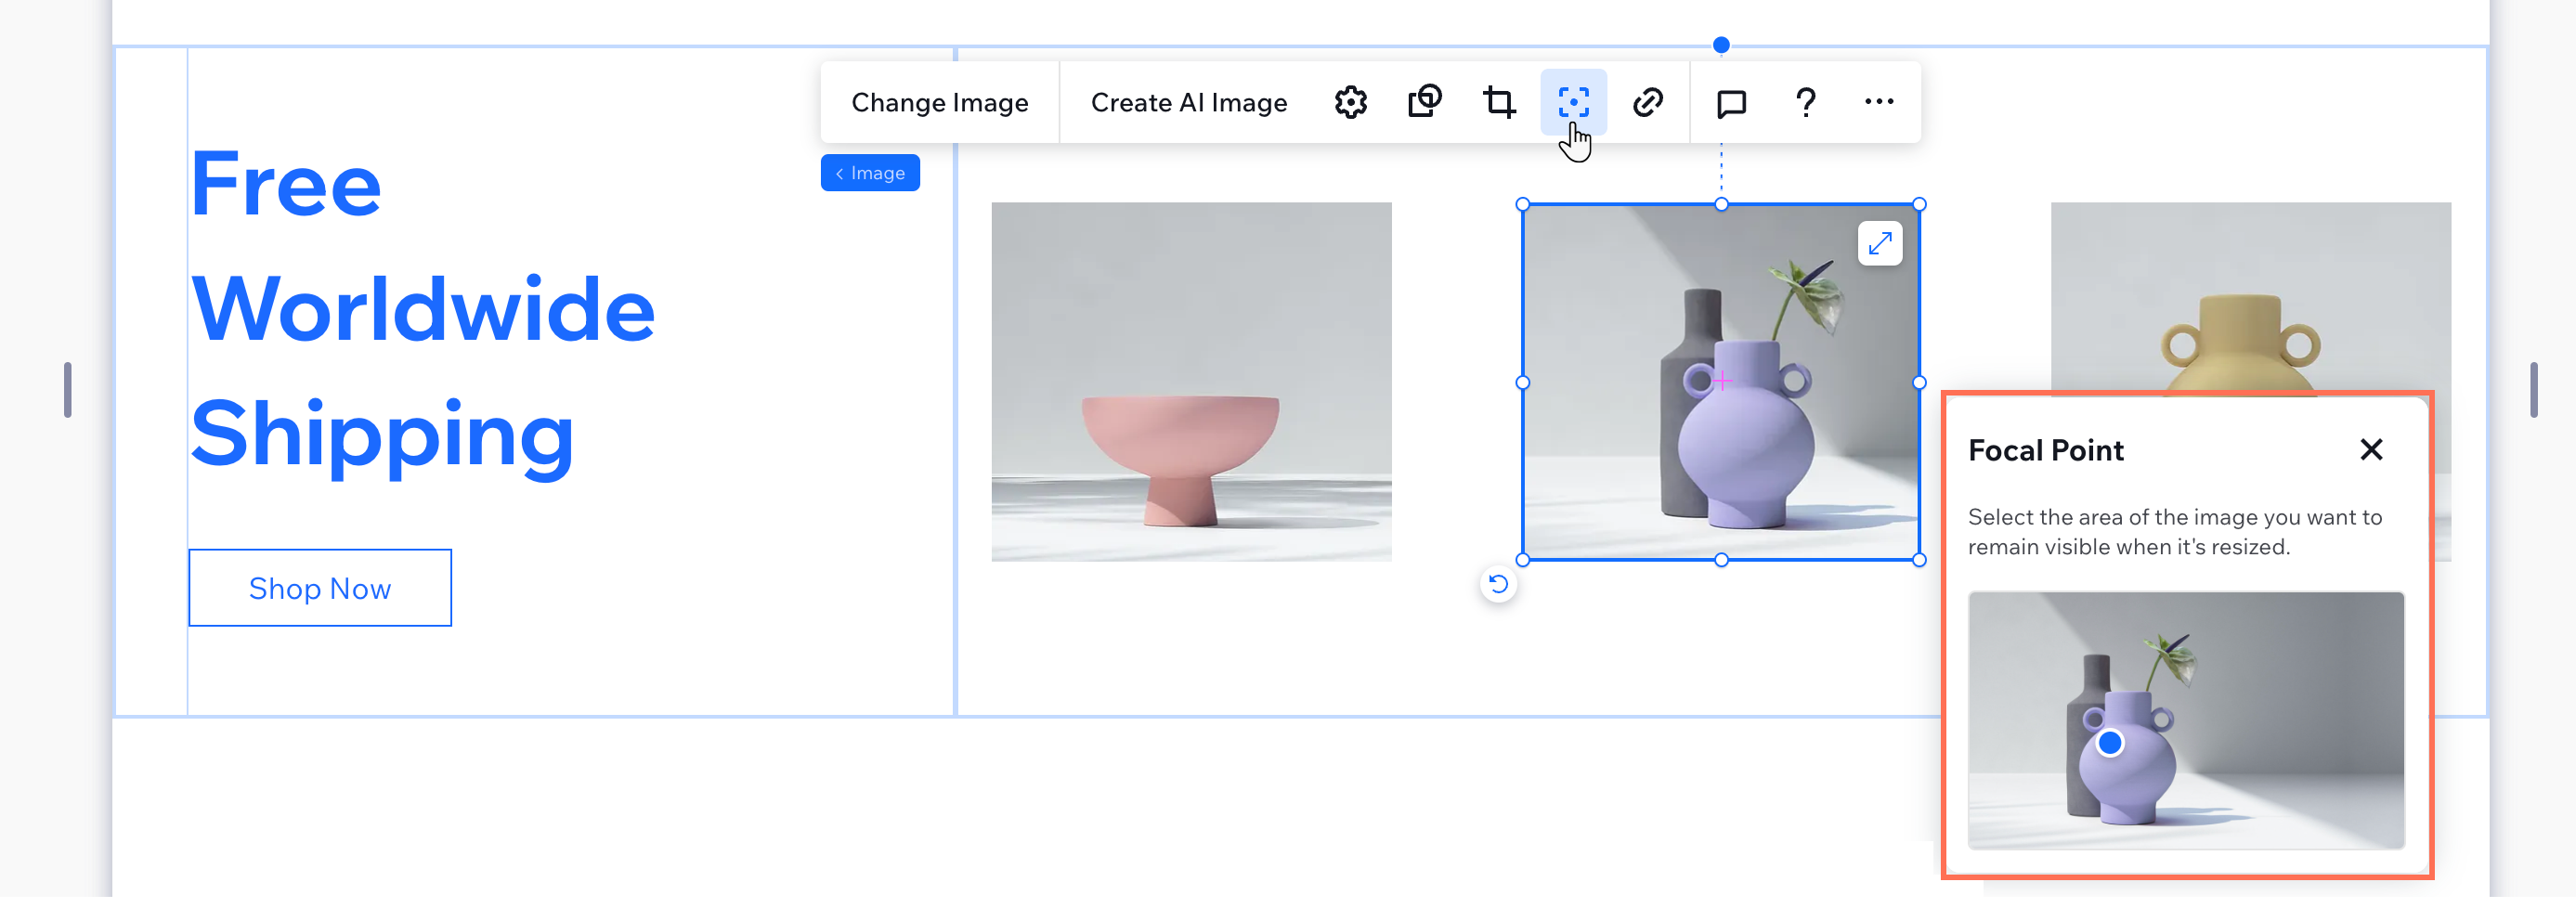
After you have reset the image, resize it as needed. If you want the image size to match other images, but the resizing crops part of the image, set the focal point to ensure the most important part of the image remains visible.
To adjust the focal point of the image:
- Select the image in your editor.
- Click the Focal Point icon
.
- Select the area of the image that you want to remain visible when it's resized.

Video tutorial
Check out the video below to see this issue being resolved.
FAQs
Click a question below to learn more.
Can I use images with different aspect ratios in the same section?
What shall I do if my image still looks wrong after resetting and adjusting the focal point?


