Studio Editor: Customizing the Signup and Login Forms
3 min
In this article
- Customizing the signup form
- Customizing the login form
Personalize the signup and login experience for your client's site members. Switch from the default forms to the custom forms, where you have full control of the design, the text and the actual form fields.
Before you begin:
Make sure your client's site includes the Members Area app.
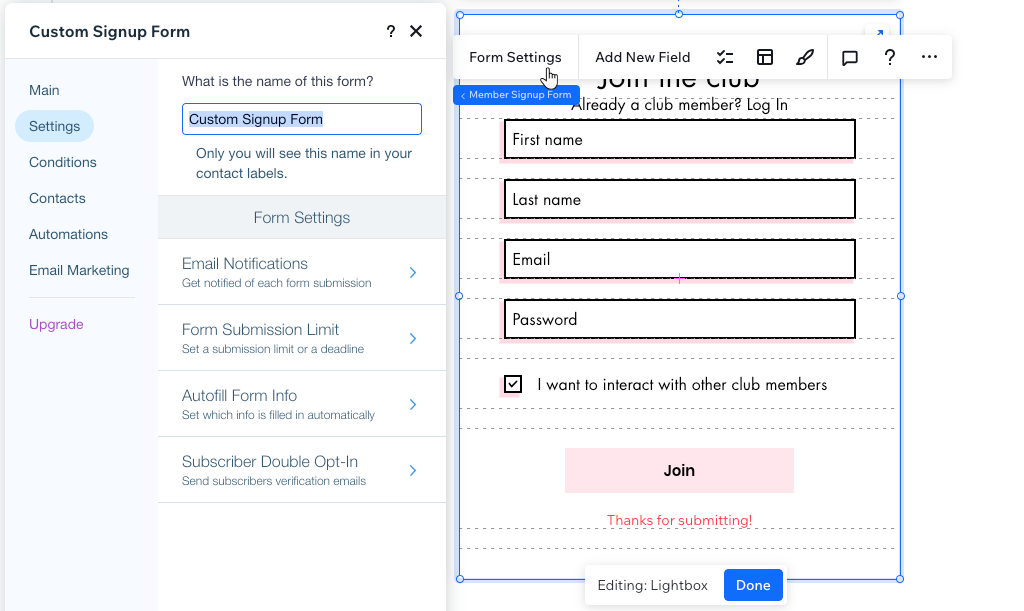
Customizing the signup form
Design the signup form to match your client's needs and look exactly how you want. You can add any element to the form, customize the title, fields, background, button and more.
Note:
Currently, it is not possible to add social login buttons (e.g. Facebook, Google) to the custom signup form. They are only available on the default signup form. Vote for this feature
To add and set up a custom signup form:
- Click Pages
 on the left side of the Editor.
 - Hover over Signup (Default) and click the More Actions icon
 .
. - Click Settings.
- Select Custom Form under Which member signup form do your visitors see?.
- Click Add to Site to start customizing.
- Select the form on the canvas.
- Choose how you want to customize the form:
- Manage the form: Add more fields and remove those you don't need. You can also click individual fields to adjust the title, placeholder text and other settings.
- Design the form: Customize the form's design from the Inspector panel. Change the background, the input fields and the button members click to submit the form.
- Adjust the form settings: Click Form Settings to add conditional rules, change the email notification settings and adjust the way new members are saved to the contact list.
Tip:
You can add any element you need (e.g. image, text, etc.) around the custom signup form.
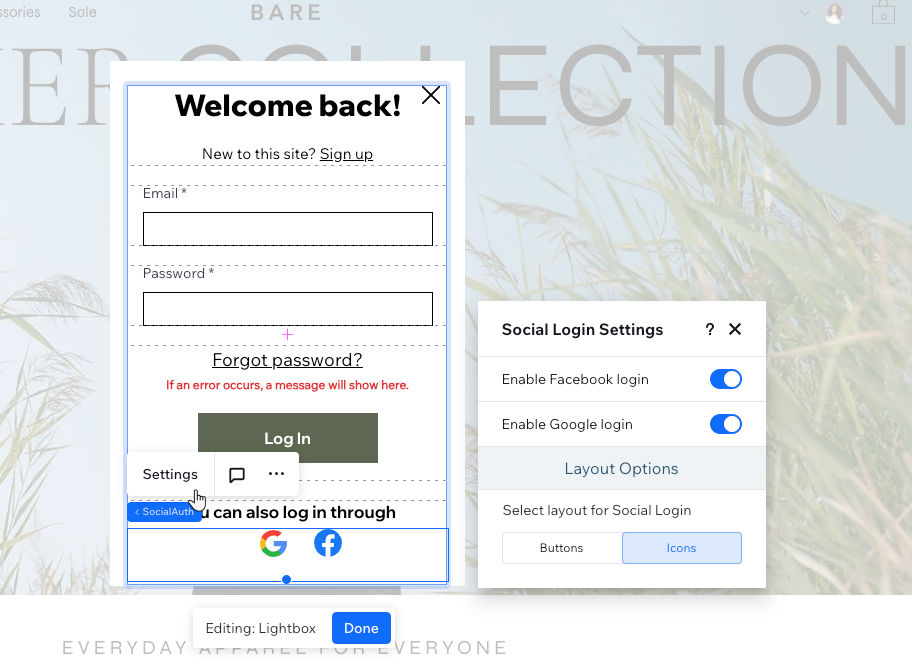
Customizing the login form
The custom login form allows you to design every individual part of the screen so it fits your client's site. You can also choose whether or not members can log in using their Google or Facebook account.
To add and set up a custom login form:
- Click Pages on the left side of the Editor.
- Hover over Login (Default) and click the More Actions icon .
- Click Settings.
- Select Custom Form under Which member login form do your visitors see?.
- Click Add to Site to start customizing.
- Choose how you want to customize the form:
- Adjust the email and password fields: Select a field to adjust its title, layout, placeholder text and other settings.
- Design the form: Select any text element, link or button on the form to design it in the Inspector panel. The available settings depend on the chosen element.
- Adjust the social login settings: Select the Google and Facebook icons to enable or disable these login methods. You can also choose whether they appear as icons or text buttons.