Studio Editor: Customizing the Members Area Menu
In this article
- Navigating the Member Menu
- Managing the tabs on the Member Menu
- Adjusting the layout of the Member Menu
- Designing the Member Menu
The Member Menu appears on every tab of the site's Members Area, allowing members to navigate their account with ease. You can decide which tabs appear on the menu and control its layout and design.
Navigating the Member Menu
You can quicky access and edit the different tabs that make up your Members Area right from the editor.
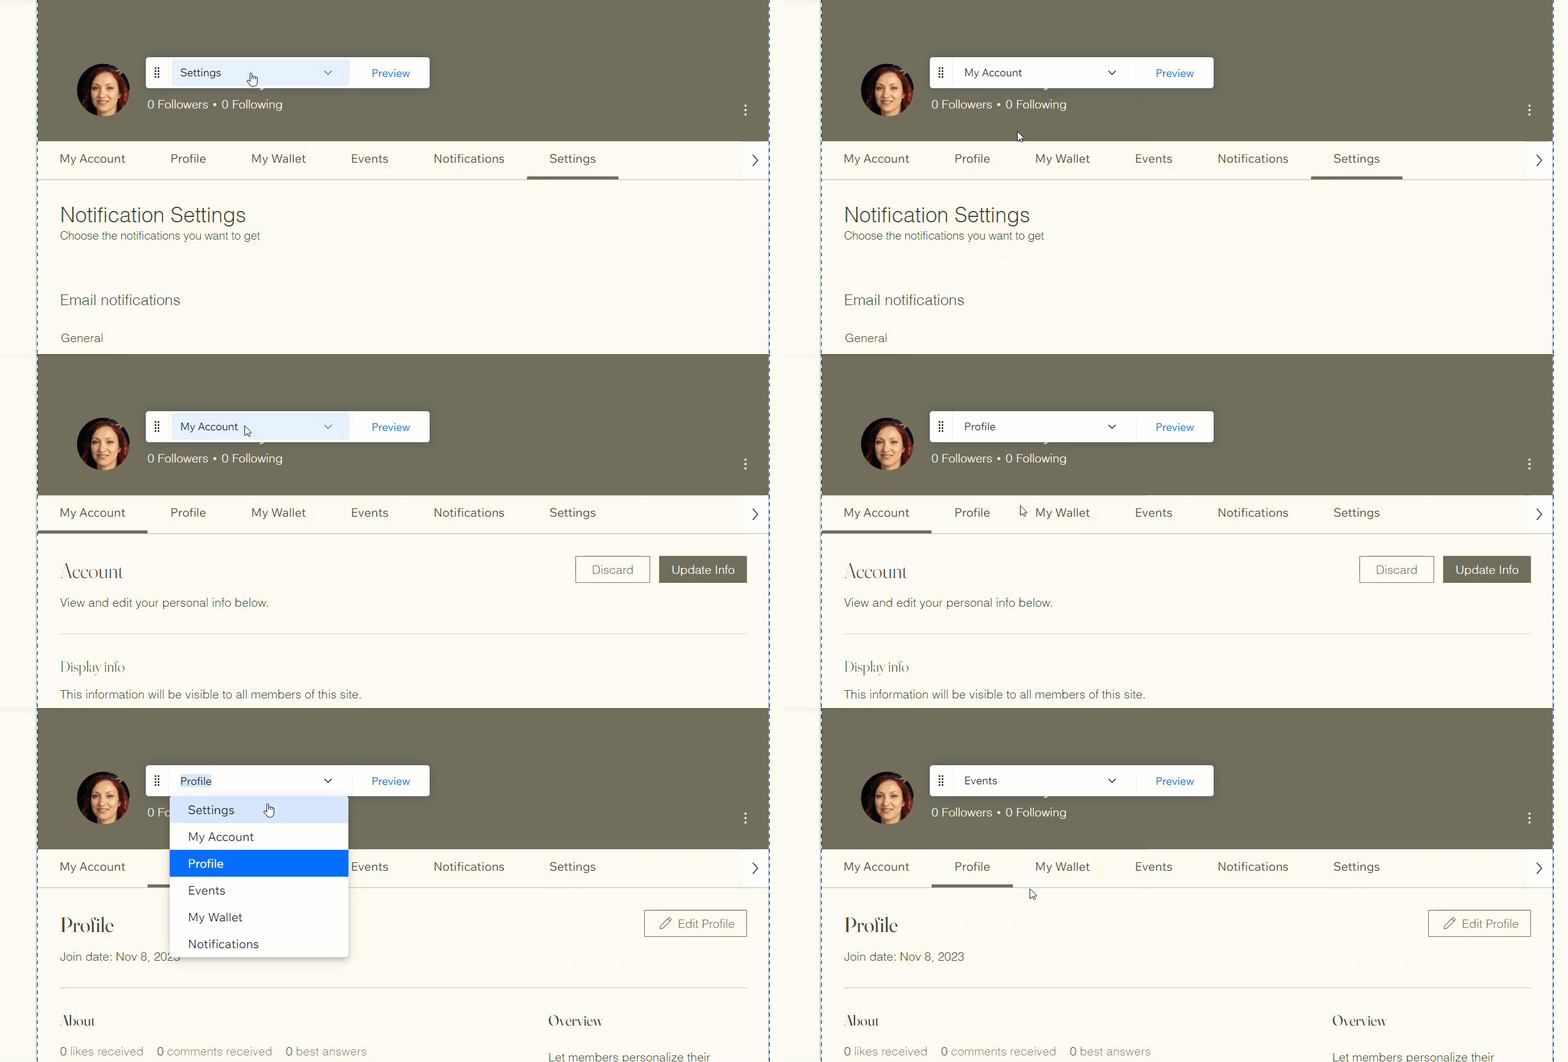
Use the floating dropdown menu to quickly switch between tabs. You can then manage and edit the settings for each tab.
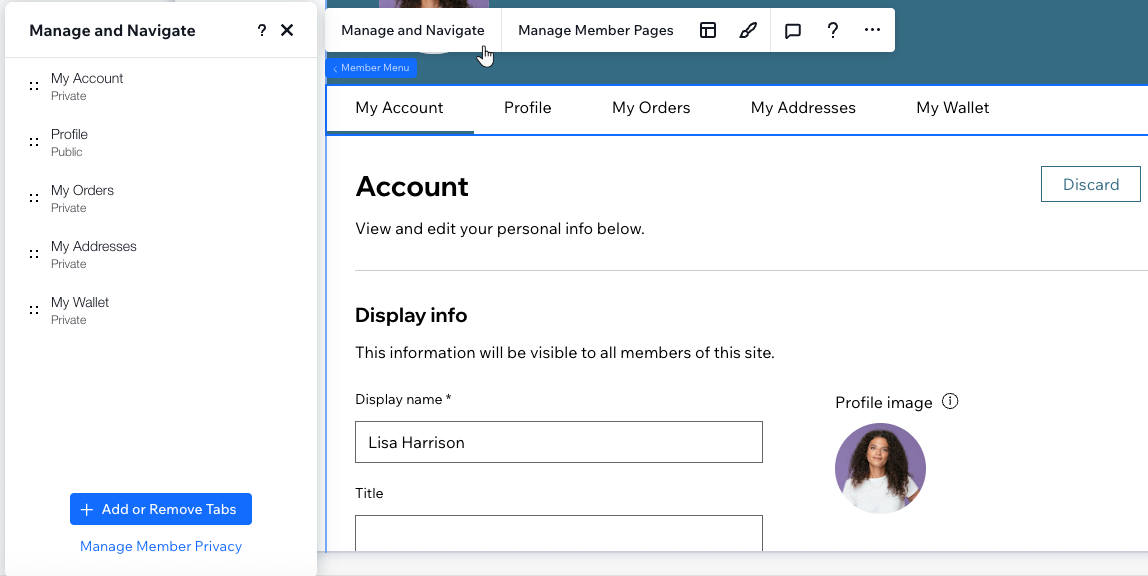
Clicking on tab names in the Manage and Navigate panel also takes you to see the content. From this panel, you can control which tabs appear on the Member Menu, as well as reorder and rename them.
Tip:
The dropdown will appear at the top of your editor when viewing your Members Area. If you don't see it right away, just scroll down a little. You can click and drag the menu to move it wherever you like.
Managing the tabs on the Member Menu
You have full control of the tabs that appear on your Member Menu. You can choose which tabs it shows, change their order and add a submenu to keep your menu neat and minimal.
To manage your Member Menu:
- Click Pages
 on the left side of the Studio Editor.
 - Click Member Page under Members Area.
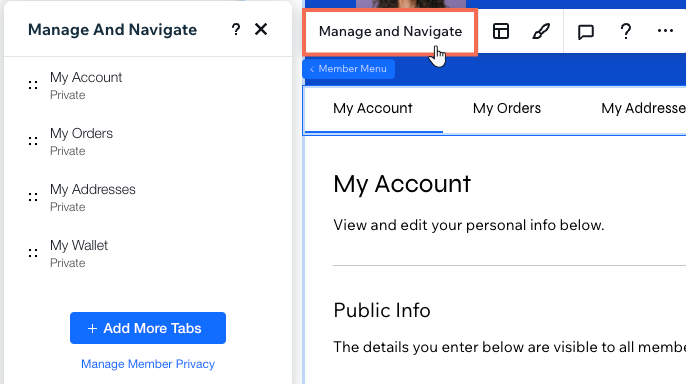
- Select the Member Menu element and click Manage and Navigate.
- Choose what to do next:
- Add more tabs: Enhance the Members Area with new capabilities, like the Profile tab that lets members introduce themselves to the community.
Note: The available tabs depend on the Wix apps installed on this site (e.g. the "My Wallet" tab is only available for Wix Stores). Learn more about adding tabs to your Member Menu. - Remove a tab: Hover over a tab, click the More Actions icon
 and Delete Tab.
 - Rename a tab: Hover over a tab, click the More Actions icon and Edit Tab Name.
- Reorder tabs: Hold the Reorder icon
 next to a tab and drag it to the desired position.
- Add more tabs: Enhance the Members Area with new capabilities, like the Profile tab that lets members introduce themselves to the community.
Adjusting the layout of the Member Menu
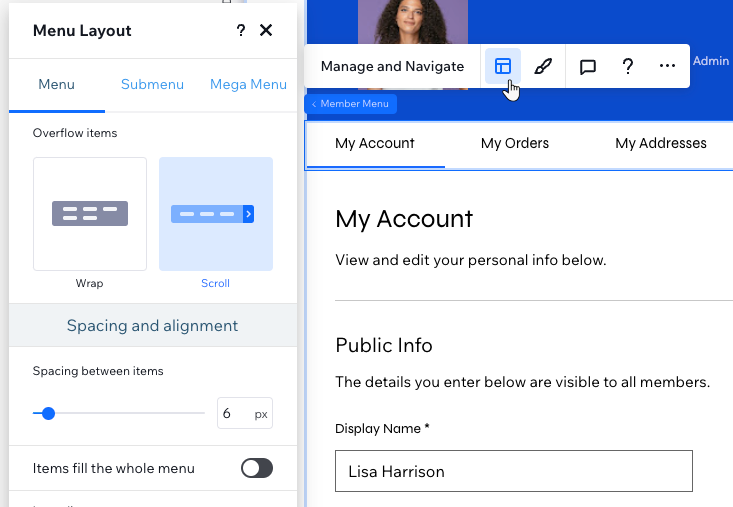
Change the Member Menu's layout to your needs. Choose how to display the items by adjusting their alignment, size, direction and more.
To adjust the layout of your Member Menu:
- Click Pages on the left side of the Studio Editor.
- Click Member Page under Members Area.
- Select the Member Menu element and click the Layout icon
 .
. - Use the available options to adjust the layout of the menu and submenu.
Tip:
The available layout settings depend on the type of menu you have (vertical or horizontal). To change your menu from vertical to horizontal or vice versa, you need to
change the layout of the Members Area.
Designing the Member Menu
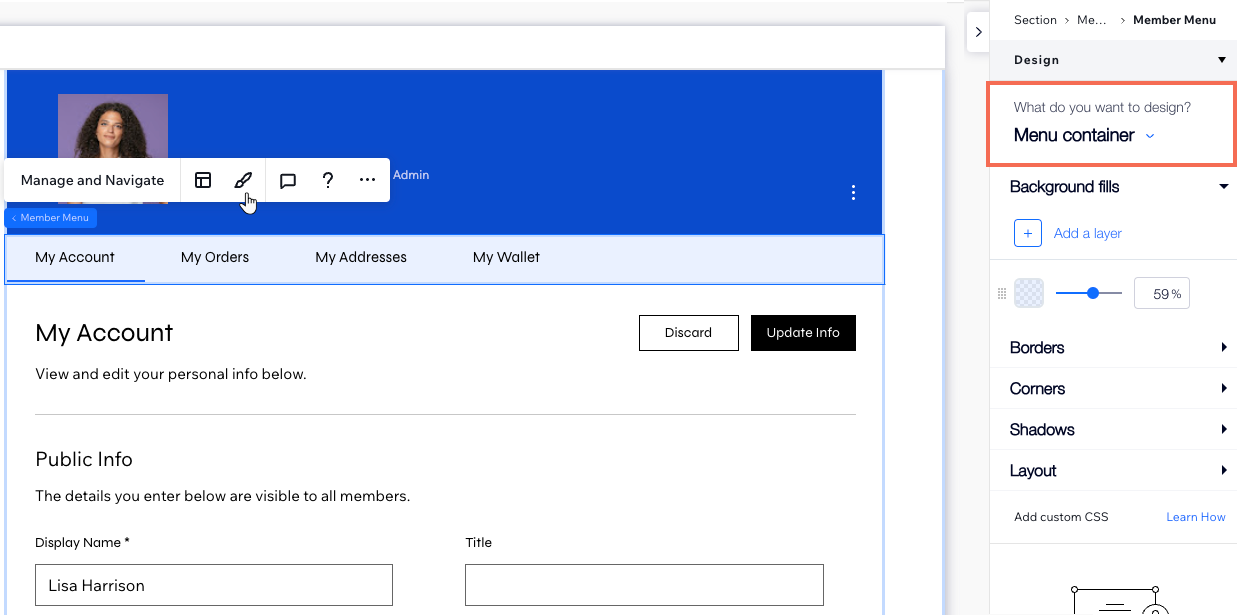
Customize the look of your Member Menu to fit your aesthetic. Design the menu's background, the text it shows and the borders and corners. You can also design your menu items so they stand out from the rest of the menu when members hover over or select them.
To design your Member Menu:
- Click Pages on the left side of the Studio Editor.
- Click Member Page under Members Area.
- Select the Member Menu element and click the Design icon
 .
. - (In the Inspector) Select an option under What do you want to design?: The menu container, Scroll button or the menu items.
- Select the relevant state from the drop-down: Regular, Hover or Current page.
Note: This option is only relevant for the scroll button and menu items. - Use the available options to design the menu.