Studio Editor: Adjusting the Layout of New Menus
6 min
In this article
- Adjusting the layout of horizontal menus
- Adjusting the layout of vertical menus
- Adjusting the layout of hamburger menus
With our latest menu component, you can change the layout of a single menu for each individual breakpoint — making it even easier to design your client's site across screen sizes.
Once you've chosen a menu type (layout), use the customization options to make it look exactly how you want.
Adjusting the layout of horizontal menus
Horizontal navigation bar menus have a ton of options, giving you full creative control over their layout. You can choose how overflow items are displayed, enable an icon for dropdowns, and more.
To adjust the layout of a horizontal menu:
- Click the menu in your editor.
- Click the Layout icon
.
- Click Navigation bar under Menu type.
- Select Horizontal from the Orientation dropdown.
- Use the options to adjust the layout:
Overflow items
Dividers and padding
Dropdown icon
Direction and alignment
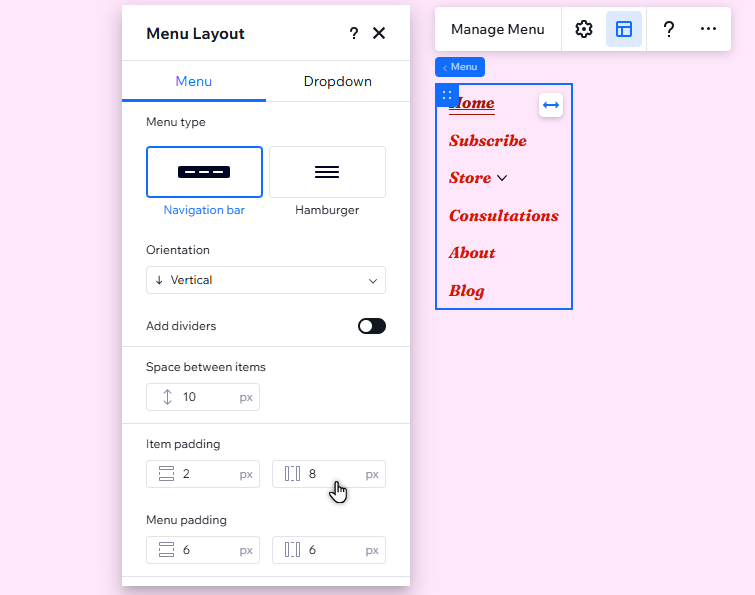
Adjusting the layout of vertical menus
Vertical menus look great on smaller screen sizes, making them suitable for tablet breakpoints. Adjust options such as the spacing and direction to keep everything aligned, and complement the site's structure.
To adjust the layout of a vertical menu:
- Click the menu in your editor.
- Click the Layout icon
- Click Navigation bar under Menu type.
- Select Vertical from the Orientation dropdown.
- Customize the layout with the options:
- Dividers: Select the Add dividers toggle to enable or disable this option, and adjust the spacing:
- Enabled: Adjust the spacing between the dividers and menu items.
- Disabled: Adjust the spacing between items.
- Padding: Use the options to make the padding around the menu and items bigger or smaller.
- Dropdown icon spacing: Adjust the spacing between the dropdown items and icon.
- Direction: Set the menu to display from left to right, or right to left.
- Alignment: Align the menu items to the left, center, or right of the container, or set them as justified.
- Dividers: Select the Add dividers toggle to enable or disable this option, and adjust the spacing:
Notes:
The Dropdown icon spacing option only appears if:
- You have enabled a dropdown icon from horizontal layout (dropdown icons cannot be enabled / disabled on vertical menus).
- The menu is aligned to the left, center, or right of the container.
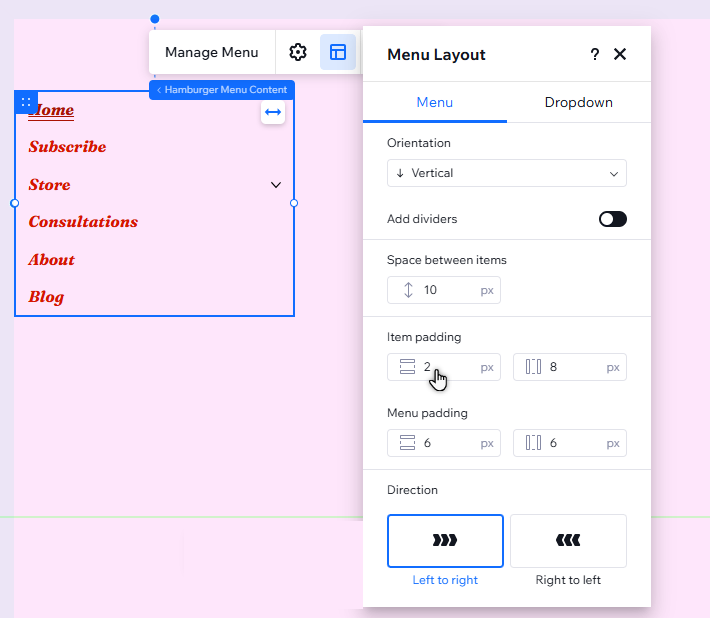
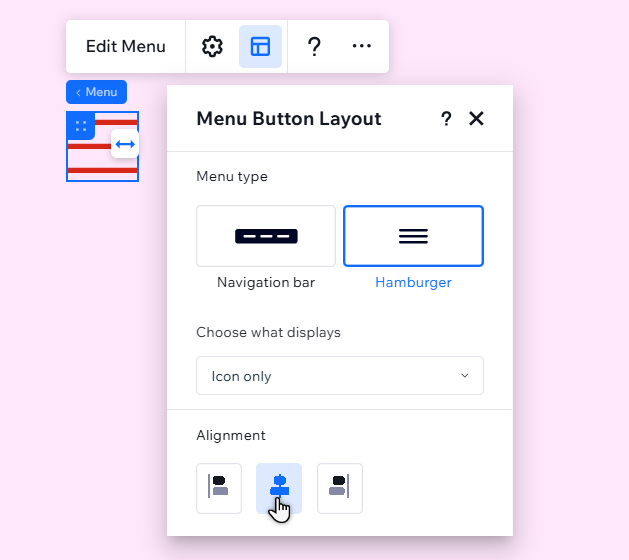
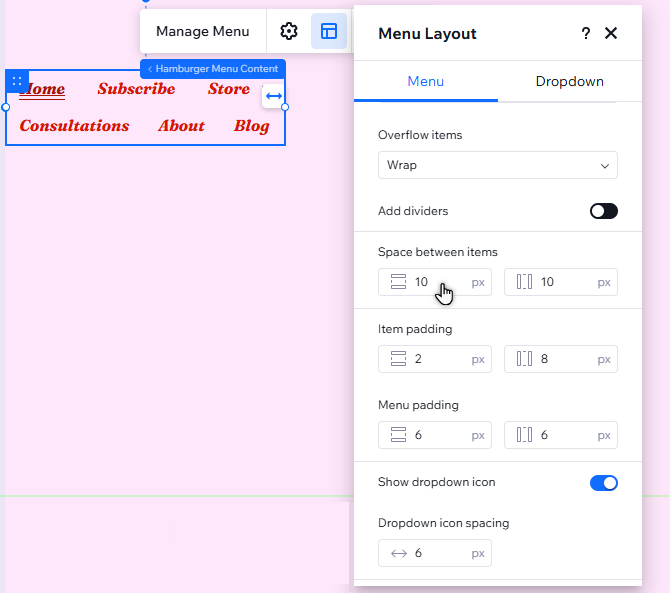
Adjusting the layout of hamburger menus
With hamburger menus, you can choose what the menu icon displays (text, an icon, or both), and set the alignment.
You can also select whether menu items are displayed horizontally or vertically and adjust the settings.
To adjust the layout of a hamburger menu:
- Click the menu in your editor.
- Click the Layout icon
- Click Hamburger under Menu type.
- Depending on which part of the menu you want to adjust, exit or stay in the Layout panel:
- The menu icon:
- Stay in the Layout panel.
- Customize the layout with the options:
- Choose what displays: Select whether the hamburger menu button displays text, an icon, or both.
Note: It is also possible to choose for the menu to display nothing. However, we recommend selecting one of the other options so visitors can find the menu. - Alignment: Align the menu icon to the left, center, or right of the container.
- Choose what displays: Select whether the hamburger menu button displays text, an icon, or both.
- The menu itself:
- Exit the Layout panel.
- Click Edit Menu.
- Select the menu items.
- Click the Layout icon
- Choose whether the items are displayed horizontally or vertically, and adjust them with the options:
- The menu icon:
Horizontal
Vertical