

Studio Editor: Adding and Setting Up a Rive Animation
5 min
In this article
- Step 1 | Add the Rive element
- Step 2 | Customize the Rive element
- FAQs
Add Rive animations to enhance your client's site with rich, interactive and engaging experiences. Using our seamless integration, you can incorporate pre-designed elements from Rive's community or your own Rive designs.
After uploading the Rive file, customize it right in the editor – adjust the fit, choose a specific artboard and state machine, set the animation to autoplay, and more. This gives you the flexibility to create dynamic experiences that captivate visitors and elevate your projects.
New to Rive?
Visit Rive Docs to learn how to use the platform to design animations.
Step 1 | Add the Rive element
Get started by adding the Rive element from the Add Elements panel. Then, you can change the default animation to your Rive file so that the element displays it.
Before you begin:
We recommend uploading the Rive file to the site's Media Manager in advance so it's ready to be integrated. However, you can also upload it on the spot while setting up the element.
To add the Rive element:
- Go to your editor.
- Click Add Elements
 on the left side of the editor.
 - Click Media.
- Click Rive.
- Click the Add to Site icon
 next to Rive Animations.

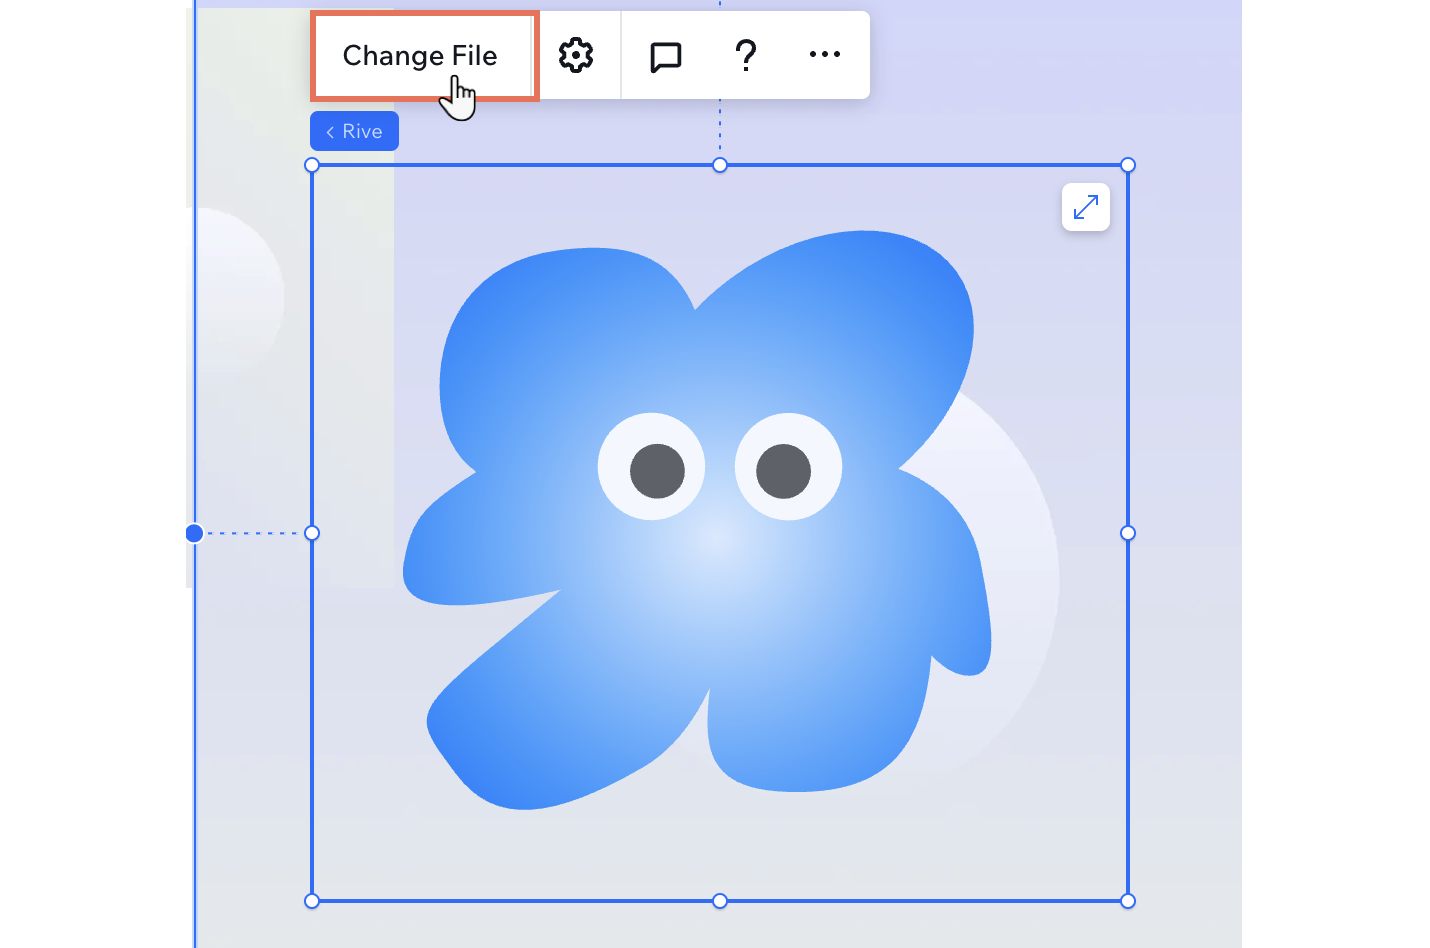
- Upload the Rive file:
- Click Change File.
- (In the Media Manager) Select the relevant .riv file or click + Upload Media to add it on the spot.
- Click Add to Page.
Step 2 | Customize the Rive element
Fine-tune your Rive animation to ensure it aligns perfectly with your client’s vision and the site’s design. From selecting a specific artboard to adjusting alignment and playback settings, you have complete control over how the animation integrates into the site.
Working with breakpoints:
By default, the settings of your Rive animation apply to all breakpoints.
To customize the Rive element:
- Select the Rive element in your editor.
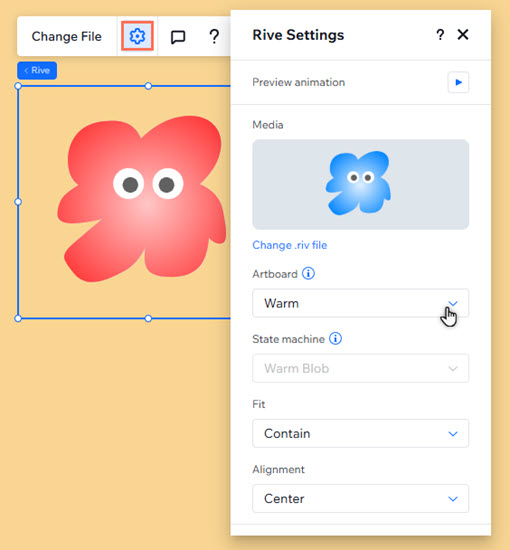
- Click the Settings icon
 and adjust the following settings:
- Media: Click Change .riv file to select / upload a different file.
- Artboard: If your Rive file contains multiple artboards (i.e. individual canvases), you can select the one you want to display in this element.
- State machine: If your Rive file contains multiple state machines (i.e. combinations of multiple animations), you can select the one you want this element to play.
- Fit: Select the fit of the animation within the element's bounding box (e.g. cover, fill, etc.)
- Alignment: Choose an alignment for the animation within the element's bounding box (e.g. center, bottom left, etc).
- Autoplay: Click the toggle to decide whether or not the animation plays automatically.
- Enable touch scroll: Enable the toggle to allow scroll behavior to still occur on touch devices – when visitors touch or drag the Rive element, it triggers the scroll behavior. Otherwise, scroll behavior may be prevented on touch / drag actions by default.
- Accessibility: Enter an accessible name to provide a brief description of the animation. If the element is decorative (i.e. doesn't need an accessible name), select the checkbox next to This animation is decorative, it doesn't need a description.
- (Optional) Use the element's drag handles to resize it.
Tip: Rive animations will be contained to the element's bounding box.
Click Preview animation to see the animation directly on the canvas.
FAQs
Click a question below to learn more.
What file format do I need for Rive animations?
Can I add multiple Rive animations to my page?
What should I do if my animation is not displaying properly?
How can I make my animation responsive?

Can I use the responsive behaviors I set on Rive?
