

Studio Editor: Adding and Customizing Buttons
6 min
In this article
- Adding a button
- Setting up a button
- Customizing a button
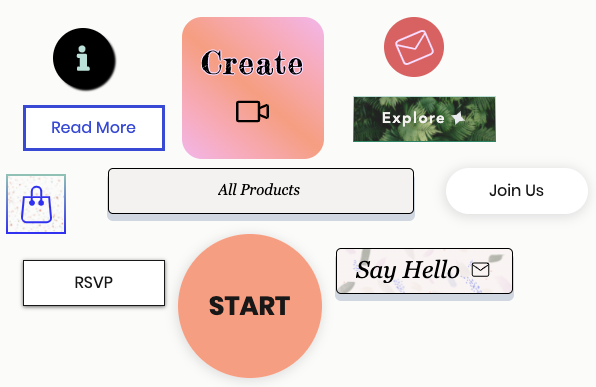
Buttons are a great way to encourage visitors to engage with a site. In the Studio Editor, you can add regular or animated buttons, and choose what they show (text, an icon, or both). There are also a ton of design and layout options, giving you full creative control.
Important:
This article refers to the new button element in the Studio Editor. For steps on adding and working with the previous button element, please click here.
How do I know which button I have?

Adding a button
Choose whether you want to add a styled (static) button, or an animated button. They have all the same design options, and you can switch a button from styled to animated at any point (and vice versa).
To add a button:
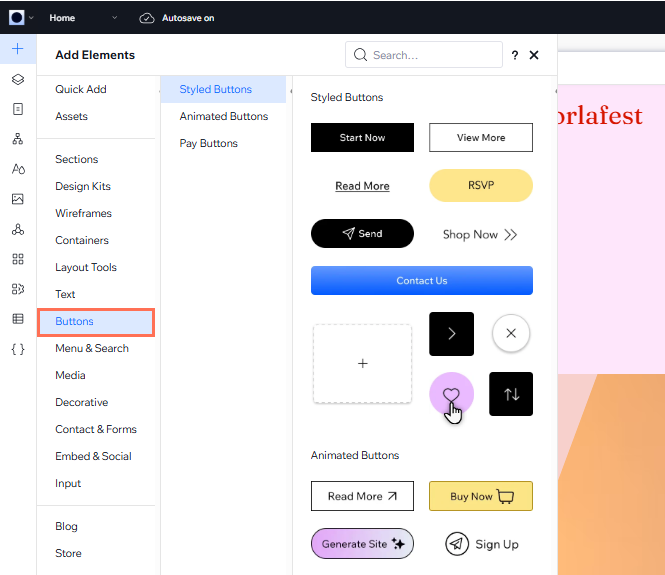
- Click Add Elements
 on the left side of the editor.
 - Click Button.
- Click or drag an option under Styled Buttons / Animated Buttons to add it to the page.
Need some inspiration?
Check out these button tutorials:
Setting up a button
After you add a button, set up its action and choose what to show (text, an icon, or both). Depending on what the button displays, you can also set the text and icon.
To set up a button:
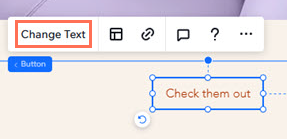
- Select the button in your editor.
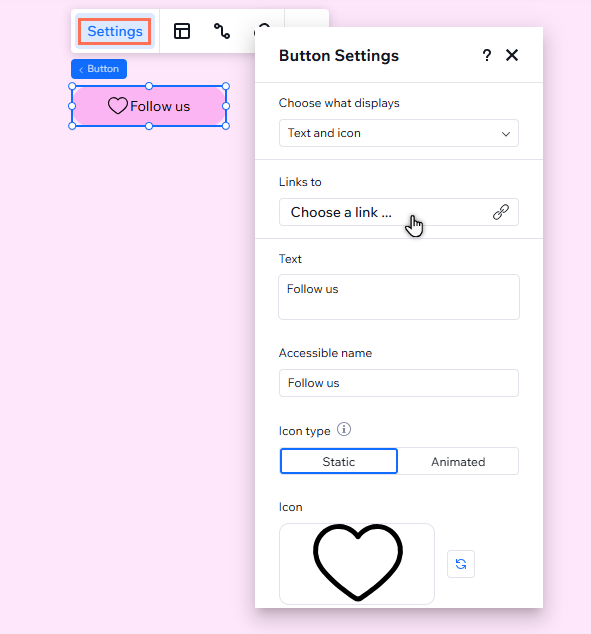
- Click Settings.
- Set up the button with the options:
- Choose what displays: Select an option and change the settings:
- Text and icon: Use the Text field to change what it says, and click the Replace icon
 to choose a different icon.
 - Text only: Edit the button text under Text.
- Icon only: Click the Replace icon to choose a different icon for the button.
- Text and icon: Use the Text field to change what it says, and click the Replace icon
- Links to: Click the field and set up the link from the panel:
- Select a link type on the left.
- Add the relevant link information.
- Click Done.
- Accessible name: Describe the button's function to visitors using assistive technologies.
- Choose what displays: Select an option and change the settings:
Note:
If you select Nothing under Choose what displays, the button is blank. You can still add an accessible name and link it to what you want.
Customizing a button
Styled buttons offer tons of customization options so you can design them down to the last detail. Change the text and icon to match the desired action, choose how the two should be arranged, set a gradient or an image as the background, and much more.
To customize a styled button:
- Select the relevant button.
- Choose what you want to customize:
Add icon animations
Design the button
 at the top right of the editor.
 to customize them separately.
 to customize them separately.
 Adjust the button's layout
 .
.  .
.
