

Studio Editor: Adding a WebGL Effect to Media Backgrounds
9 min
In this article
- Adding a WebGL effect
- Customizing a WebGL effect
- Removing a WebGL effect
- FAQs
Transform your client projects with our WebGL effects, designed to turn media backgrounds into showstoppers. These effects engage site visitors while ensuring optimal performance. Choose from a variety of impressive presets, tweak their properties and decide how they activate—automatically on scroll, or through the visitor's mouse movement.

Adding a WebGL effect
Head over to the Inspector panel to add a WebGL effect to a section media background. You can choose from various different presets, depending on the look and interaction you want to achieve.
Note:
It is not possible to combine background scroll effects and WebGL effects.
To add a WebGL effect:
- Add an image or video to the relevant section's background.
Note: WebGL effects are not supported for GIF backgrounds, as well as media backgrounds set to fit as Tiles. - Select the section on the canvas.
- Apply a WebGL effect:
- Click the Open Inspector icon
 at the top right of the editor.

- Click the Animations and Effects tab
 .
. - Click + Add under WebGL Effects.
- Select an effect from the list.
- Click the Open Inspector icon
Tip:
Hover over the preset icons to see a preview of how they look. You can also preview the effect on the canvas by clicking Adjust Animation (make sure the Preview in editor toggle is enabled).

Customizing a WebGL effect
Customize WebGL effects to fine-tune their look and behavior, whether you're adding subtle distortions or bold, dynamic motion. Each effect comes with its own set of adjustable settings—like intensity, speed, and direction—giving you full control over how it interacts with your content.
For certain effects, you can also decide what triggers them on your client's site – autoplay, scrolling, mouse movement, or a combination of multiple actions.
To customize a WebGL effect:
- Select the relevant section.
- Click the Open Inspector icon at the top right of the editor.
- Click the Animations and Effects tab .
- Click the effect you want to change.
- Click Adjust Animation to change its settings:
Noisy track
Liquify
Slitscan
 , and remove a trigger by clicking the Remove icon
  next to it.
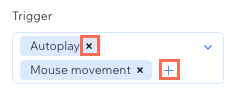
RGB orb
Ripples
RGB split
The Preview in editor toggle at the bottom of the panel is enabled by default, allowing you to experience your effect in action on the canvas.

Removing a WebGL effect
You can always remove a WebGL effect you've previously added to a section background.
To remove a WebGL effect:
- Select the relevant section.
- Click the Open Inspector icon at the top right of the editor.
- Click the Animations and Effects tab .
- Click the More Actions icon
 next to the WebGL effect.
 - Select Remove.

FAQs
Click a question below to learn more about WebGL effects in the Studio Editor.
Do WebGL effects work on touchscreen devices?
Why is the option to add WebGL effects grayed out in my editor?

