Site Members: Showing Custom Info Fields in Member Profiles
4 min
In this article
- Step 1 | Add custom info fields to member profiles
- Step 2 | Make sure the custom fields are public
- Step 3 | Add the custom fields to the signup form
- Step 4 | Edit the placeholder text of the fields
After creating custom fields to collect more information from your members, add them to the signup form and make them public. This makes the member's responses appear automatically on their profile, which is a great way to help people to get to know each other.
Show me an example
Before you begin:
Make sure you've added a custom signup form to your site. You cannot add custom fields to the default signup form.
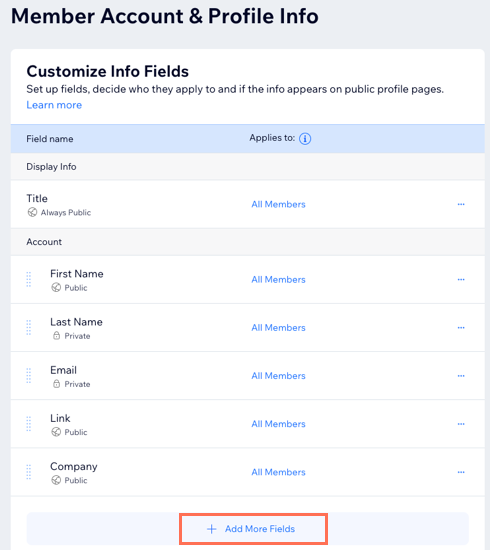
Step 1 | Add custom info fields to member profiles
The first step is to create the new fields that you'll eventually connect to the signup form. You add these fields and personalize them to your needs from your site's dashboard. Using the preview on the right, you can see how the profile looks for your members.
To add custom info fields to member profiles:
- Go to Site Members in your site's dashboard.
- Click the More Actions drop-down.
- Click Manage Member Info.
- Click + Add More Fields at the bottom.
- (In the pop-up) Click + Add Custom Field.
- Enter the custom field details:
- Field Name: Enter the title of the field.
- Field Privacy: Choose Public from the drop-down so this information appears on the members' Profile page.
- Field Type: Choose the type of information you your members to provide.
- Click Save.
- (Optional) Repeat steps 5-7 to add more custom fields.
Step 2 | Make sure the custom fields are public
For fields to appear in the signup form (and member profiles), you need to set their privacy to Public. If you see a field that's set to private in the Customize Info Fields page, you can edit it so it appears on your members' profiles.
To make a field public:
- Go to Site Members in your site's dashboard.
- Click More Actions at the top right.
- Click Manage Member Info.
- Hover over the relevant field and click Edit.
- Choose Public from the Field Privacy drop-down.
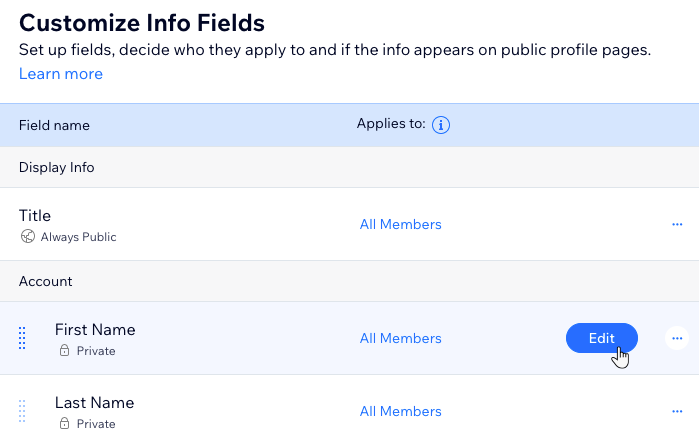
Tip:
Make sure the field settings apply to All Members.
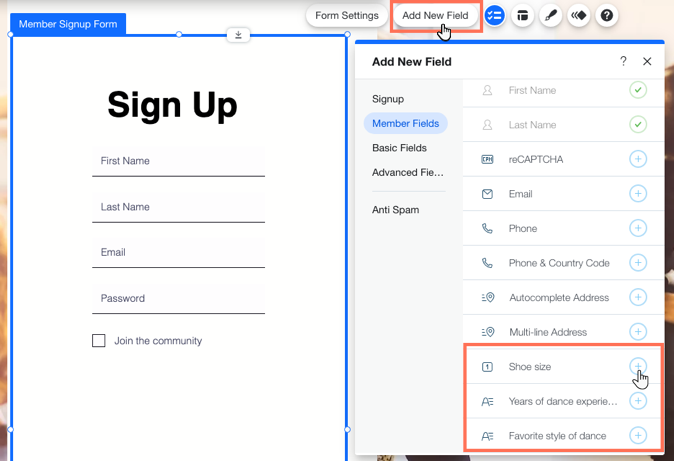
Step 3 | Add the custom fields to the signup form
After creating custom fields in the dashboard and making them public, go to your site in the editor and add the new fields to the signup form.
To connect the custom fields to the signup form:
- Click Pages & Menu
 on the left side of the Editor.
 - Click Signup & Login.
- Click Member Signup Form (Custom).
- Click Add New Field.
- Click Member Fields.
- Click the Add icon
 next to your new custom fields to add them to the signup form.
What's next?
The new fields appear in the signup form. The next step is to edit the text appearing on the field so visitors know what information they're supposed to add.
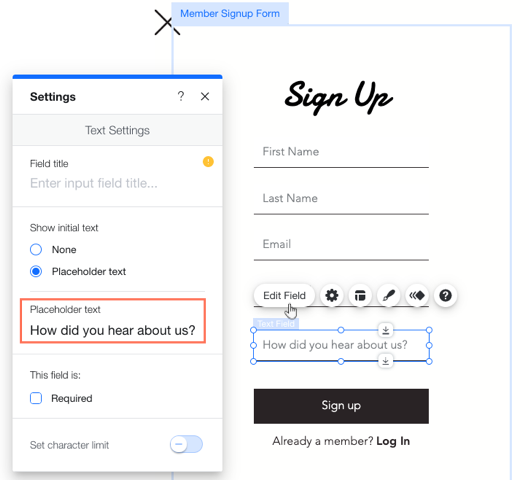
Step 4 | Edit the placeholder text of the fields
The last step is giving your new field(s) a title and / or placeholder text so new members know what info they should enter. Once they finish signing up, your members' responses are automatically displayed on their profile.
To edit a field's placeholder text:
- Click the new field you just added to the signup form.
- Click Edit Field.
- Depending on your needs, enter a title under Field title and / or text under Placeholder text.