

Site Members: Customizing the Reset Password Email Your Members Receive
3 min
Customize the Reset Password email that your site members receive. When your site member resets their password, they'll receive a default email to help them set a new one.
You can customize this email to match your style and brand. Add images, change the text, and use dynamic values for a more personalized touch. Learn more about customizing automated emails.
Important:
Make sure to keep the email type Business critical. Password reset emails are important transactional emails. The business critical email type ensures that they are sent to your members regardless of their consent to receive promotional emails.
To customize the password reset email:
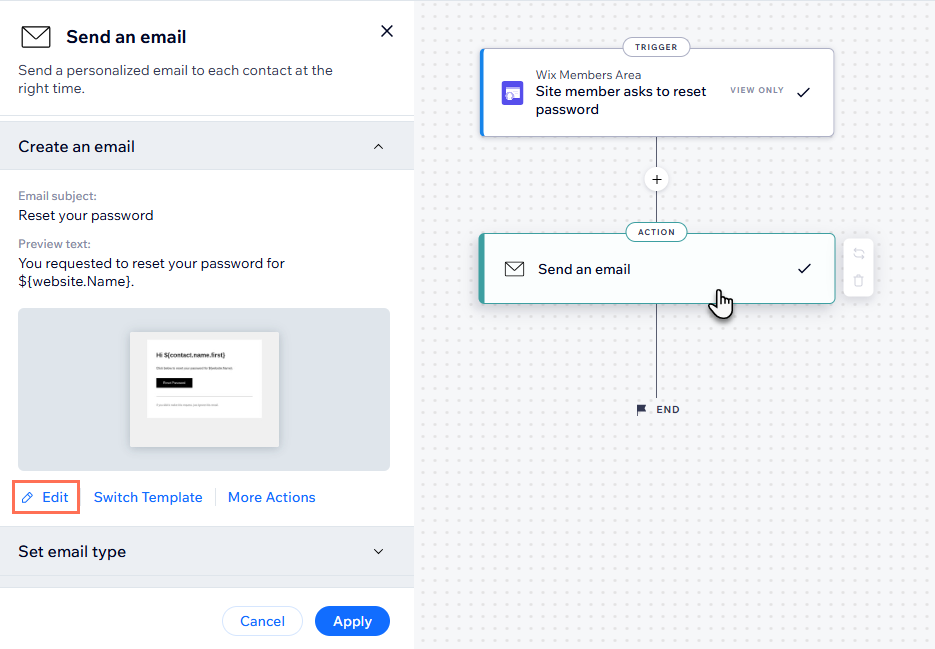
- Go to Automations in your site's dashboard.
- Click the App automations tab.
- Find the automation titled Send site members a reset password email.
Tip: Use the search box to quickly find your automation.

- Click the More Actions icon
 next to the automation and select Edit.
 - Click the Send an email action to open the panel.
- Click Edit in the Create an email section of the panel.
Note: If you're not seeing this version of the automation builder, scroll to Action 1 (Send an email) and click Edit in the Create an email section.
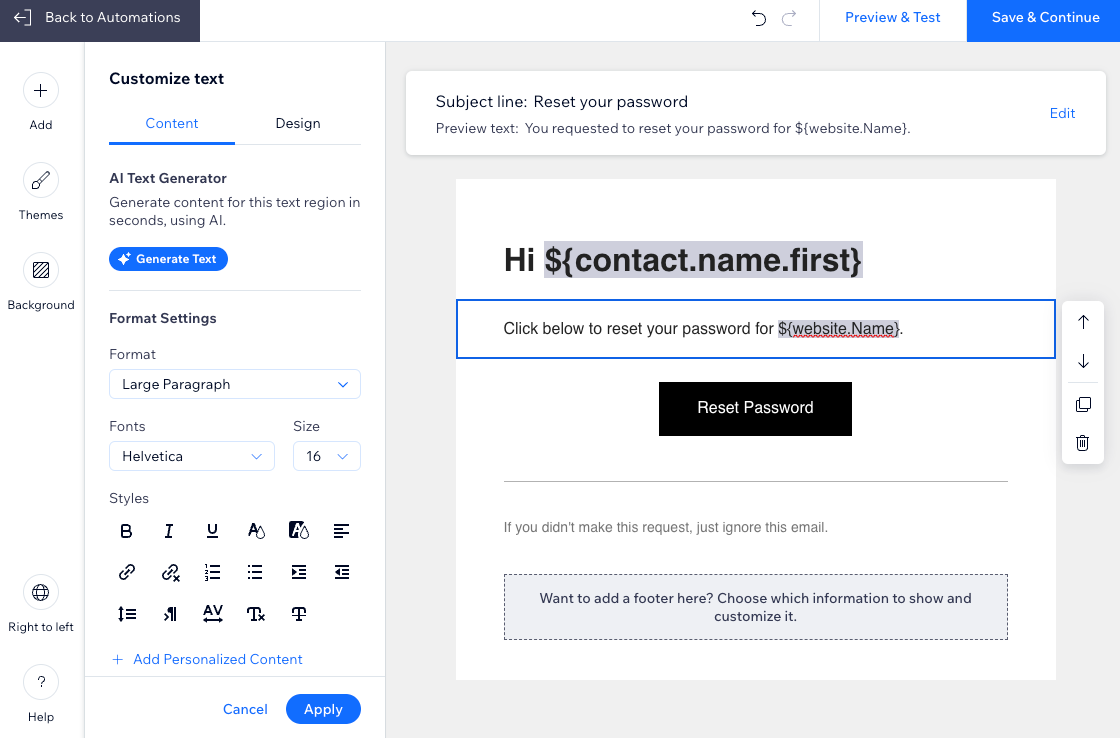
- Edit the contents of the email:
- Subject line: Click Edit next to the subject line to adjust the subject line. You can click + Personalize to add a dynamic value.
- Text: Click the text element(s) you want to edit and adjust the text. Then use the panel on the left to adjust the formatting or design.
- Button: Click the button and use the panel on the left to edit its content or design.
- Add: Click Add in the panel on the left to add elements to the email.
- Themes: Click Themes in the panel on the left to personalize the theme of the email.
- Background: Click Background on the panel on the left to update the background.
- (Optional) Click Preview & test to generate a preview and send yourself a test email.
- Click Save & Continue when you're done customizing the email.
- Click Apply Changes to save the automation.
Want to change the sender details?
You can change the sender's name so your message is recognized at first glance, and include a reply-to email for when people reply to your automated message. Learn how to customize the sender details attached to your email.
