

Setting Goals & Tracking Conversions with Yandex Metrica & Google Tag Manager
5 min
In this article
- Step 1 | Connect Google Tag Manager to Your Wix Site
- Step 2 | Get Your Yandex Metrica Tracking Code Snippet
- Step 3 | Create a New Tag in Google Tag Manager
- Step 4 | Generate a Goal ID in Yandex Metrica
- Step 5 | Add Your Yandex Goal ID in Google Tag Manager
- Step 6 | Differentiating Between Wix Tracking Sources
- Major Wix Origins & Event Mapping
About a week after you add Yandex Metrica code to your Wix site, you'll see basic visitor tracking in your Yandex Metrica account. For tracking to capture user journeys through Javascript events (such as add to cart, start checkout, or purchase events), you can use Google Tag Manager.
Important:
If you have added Yandex Metrica in Wix Marketing Integrations, you'll need to disconnect it to avoid double reporting.
Step 1 | Connect Google Tag Manager to Your Wix Site
For instructions to connect your Google Tag Manager to your Wix site, click here.
If you've already connected your Google Tag Manager account to your Wix site, continue to Step 2.
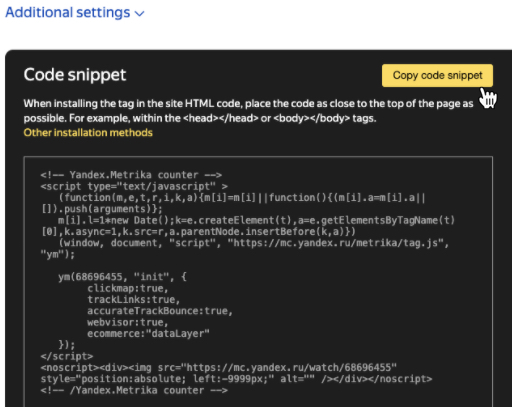
Step 2 | Get Your Yandex Metrica Tracking Code Snippet
- Log in to your Yandex Metrica account.
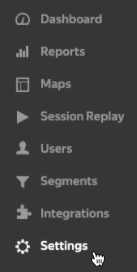
- Click Settings.
- In Additional Settings, click Copy code snippet.
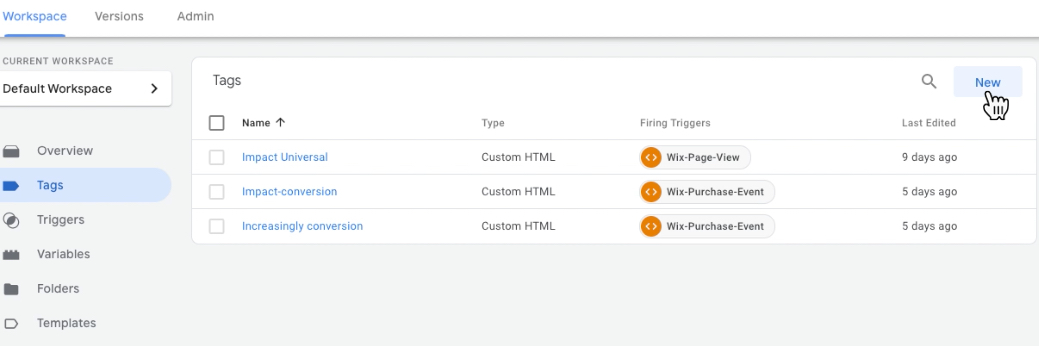
Step 3 | Create a New Tag in Google Tag Manager
- Log in to your Google Tag Manager account.
- Click Tags.
- Click New.
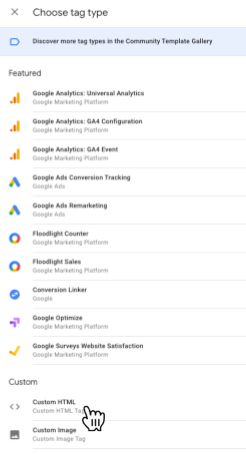
- Click Tag Configuration.
- Choose Tag Type: Custom HTML.
- In Tag Configuration, paste your copied Yandex Metrica code into the HTML field.
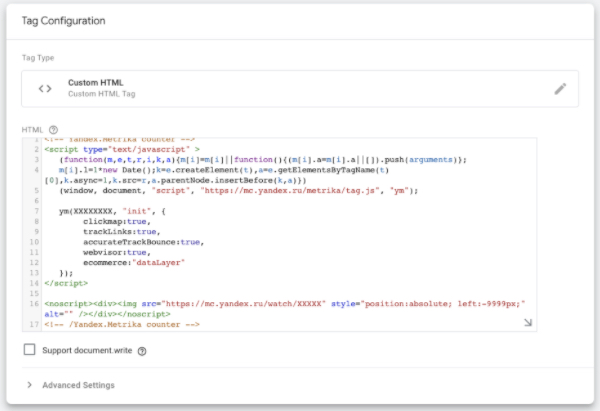
- Click the pencil icon to edit the tag name, and name the tag "YM-Basic".

- Click Triggering.
- In Choose a trigger, click the add symbol +.

- Click Trigger Configuration.
- Click Custom Event.
- Enter Event Name "Pageview", and Trigger name "Wix-Page-View".
- Click Save.
- In Tag Configuration, click Advanced Settings.
- In Tag firing options select Once per event.
- Click Submit.
Step 4 | Generate a Goal ID in Yandex Metrica
You can generate a Goal ID to track "purchase" events and other events such as "add to cart", depending on the Wix products you use, including Wix Stores, Wix Bookings, Wix Events and Wix Pricing Plans. See a list of events for each Wix Product.
To generate a Goal ID in Yandex Metrica:
- Go to your Yandex Metrica account.
- Click Settings.
- Click Goals.
- Click Add Goal.
- Create your goal ID using naming conventions, for example: wix_store_purchase:
- Wix is the constant.
- Store is the source.
- Purchase is the event.
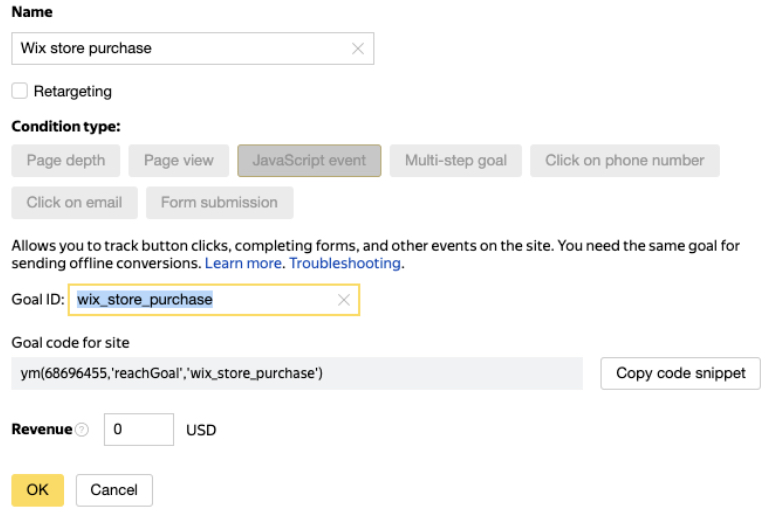
- Click Copy code snippet.
Step 5 | Add Your Yandex Goal ID in Google Tag Manager
- Go to your Google Tag Manager account.
- Click Tag.
- Click Tag Configuration.
- Click Custom HTML.
- Paste your copied Yandex Metrica code into the HTML field.
- Check to make sure opening and closing HTML script tags are present, and if they aren't, add them.

- Click Triggering.
- Click Wix-Page-View and set up your trigger:
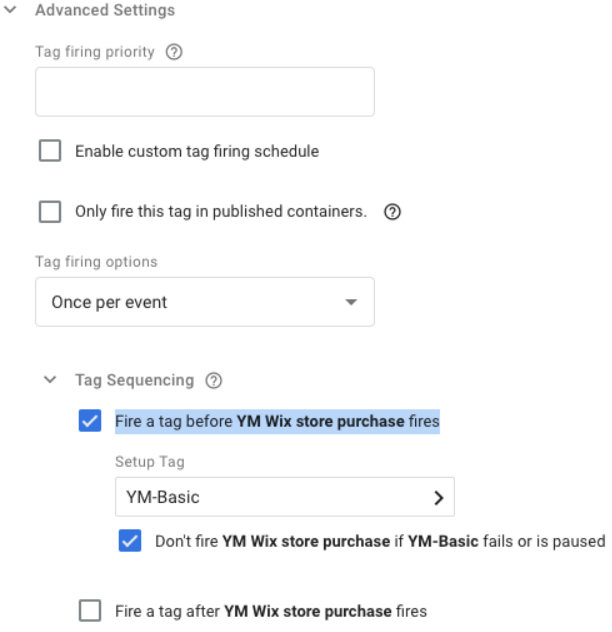
- Tags firing options: Once per event.
- Tag sequencing: The goal script should fire after the basic tag. An example is shown in the image below:
Viewing Your Goals & Conversions in Yandex Metrica
You can view your goals and conversions in the Yandex Metrica dashboard within hours after events are registered. You can find more information in the Yandex support center.
Step 6 | Differentiating Between Wix Tracking Sources
This step should be completed if you're using more than one Wix application; for example, Wix Stores and Wix Bookings. It's helpful to understand where a specific event took place, and this can be achieved by splitting triggers by "Wix origin" in Google Tag Manager.
To split triggers by Wix Application:
Note:
You can split triggers for any Wix application. The example given in the steps below is for Wix Store Purchase Triggers. For more Wix Origin values and events, see table below.
- Go to your Google Tag Manager account.
- Click Variables in the left side menu.
- Scroll down to User-Defined Variables, and click New.
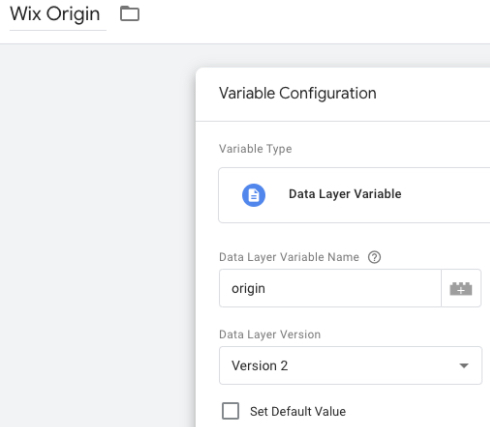
- In Variable Type, select Data Layer Variable.
- For the Data Layer Variable Name, type "origin".
- At the top left corner next to the Folder icon
 , name the variable "Wix Origin".
- Click Triggers in the left side menu.
- Find your Wix Store Purchase trigger, and click the Edit icon
 .
. - Select Some Custom Events.
- Add the conditions:
- Wix Origin
- equals
- Stores

- Click Submit.
Major Wix Origins & Event Mapping
| Events / Origins | Wix Stores | Wix Bookings | Wix Events | Wix Pricing Plans |
|---|---|---|---|---|
productimpression | Yes | - | - | Yes |
productClick | Yes | Yes | Yes | Yes |
viewContent | Yes | Yes | Yes | Yes |
addToCart | Yes | - | Yes | - |
removeFromCart | Yes | - | Yes | - |
checkout | Yes | Yes | Yes | - |
purchase | Yes | Yes | Yes | Yes |
Widget View | - | - | Yes | - |
