

Manage Custom Fields in Your Contact List
2 min
In this article
- Adding a Custom Field
- Managing Your Custom Fields
Add custom fields to your contact list to store additional information about your contacts. Custom fields can be either text, number, date or URL and can have any name you choose.
Learn how to:
Adding a Custom Field
The fields you create are automatically added to all your contacts, but you don't have to fill them in when they aren't relevant.
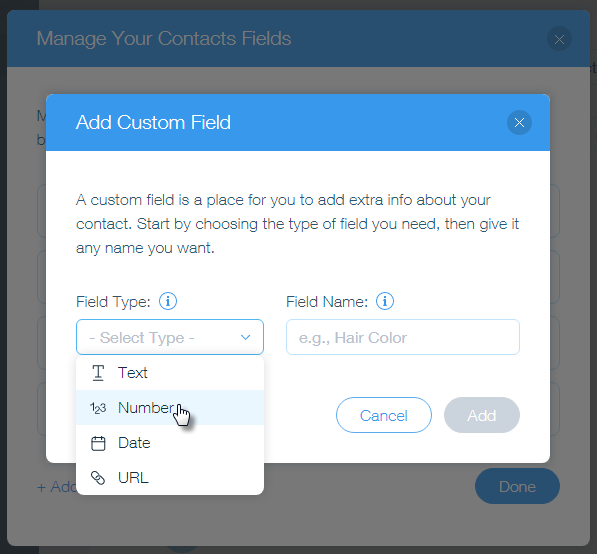
To add a custom field:
- Click + Add New Field.
- Click the Field Type drop-down menu and select the type:
- Text (e.g. Favorite Color)
- Number (e.g. Number of Children)
- Date (e.g. Date of Birth)
- URL (e.g. Link to Facebook Profile)
- Enter the name of the field in the Field Name box.
- Click Add.
- Click Done.
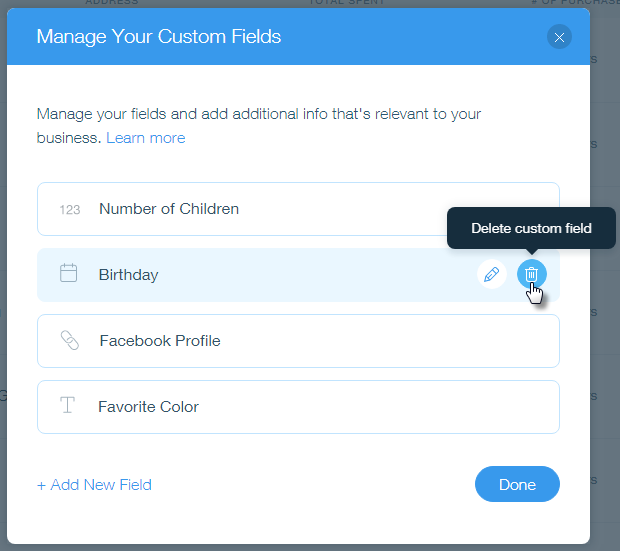
Managing Your Custom Fields
From here you can also delete or rename your custom fields. The change is applied to all of your contacts. If you delete a field, the data collected in that field is deleted as well.
To delete a custom field:
- Hover over the field you want to delete and click the Delete icon
 .
. - Click Delete to confirm.
- Click Done.
To rename a custom field:
- Hover over the field you want to rename and click the Edit icon
 .
. - Edit the name of the field and click the checkmark to save.
- Click Done.

