Wix Contacts: Importing Contacts by Uploading a CSV File
5 min
In this article
- Step 1 | Create or export your CSV file
- Step 2 | Initiate the import process
- Step 3 | Upload your CSV file
- Step 4 | Match your fields to Wix contact fields
- Step 5 | (If necessary) Review and fix file errors
- Step 6 | (Optional) Label and import your contacts
Keep all your contacts in one place by importing them into the Contacts area of your site's dashboard. You can export your contact list from an external host such as Gmail or Outlook and save it as a CSV file. This CSV file will be used to import your contacts.
Step 1 | Create or export your CSV file
Before initiating the import process, make sure your CSV file is ready and in the right format. Follow our basic instructions on exporting your contact list as a CSV file, or download a sample CSV and create your file manually.
Choose what you want to do:
Export your contacts from another host
Manually create your CSV file
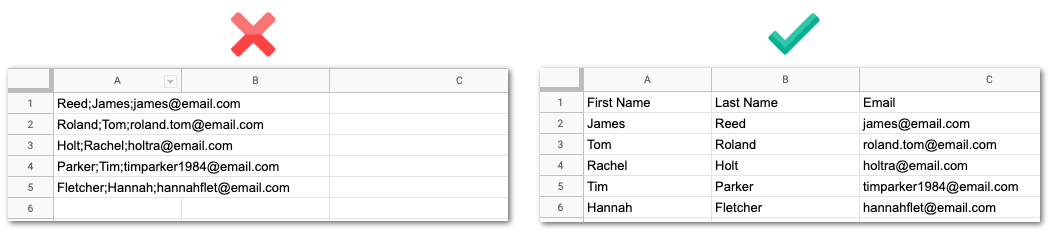
Keep the following in mind when setting up your import file:
- You can import a maximum of 100 custom fields and include up to 200 columns.
- Include a header row in your file. Each header will match up to a field within Wix Contacts. You can include values for any of the default Wix Contacts fields or custom fields you've added.
- Make sure each row in your file contains an email address or phone number.
- Make sure your import file contains fewer than 20,000 contacts.
- Make sure any date fields are in the following format: YYYY-MM-DD.
- Make sure your file is a CSV file in UTF-8 encoding.
- Make sure your contact email addresses are correct. Mistyped emails such as @gmial.com or @gmal.com may cause your email marketing campaigns to bounce.
Check that your data is displayed correctly before moving to Step 2. If you're using software that isn't displaying your data correctly, open your CSV file using different software (e.g. Google Sheets).
Step 2 | Initiate the import process
From the Contacts area of your site's dashboard, start the process of importing your contacts.
To initiate the import process:
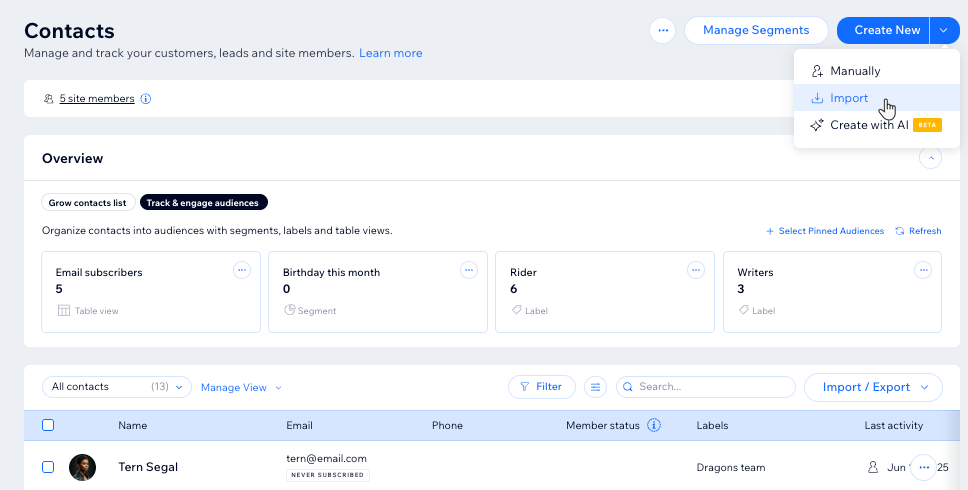
- Go to Contacts in your site's dashboard.
- Click the drop-down next to Create New at the top.
- Click Import.
- Click Get Started under CSV file.
- Click Next.
Step 3 | Upload your CSV file
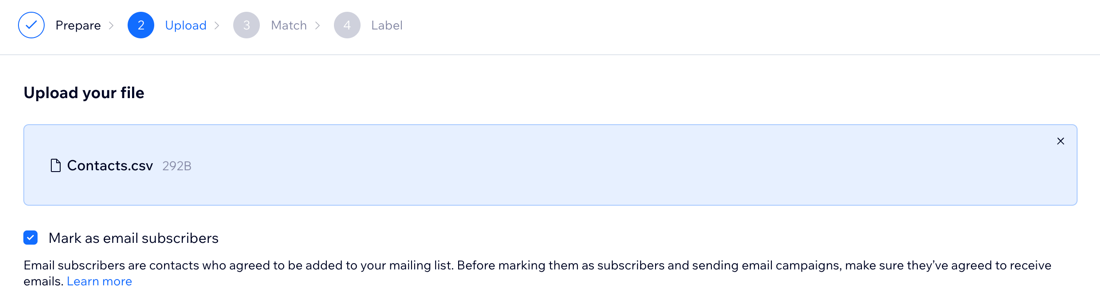
Upload your CSV file by dragging it onto your screen or selecting it from your computer.
To upload your CSV file:
- Click the Add + icon to browse for your file on your computer, or drag your file into the box.
- (Optional) Select the Mark as email subscribers checkbox if every contact you're importing has agreed to be added to your mailing list.
Tip: Learn more about the differences between contacts and subscribers. - Click Next.
Tip:
It might take a few seconds for your file to upload.
Step 4 | Match your fields to Wix contact fields
Wix will attempt to match the fields (column titles) from your CSV file with the contact fields in Wix Contacts. This happens during the upload process. If Wix can't work out a match, you can map these fields manually.
To match your file's fields to Wix contact fields:
- Review the drop-downs under Wix Contact Fields. For each drop-down, choose what you want to do:
- Leave the field as it is: Wix automatically maps the fields in your file to the Wix contact fields. You only need to make changes if the field displayed is incorrect.
- Select a new field: Choose an existing field or click Create Custom Field to create a new field.
- Do not import the field: Select - Don't Import - to leave this field out.
- Click Next.
Important:
Make sure to match fields that have an orange notification icon. Fields that are not matched will not be imported.

Step 5 | (If necessary) Review and fix file errors
Data errors will be flagged so you can return to your file and fix any missing or incorrect data (for example, a number in an email field). Fixing data at this stage means it will be imported successfully.
Note:
If you do not see this screen, skip this step.
If there are any errors in your file, you'll see the below Some Contacts Have Errors screen.
If you do not see this screen, skip this step.
To review and fix file errors:
- Click the view errors link under Want to fix your file?.
- Open the file and review the Import Status and Error Description columns.

- Make the recommended changes that appear in the Solution column.
- Click Back to Upload and upload your file again.
- Click Next.
- Follow step 4 above to match your file fields to Wix Contacts fields.
- Click Next.
Possible errors and what they mean:
- Contacts will be imported with incomplete or incorrect fields: There was a validation error in one of the fields - the contact will be created, but that field will be left blank.
- Contacts won’t be imported due to missing required fields: You need at least a complete email or phone field. If both are missing, the contact can’t be imported at all.
- Contacts won’t be imported because they are duplicates: Duplications are based on the email address. You cannot have 2 contacts with the same email address.
Step 6 | (Optional) Label and import your contacts
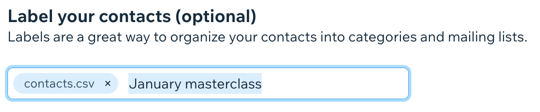
Label the set of contacts you're importing if you'd like to add a searchable tag to them. For example, if all these contacts attended the same yoga session, you could add a "yoga" label to help you identify them in the future.
To label and import your contacts:
- Click + Add Label and select an existing label, or start typing and press Enter to create a new label.
- Click Import.
- Click Done.