Email Marketing: Creating a Campaign in the Wix App
2 min
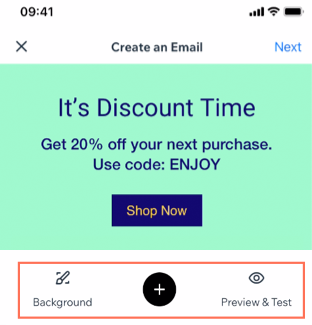
Create an email campaign for subscribers while on the go with the Wix app. Customize your campaign using all the same elements you use when creating on a desktop, including updating the email's background, image and text.
You can also send a test email to make sure the campaign looks great from a mobile device.
To create an email campaign in the Wix app:
- Go to your site in the Wix app.
- Tap Manage
 at the bottom.
 - Tap Marketing and select Email Marketing.
- Tap the campaign you want to edit or tap Create New Campaign to create a new one.
- Customize the campaign using the available options.
- Change the background color: Tap Background to update the background color of the email.
- Customize the email content:
- Tap the Add
 icon.
icon. - Choose an element to add to your email.
- Tap the Add
- Preview your email: Tap Preview & Test to see how your email looks on mobile.
- Send a test email:
- Tap Preview & Test.
- Tap Send Test at the top right.
- Enter an email address that should receive the test email under Send To.
- Tap Send at the top right.

- When you're finished creating your campaign tap Next at the top left.
- Choose how to publish your email:
- Send to Contacts: The campaign is sent to specific recipients from your contact list.
- Tap Send to Contacts.
- Tap Add next to Recipients to add contacts or email addresses who will receive the email marketing campaign.
- (Optional) Edit the email details such as subject line and From Name.
- Tap Send Campaign.
- Publish on Social: Share the email campaign on a social media platform.
- Tap Publish on Social.
- Tap Share Now.
- Choose a social app and follow the instructions to share on that platform.
- Send to Contacts: The campaign is sent to specific recipients from your contact list.
Note:
If you decide you're not ready to send the campaign, it is automatically saved in your Drafts tab.


