

CMS: Using Input Elements to Allow Visitors to Filter Content
15 min
In this article
- Step 1 | Add input elements set to filter content
- Step 2 | Connect your input element(s) to the CMS
- Advanced filtering conditions
- (Optional) Step 3 | Add a button to apply the filters
- (Optional) Step 4 | Add a reset button
- FAQs
Use input elements such as Dropdowns or Radio Buttons to provide a way for site visitors to filter the content that appears in repeaters, galleries, and tables. This article walks you through connecting input elements to a dataset that connects your CMS (Content Management System) collection to live site content.
Each input element connects to a specific collection field to show the field's unique values as filter options. When visitors select a filter option, only items with a matching field value appear in the connected repeater, gallery or table. Alternatively, you can add a conditional filter that changes the behavior of the filter. For example, you could add the "Is not" condition to create a filter that displays items that do not match the visitor's selection.
By default, when visitors select a filter, the content changes immediately. However, you can add an "apply filter" button if you want visitors' filters to be applied only after clicking a separate button. You can also add a reset button visitors can click to instantly clear all the filters they've set.
Before you begin:
- Add the CMS (Content Management System) to your site if you haven't already.
- Connect a repeater, gallery, or table to your CMS collection.
Step 1 | Add input elements set to filter content
Go to the page in your editor where you want visitors to filter the content that appears in a repeater, gallery, or table. Then add the input elements that you want visitors to use to filter the content. If you add multiple input elements, you can set each to filter a different collection field.
You can choose from the following input elements that allow filtering: Radio Buttons, Checkboxes, Dropdown, Selection Tags, or Slider (Range Sliders only). Keep in mind that each input element has limitations to the field types it can filter.
Wix Editor
Studio Editor
- Go to your editor.
- Go to the page that includes the repeater, gallery, or table you want visitors to filter.
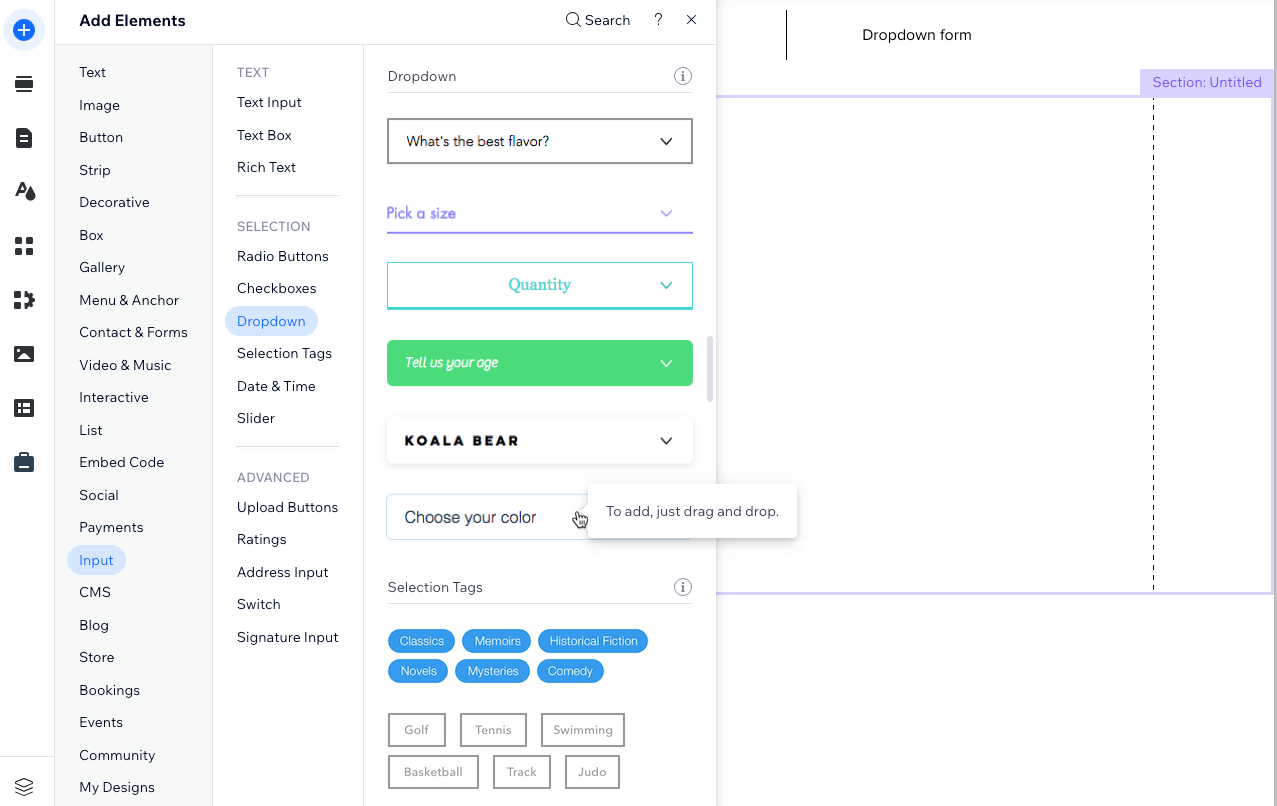
- Click Add Elements
 on the left side of the editor.
 - Click Input.
- Under Selection, click the type of input element you want visitors to use to filter content. Choose from the following elements that allow filtering: Radio Buttons, Checkboxes, Dropdown, Selection Tags, or Slider (Range Sliders only)
- Click and drag the relevant input element onto the page.
- (Optional) Repeat steps 3-6 above to add more input elements that your visitors will use to filter the content.
Step 2 | Connect your input element(s) to the CMS
Connect each input element to the same dataset that connects to your repeater, gallery, or table. Then choose which collection field each input element will filter. The input elements will display each unique value from the connected collection field. When a visitor makes a selection in the input, the repeater, gallery, or table displays only items that match the selected field.
You can also add conditional filtering that applies to the filter. For example, add the "Is not", "Does not equal", or "Does not include" conditions to create a filter that displays items that do not match the field that your visitor selects. When you add a condition to the filter, the field title and placeholder text on your input element automatically adjust to let visitors know what the filter does (e.g. "Exclude by field").
Adding filters and sorts to the dataset affects the input elements too:
Your input elements connect to a dataset that retrieves content from its connected collection fields. If you add filters to the dataset to exclude items from appearing, the excluded items and their field contents are not passed to the input elements. This means your input elements will only display unique field values from items that are included by the dataset. The dataset's sort conditions also affect the order in which the field selections appear in the input elements.
Wix Editor
Studio Editor
- In your editor, click the input element you just added.
- Click the Connect to CMS icon
 .
. - Click Filter content.
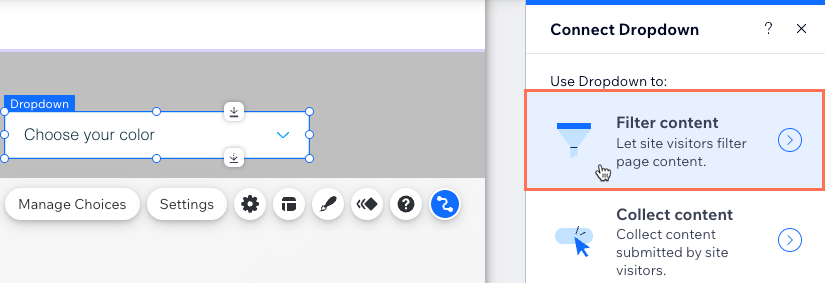
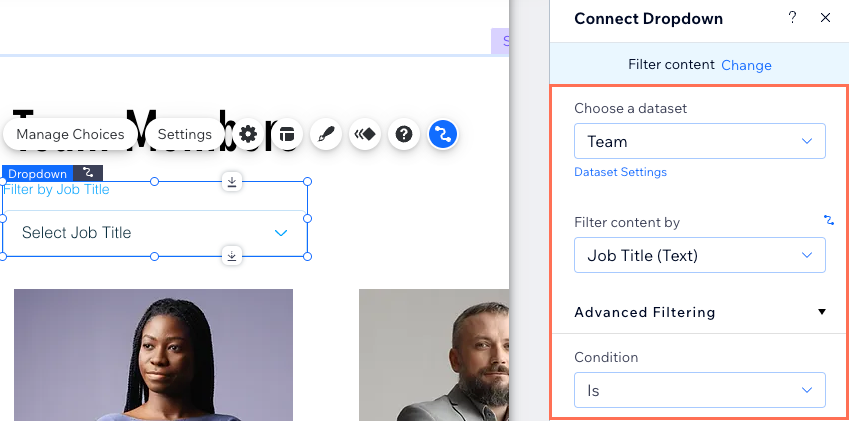
- Click the Choose a dataset drop-down and select the same dataset that connects to the repeater, gallery, or table that you want visitors to filter.
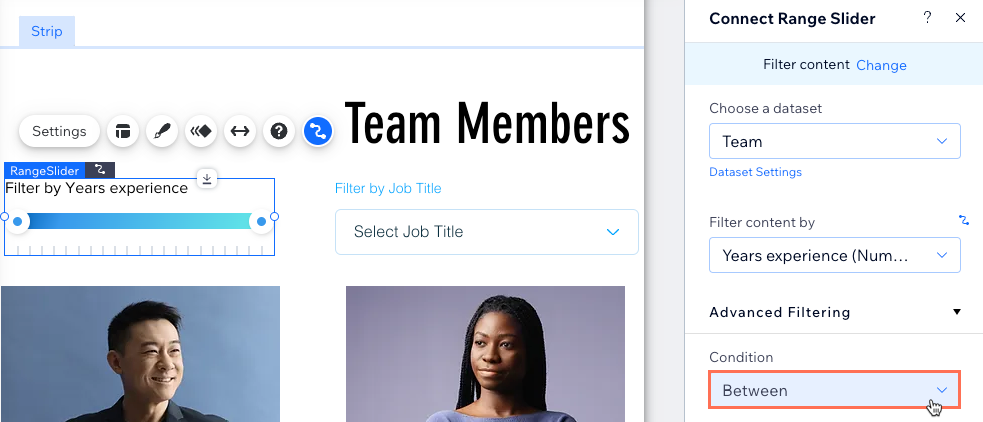
- Click the Filter content by drop-down and choose which collection field visitors will use to filter the content that displays.
- (Optional) Add a condition that affects how the filter works:
- Click Advanced Filtering.
- Click the Condition drop-down and choose an operator that controls how the filter is applied (e.g. Is not, Does not equal, Does not include).
Note: The conditions vary depending on the input element type and the connected field type. See the Advanced filtering conditions for each input element section below for details.
- Repeat these steps for each input element you want visitors to use to filter content.
- Click Preview to test using your inputs element(s) as filters.
- Click Publish if you are ready to make the changes go live.
Advanced filtering conditions
Click below to view the advanced filtering conditions available for each input element:
Dropdown and Radio Buttons
Selection Tags
Multi Checkboxes
Checkbox
Range Slider
(Optional) Step 3 | Add a button to apply the filters
If you only want the filters your visitors select to be applied after clicking a separate button, you can create an 'apply filters' button. When visitors click this button, all the input element filters they selected are applied. Without it, the filters are applied as soon as visitors select them from each input element.
Wix Editor
Studio Editor
- Click Add Elements
 on the left side of the Editor.
 - Click Button.
- Click the button you want to use for applying the filters and drag it onto the page. You can use any of the following button types: Themed Buttons, Text & Icon Buttons, Icon Buttons, or Image Buttons.
Tip: Alternatively, you can add an image and use it as your 'apply filters' button. - Click Change Text and enter the text you want to display on the button (e.g. "Apply Filters").
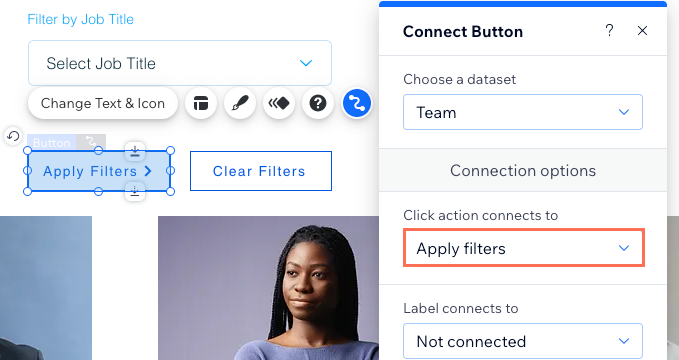
- Click the Connect to CMS icon .
- Click the Choose a dataset drop-down and select the same dataset that connects to the repeater, gallery, or table.
- Click the Click action connects to drop-down and select Apply filters.
- Click the button and select the Design icon
 to customize the appearance of your 'apply filters' button.
 - Click Preview to test your 'apply filters' button.
- Click Publish if you are ready to make the changes go live.
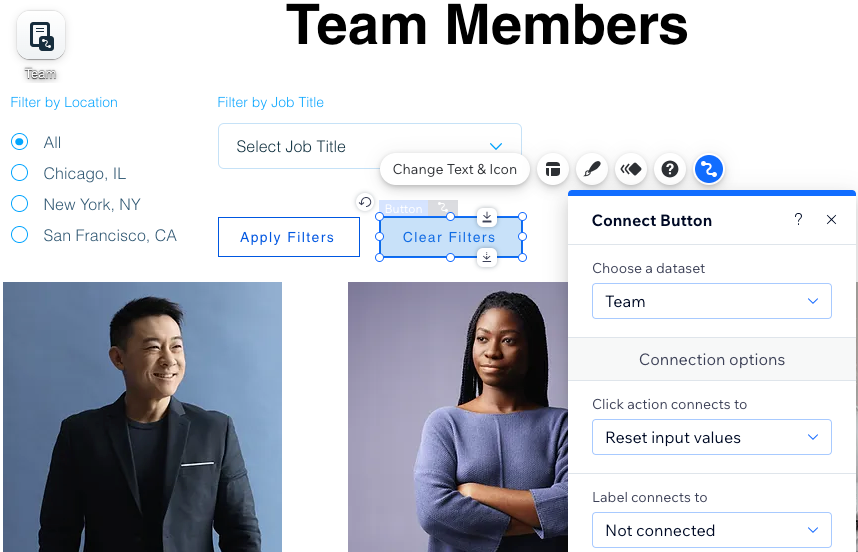
(Optional) Step 4 | Add a reset button
You can create a reset button that visitors click to reset all the input element filters they've selected. This provides an easy way for visitors to start over and filter the content without having to refresh the page.
Wix Editor
Studio Editor
- Click Add Elements on the left side of the Editor.
- Click Button.
- Click and drag the button you want to use as your reset button onto the page. You can use any of the following button types: Themed Buttons, Text & Icon Buttons, Icon Buttons, or Image Buttons.
Tip: Alternatively, you can add an image and use it as your reset button. - Click Change Text and enter the text you want to display on the button (e.g. "Reset Filters").
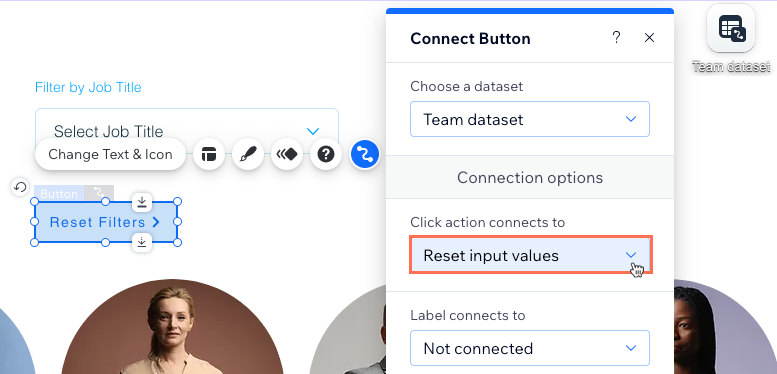
- Click the Connect to CMS icon .
- Click the Choose a dataset drop-down and select the same dataset that connects to the repeater, gallery, or table.
- Click the Click action connects to drop-down and select Reset input values.
- Click the button and select the Design icon to customize the appearance of your reset button.
- Click Preview to test your reset button.
- Click Publish if you are ready to make the changes go live.
FAQs
Click below for answers to the most common questions about using input elements to filter content.
What dataset mode and collection permissions should I set when allowing visitors to filter content?
Can I allow visitors to filter Wix app collection content?
Can site visitors use input elements to submit content to my collection?
How do I troubleshoot if my filters aren't working as expected?
