

Wix Mobile Apps: Setting Up an Automated Push Notification for Your Own App
5 min
In this article
- Step 1 | Create an automation with 'send a push notification' as the action
- Step 2 | Configuring your push notification message
- Step 4 | Choose the timing and activate the automation
- FAQs
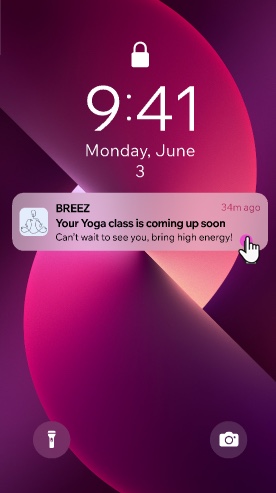
Create an automation that sends push notifications to your native mobile app users when they perform a specific action. The notification appears on their lock screen with a custom message, and you decide what happens when they tap it.
If you use Wix Stores or Wix Bookings, you can link the notification directly to a product or service page. For instance, after a yoga class, send attendees a push notification with a link to a yoga mat in your store.
Note:
Customized push notifications for your own native app are only available if you have a Mobile App Premium plan and your app is live in the App Store and Google Play Store.
Step 1 | Create an automation with 'send a push notification' as the action
The first step is to create a new automation. Choose a trigger that works for your business, such as every time a store order is placed, or when an invoice is overdue. When you select an action for your automation, choose 'send push notification.'
To create an automation with the push notification action:
- Go to Automations in your site's dashboard.
- Click + Create Automation at the top right.
- Click + Start from Scratch.
- (Optional) Click Untitled Automation to name your automation.
- Choose a trigger (e.g. when someone books an online session).
- Click the Add icon
 and then click Action.
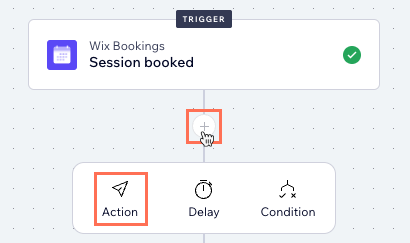
- Click Send a push notification.
Step 2 | Configuring your push notification message
Choose the recipient, title, and message for your push notification. Keep the message short and clear, and set what opens when someone taps it.
You can personalize messages with dynamic text, like the recipient’s first name, and group them by topic so users choose what they want to receive. Then, decide whether the notification opens your app’s home screen or a specific page, like a booked class.
Note:
Push notifications are available for all collaborators. To send them to contacts, the contacts need to have your native mobile app installed.
To configure your push notification message
- Follow the steps below to configure your push notifications:
- Recipient type: Choose who to send the notification to:
- Site collaborators: Send push notifications to your team. Select the roles to include in the Recipients section.
- Contacts: Send notifications to a specific contact or group. Add your contacts in the Recipients section.
Note: Push notifications can only be sent to contacts who use your app.
- Message: Choose the message you want to send.
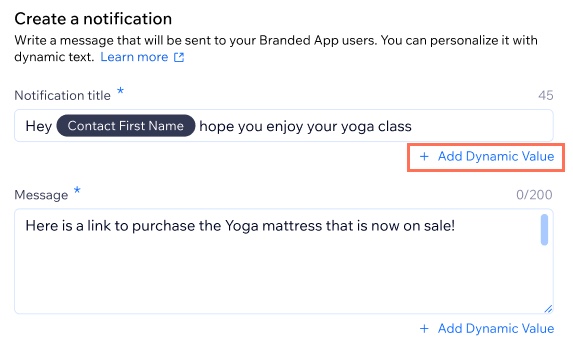
- Enter the notification title that appears above the main message.
- Enter the push notification message.
Tip: Keep your message clear and concise since it appears on smaller device lock screens. - (Optional) Click + Add Dynamic Value under Title / Message. Dynamic values appear in bold at the top of your notification. Then select the relevant dynamic value and click Add. in the pop-up.
- Notification topic: Select a topic from the drop-down, so recipients can choose the notifications they want to receive.
Note: Notification topics depend on the trigger you select.
- Recipient type: Choose who to send the notification to:
- Click Apply.
The available dynamic values depend on the apps you have installed.
What is a dynamic value?
Step 4 | Choose the timing and activate the automation
The final step is to set up the automation's timing and activate it. You may want to send the push notification immediately after the trigger occurs or set a delay. For example, if your trigger is "Customer abandons a cart", you would probably want it to be sent after a certain amount of time has passed.
Once active, you can track the new automation from the Automations dashboard to see how many times it was triggered.
To choose the timing and activate the automation:
- (Optional) Add delay to the automation:
- Click the Add icon
- Click Delay.
- Click the up and down arrows to set the number and click the drop-down to choose between days, hours and minutes.
- Click the Add icon
- Click Apply.
- Click Activate at the top right to publish your automation.
What's next?
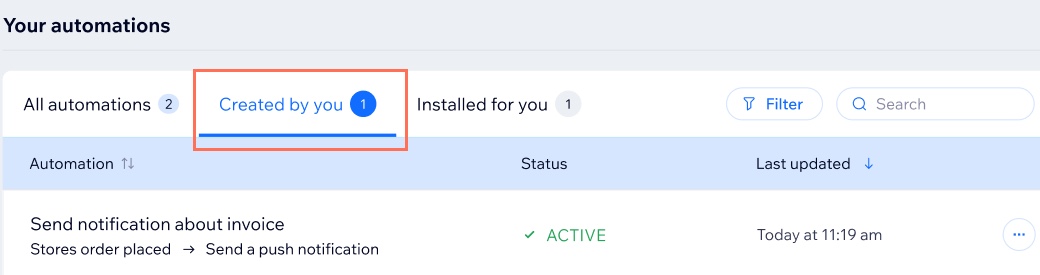
The new automation appears on your Automations dashboard under the Created by you tab. If the automation status is set to Active it means it's live. From here you can also edit, deactivate or delete it.
FAQs
Click a question below to learn more about notification for your own mobile app.
How do I enable notifications for my own mobile app?
Why can't my app users see my push notifications?
How do I see how many times my automation has been triggered?
Can I send automated push notifications if I don't have a native mobile app?
Is it possible to delete a push notification after I've sent it?
