Wix Mobile Apps: Customizing Member Permissions in Your Native Mobile App
11 min
In this article
- Setting member visibility
- Customizing member info in the header
- Limiting access to specific screens
- Limiting access to sections based on operating system
- Approving or denying new member requests
Control what your members can and can't do in your native mobile app by setting specific member permissions. Setting permissions allows you to understand at all times who is joining your app as well as your current member activity. Hide information you don't want members to see, or limit access to specific screens based on criteria such as badges or pricing plans.
If you have a social aspect to your own app such as a blog, forum or chat, you can also change permissions so members cannot chat with one another and can only speak to you, the business.
Setting member visibility
Choose whether you want members to have the ability to see each other's activity and socialize in your app. If you have Wix Chat installed, you can turn off the feature that allows members to chat with one another.
Wix app
Wix Studio app
- Go to your site in the Wix app.
- Tap Manage
 at the bottom.
 - Scroll down and tap Settings.
- Tap Member Privacy.
- Under Who can set their profile to public? choose if you want member activity to be visible to others. This includes members chat.
- All site members: Members as well as their social activity (e.g. liking blog posts, posting in a forum) are visible to all other members. Members can also chat with each other.
- No one: Members cannot see each other's activity or a member list. They cannot chat with each other and can only chat directly with the business.
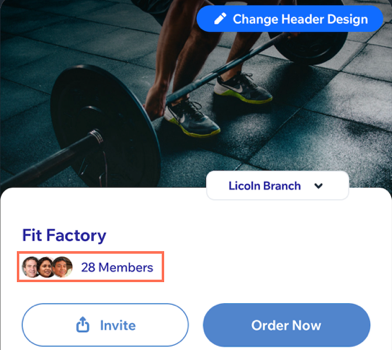
Customizing member info in the header
With a minimal header, member details won’t be visible. For detailed headers, you can choose whether to show or hide the total number of members and their profile images in your mobile app.
Wix app
Wix Studio app
- Go to your site in the Wix app.
- Tap Manage at the bottom.
- Tap Mobile App.
- (If needed) Switch to editing your own mobile app:
- Tap the member app name at the top (e.g. Spaces by Wix).
- Select Mobile App Builder.
- Tap Edit.
- Tap the Change Header Design at the top.
- Tap the Detailed header and then tap Customize.
- Scroll down to Members info and tap the Show member count toggle to display your app members and their profile images.
- Enabled: All members can see the total number of current members as well as profile image icons. Tap the Show Member Profile toggle to show or hide the profile images (members will still see the member count).
- Disabled: Members cannot see any information about other members of your app.
Limiting access to specific screens
You can change the permissions of each screen in your app so only members with a specific badge or pricing plan can access that screen's content.
Before you begin:
Set your native mobile app to visitor mode to access more permission options for each screen. In member mode, selecting 'All members' gives everyone access and hides those advanced settings.
Wix app
Wix Studio app
- Go to your site in the Wix app.
- Tap Manage at the bottom.
- Tap Mobile App.
- (If needed) Switch to editing a different mobile app:
- Tap the mobile app name at the top.
- Tap the relevant mobile app.
Tip: If you want to edit a different mobile app (e.g. Fit by Wix, Spaces by Wix), choose the app as your preferred mobile app.
- Tap Edit.
- Tap Screens at the bottom.
- Tap the More Actions icon
 next to the relevant screen.
 - Tap Set screen permissions.
- (Visitor mode only) Select who can view this screen:
- Everyone: Anyone using your app can view the screen. Tap Done to set permissions to everyone.
- Members only: Limit access to certain members. Choose which members can access the screen:
All Members
Members with badges:
Members with Pricing Plans
Limiting access to sections based on operating system
Show or hide sections of your own app depending on the operating system your members are using on their mobile devices. This is useful if you want to create different content for each platform, or showcase a section that's only relevant for members using iOS.
Wix app
Wix Studio app
- Go to your site in the Wix app.
- Tap Manage at the bottom.
- Tap Mobile App.
- (If needed) Switch to editing your own mobile app:
- Tap the member app name at the top (e.g. Spaces by Wix App).
- Select Mobile App Builder.
- Tap Edit.
- Tap the Screen drop-down at the top and choose the screen you want to edit.
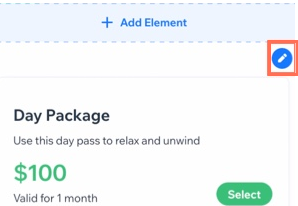
- Tap the Edit icon
 at the top right of the section you want to show or hide.
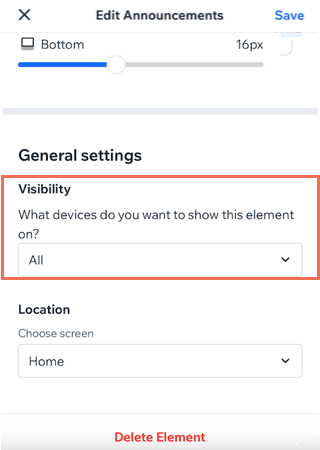
- Tap Customize element.
- Scroll to the bottom and tap the drop-down under Visibility.
- Choose what device this element should show on: Android, iOS, or All.
- Tap Save.
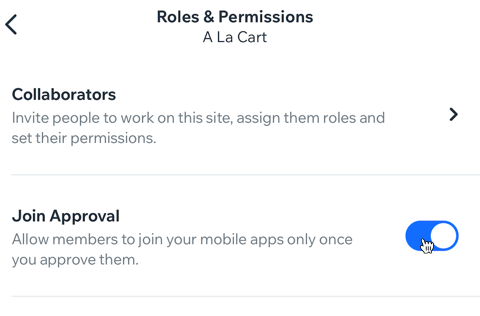
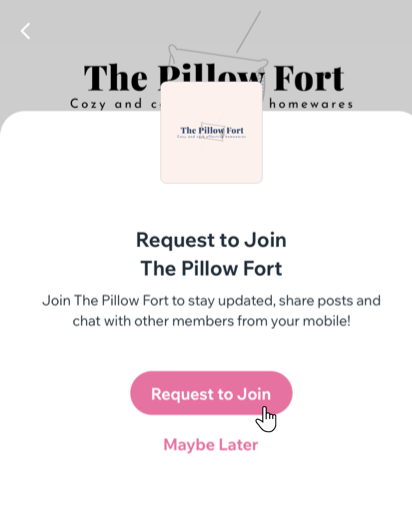
Approving or denying new member requests
Choose to approve or deny each person who requests to be an app member. Even if you have shared an invite code to join, you must still approve each request if the 'Join Approval' toggle is enabled. When enabled, new members will have a 'Pending' status until you approve or deny their request. You’ll receive a notification when someone requests to join your app.
Note:
If you have your login screen visibility settings set to member mode, anyone who downloads your app sees the login screen as soon as they launch the app and cannot view any preview content. Learn more about member mode vs. visitor mode.
Wix app
Wix Studio app
- Go to your site in the Wix app.
- Tap Manage at the bottom.
- Tap Settings then tap Your Mobile App.
- Tap Join approval and enable the toggle.