Adding and Setting Up the Product Stickers app
3 min
In this article
- Step 1 | Add the Product Stickers by PoCo app to your site
- Step 2 | Create your sticker
Important:
As of June 13th 2025 the Site Badges app will no longer be supported. To ensure your site continues running without interruptions, we recommend switching to the Product Stickers app.
With the Product Stickers app by PoCo, you can highlight sales, new arrivals, bestsellers, and more with eye-catching labels that shoppers can’t miss. The Product Stickers app also lets you target specific products, collections, or carousels, and control the size and placement of your stickers for a professional and polished look.
Step 1 | Add the Product Stickers by PoCo app to your site
Start by adding the app to your site. In order to add this app, you need to have Wix Stores installed on your site.
Wix Editor
Studio Editor
Harmony Editor
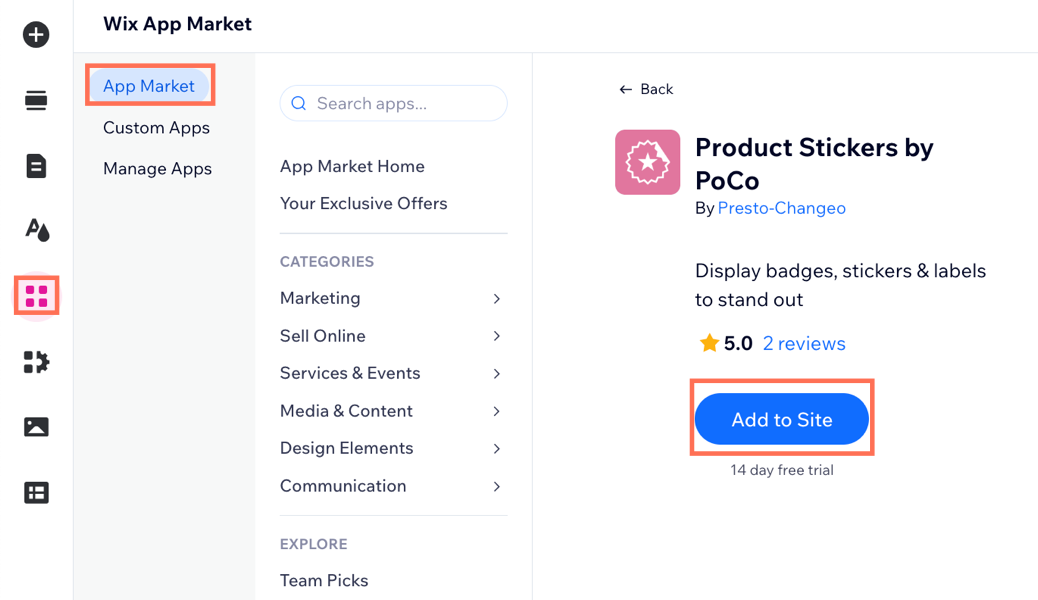
- Go to your editor.
- Click Add Apps
 on the left side of the editor.
 - Search for the Product Stickers by PoCo app in the search bar.
- Click Add to Site.
- Review the additional information and click Agree & Add.
Step 2 | Create your sticker
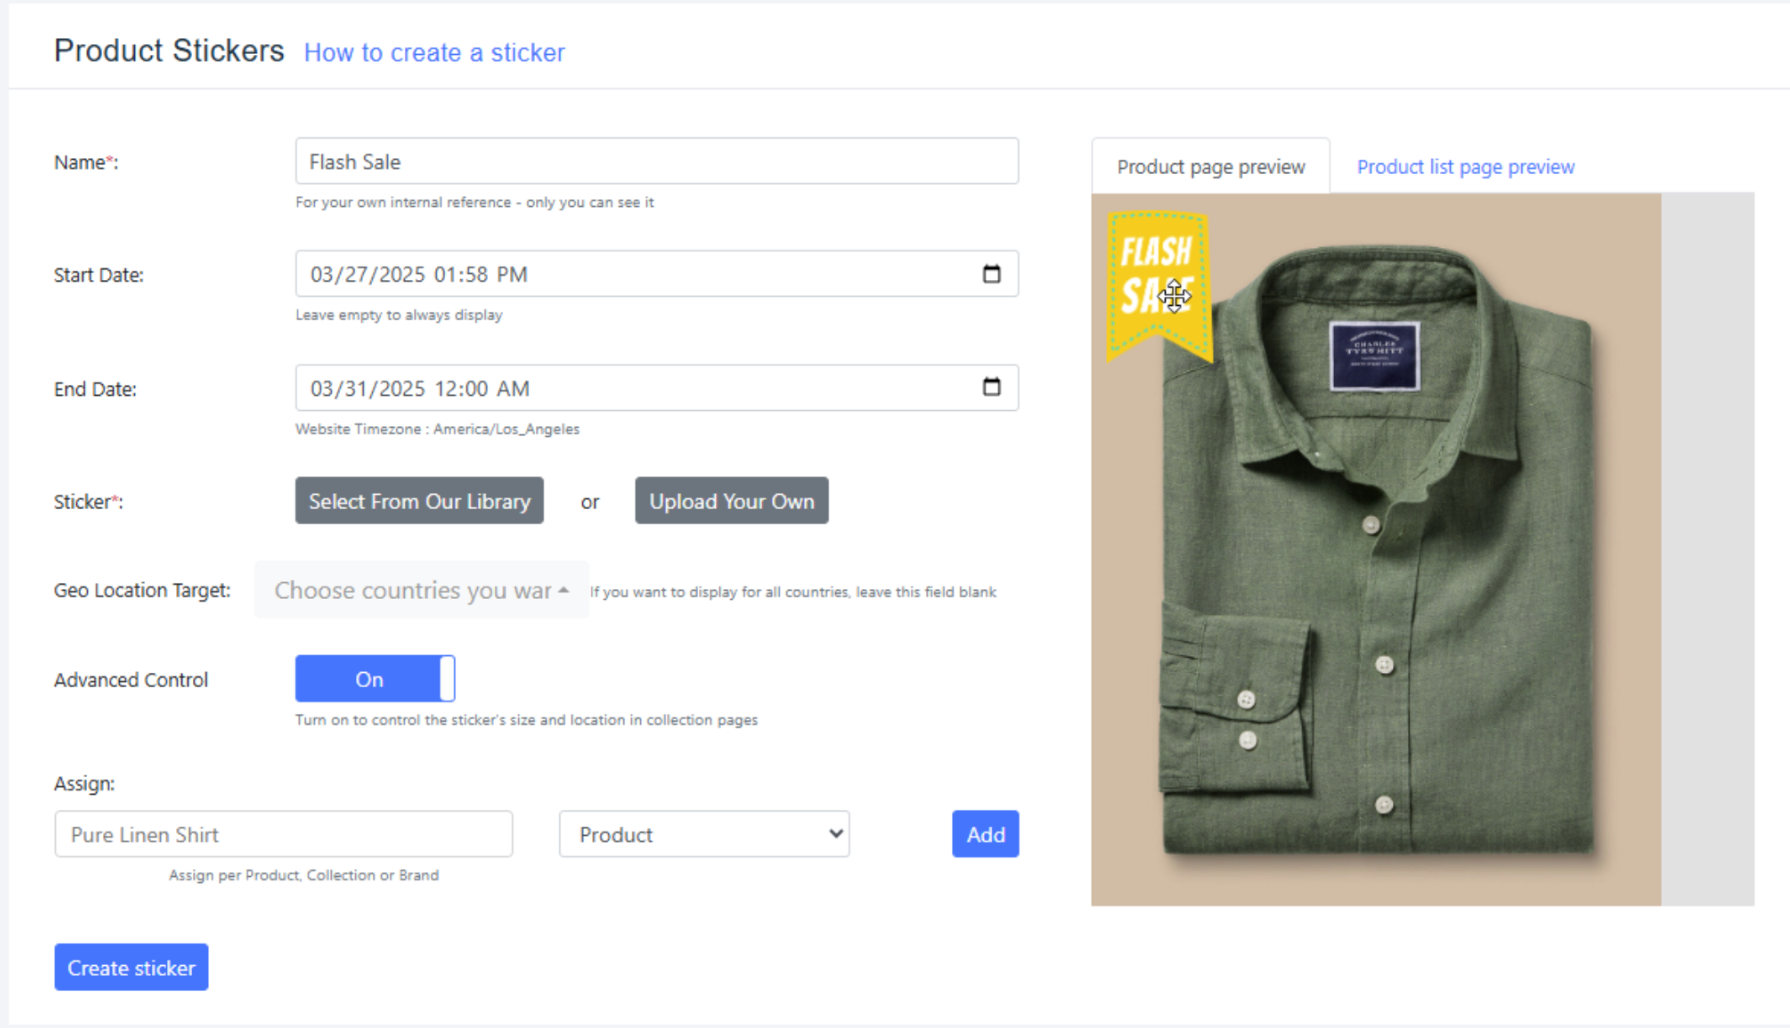
Next, create a sticker. Choose a start and end date and select the location you want to target.
To create a sticker:
- Enter a name for your sticker.
- Enter the duration of time the sticker displays for using in the Start Date and End Date fields.
Note: If you leave this blank, the sticker is always displayed. - Select a sticker from our library to use or upload your own file. The sticker displays in the preview area.
- Click the Geo Location Target drop-down and select the location the sticker displays in.
Note: If you leave it blank it shows globally. - (Optional) Enable Advanced Control to manage the size and location of the sticker in collection pages, e.g. your store pages.
- Enter the product, brand or category to assign the new sticker to.
- Click Add.
- Click Create Sticker.