Wix Editor: Adding and Managing Links in Your Menu
3 min
In this article
- Adding a link to your menu
- Managing your menu links
Add a link to your site menu to direct your visitors to important information such as sections, files, and external URLs. You can also link your phone number or email address so visitors can easily reach you or your business.

You should know:
This article refers to a regular site menu, and not advanced menus. If you have an advanced menu, you can learn how to add links here.
Adding a link to your menu
Get started by adding a link as a menu item. Links look like regular menu items, and you can name them whatever you want.
What kind of menu links can I add?
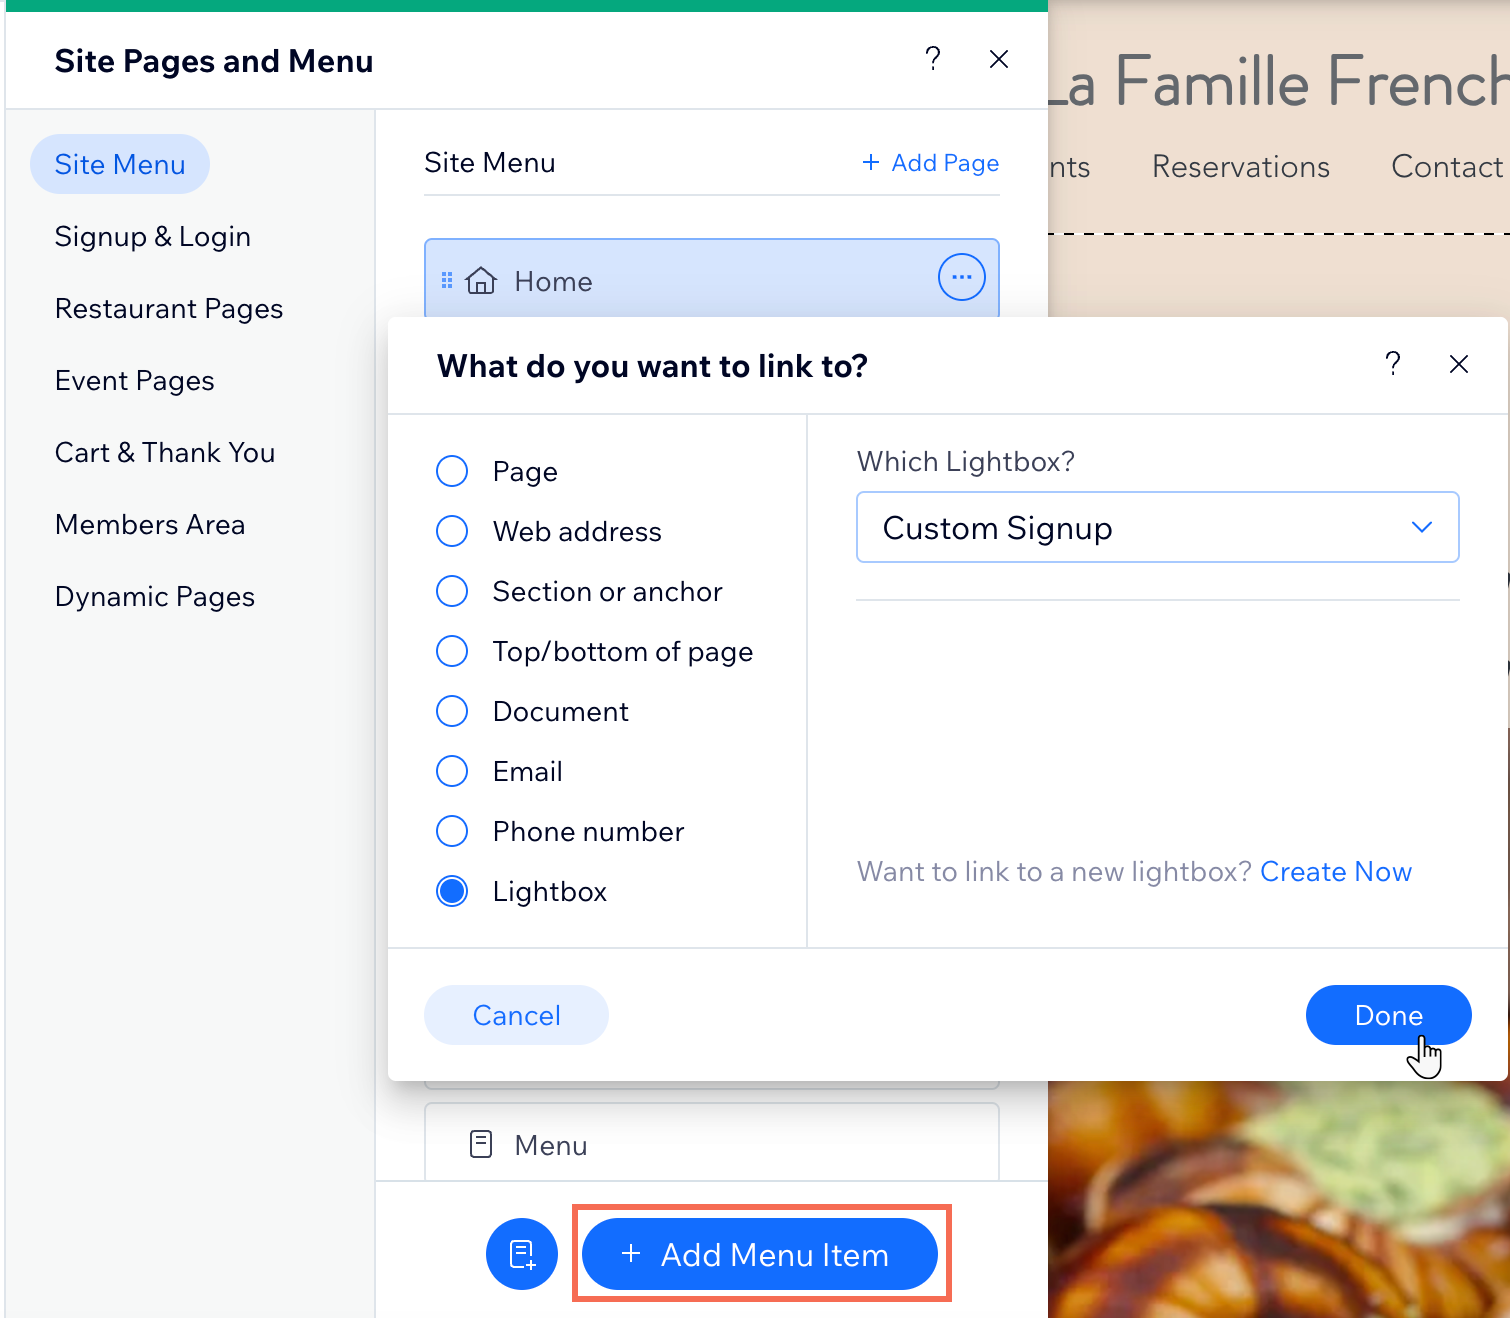
To add a link to your menu:
- Click Pages and Menu
 on the left side of the editor.
 - Click Add Menu Item and select Link.
- Select the relevant link type on the left.
- Enter the relevant details.
- Click Done.
- Enter a name for the new menu item and click Done.
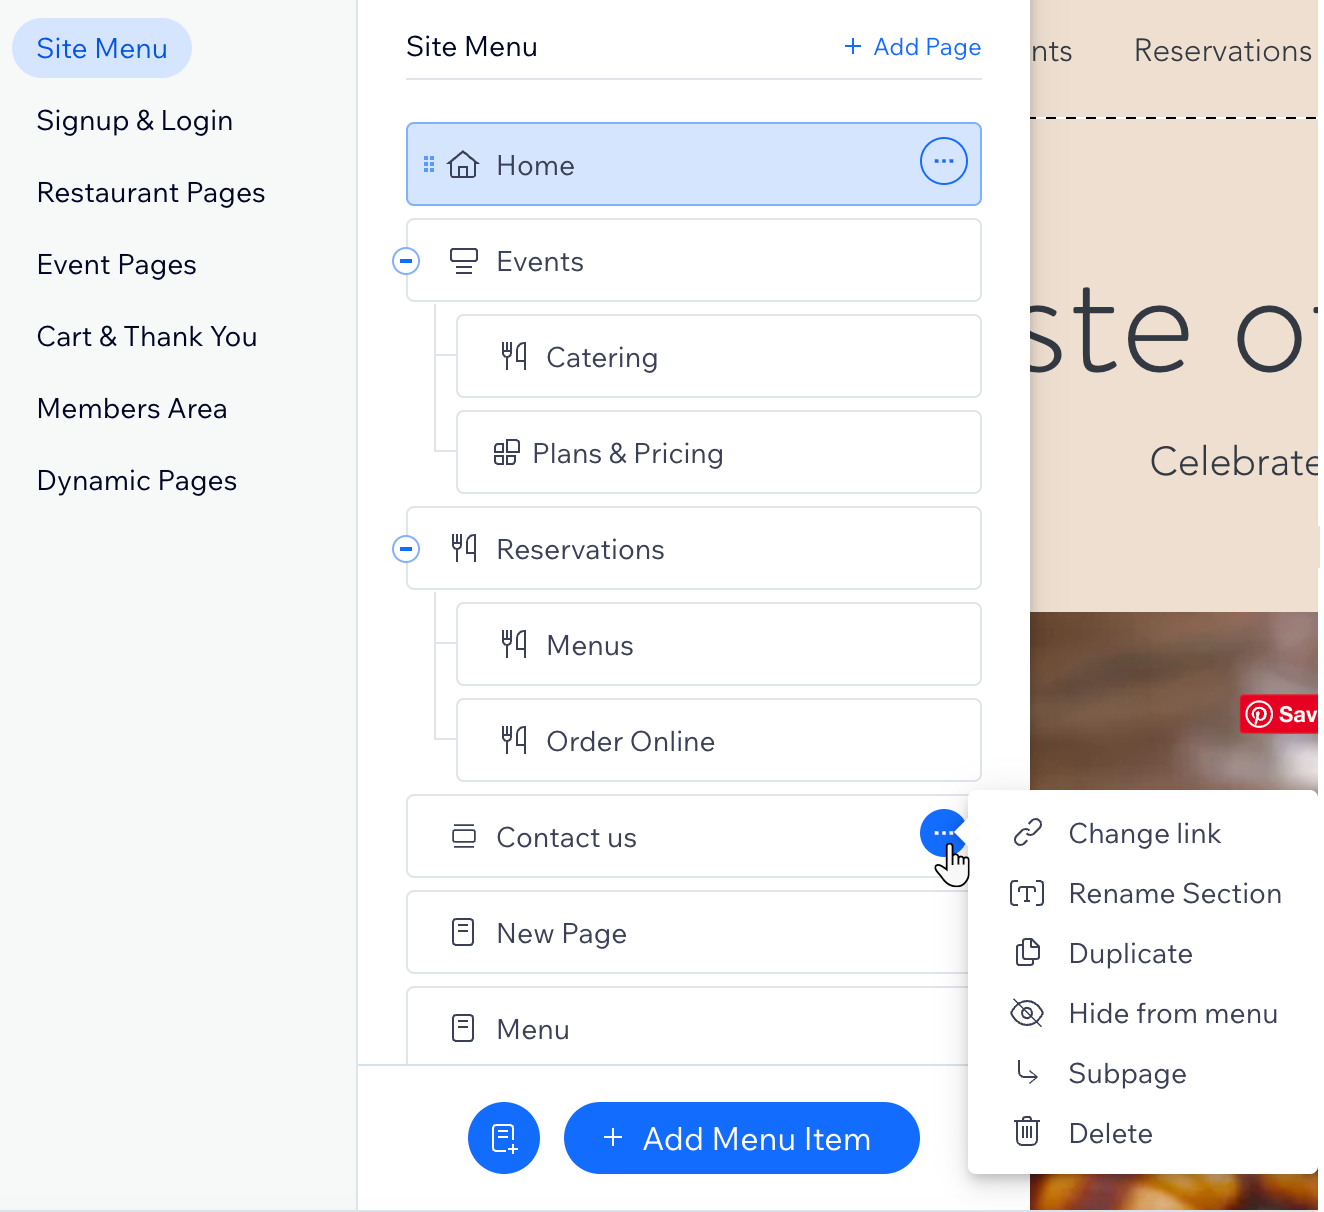
Managing your menu links
Keep your menu up to date by managing your menu items as you go.
To manage your menu links:
- Click Pages and Menu on the left side of the editor.
- Click Site Menu.
- Hover over the relevant menu item and click the More Actions icon
.
- Choose what you want to do with the item:
- Change link: Change to another link type or change the link details.
- Rename: Change the name of the item on your site menu.
- Duplicate: Make an exact copy of the item in your menu.
- Hide from menu / Show in menu: Hide the item from your menu or show it.
- Subpage / Main page: Turn the link into a subpage under the menu item above it, or turn it back into a main page on the menu.
- Delete a menu link: Remove the link from your site menu.
Did you know?
The icon that appears next to your link in the Pages and Menu panel represents the link type (e.g.  Web address,
 Lightbox,
  Section).
Web address, Lightbox, Section).