


Wix Editor: Adding and Setting Up a Horizontal Menu
6 min
In this article
- Step 1 | Add a horizontal menu
- Step 2 | Design the menu
- Step 3 | Adjust the layout of the menu
Horizontal menus display your items and drop-down menus clearly to help your site visitors navigate around your site. They are usually placed at the top of your site's pages.
Step 1 | Add a horizontal menu
Add a horizontal menu to get started on creating something fun and informative for your site. There are a variety of colorful and bold options to choose from, and you can customize and adjust the layout.
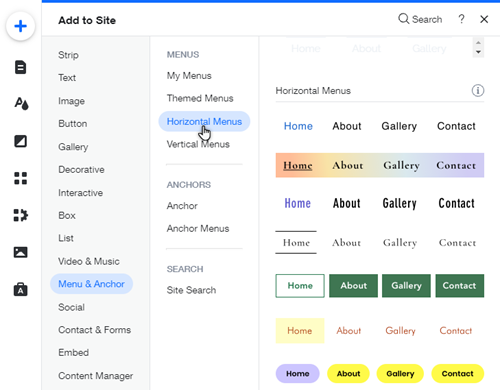
To add a horizontal menu:
- Click Add
on the left side of the Editor.
- Click Menu & Anchor.
- Click Horizontal Menus.
- Drag a menu onto your page.
Step 2 | Design the menu
After adding the menu, you can begin customizing it to look exactly how you want. The menu items have three separate states that can be adjusted separately:
- Regular: How the item/text looks before a visitor has moved their cursor over it.
- Hover: How the item/text looks when a visitor's cursor is hovering over it.
- Current page: How the item/text is displayed when it is the page the visitor is currently on.
You can customize the design for each of these states, such as the text, fills, borders, and more.
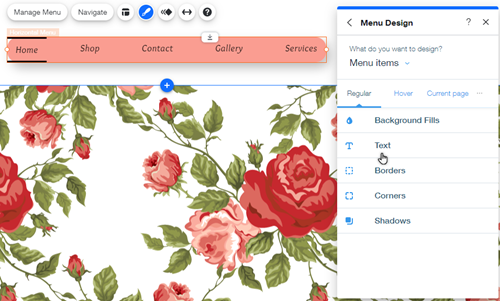
To customize the menu design:
- Click the menu.
- Click the Design icon
.
- Click Customize Design and adjust the menu with the available options.
Tell me more
 : Customize the menu's fill color and opacity.
 : Adjust the menu's border width, color, and style.
 : Adjust the menu's corner radius.
 : Add and customize a shadow.
Tip:
Click Dropdown Menu from the Customize Design panel to adjust the dropdown menu's items and text.
Step 3 | Adjust the layout of the menu
You can adjust the layout of your site menu to further suit your site's needs. You can edit the menu and dropdown menu layout settings separately, and adjust settings such as text, spacing, and alignment.
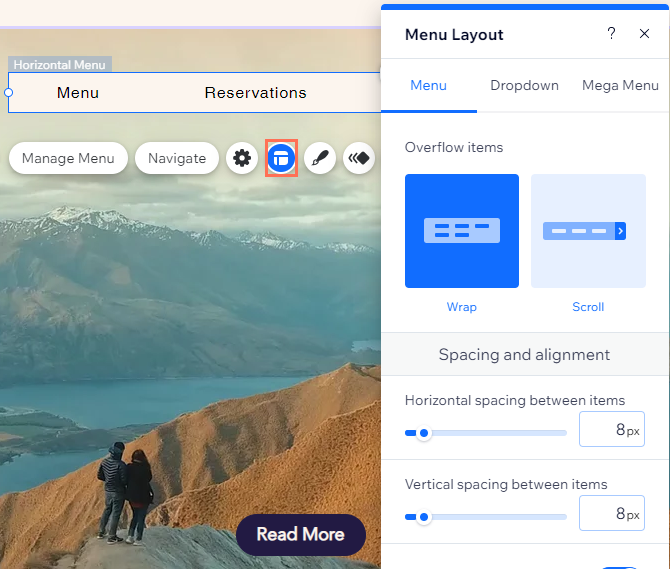
To adjust the layout:
- Click the Layouts icon
.
- Click either the Menu or Dropdown menu tab and customize the options:
Menu layout options
Dropdown menu layout options
What's next?
Add items to your menu to direct visitors to interesting and relevant content. Learn how
