Manage your store's shipping, right from your mobile phone. You can set up different shipping rules for different regions. For example, you can offer local delivery to customers in a 3-mile radius from your business, free shipping to customers in your country, and a flat shipping rate to customers around the world.
In this article, learn how to:
Adding and managing shipping regions
Before a customer can purchase items from your store, there has to be a shipping, delivery, or pickup rule that covers their region.
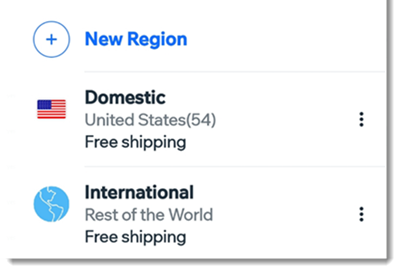
New stores come with 2 shipping rules already set up - a free shipping rule for your region and a free international shipping rule for the rest of the world. You can edit these rules or delete them and create rules from scratch.
To add and manage regions:
- Go to your site in the Wix app.
- Tap Manage at the bottom.
- Tap Sales.
- Tap Orders.
- Tap the Settings icon .
- Select Set shipping.
- Choose what you want to do:
Add a new shipping region
- Tap + New Region.
- Enter a region name.
Tip: Only you see this name. - Tap + Add Destination.
- Tap the destination(s) you want to add to this shipping rule.
- (Optional) Select specific regions inside this destination:
- Tap the country you added.
- Deselect any states / provinces you don't want to ship to.
- Tap Save.
- Tap Save.
Setting up shipping in a region
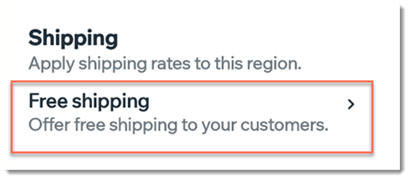
By default, every shipping region is set for free shipping. You can leave this as is or select a shipping rule that works for your store.
To set up shipping:
- Go to your site in the Wix app.
- Tap Manage at the bottom.
- Tap Sales.
- Tap Orders.
- Tap the Settings icon .
- Select Set shipping.
- Tap the region you want to set up.
- Choose the type of shipping rule you want to set up:
Free shipping is the default shipping rule. Just tap Save to save this rule.
To simplify shipping, you can set a flat rate for all your orders (e.g. shipping for all orders is $8).
To set up flat rate shipping:
- Tap the existing shipping rule.
- Tap the Shipping method drop-down and select Flat Rate.
- Tap Next.
- Create a delivery option (e.g. Standard Shipping, Express Shipping):
- Enter a title in the Delivery Option Name field.
Note: Customers see this name at checkout. - (Optional) Enter a time in the Est. Delivery Time field.
- Enter the shipping fee in the Rate field.
- (Optional) To offer free shipping on orders above a specific price:
- Select the Offer free Shipping when... checkbox.
- Enter the price above which shipping is free and tap Done.
Note: If you create additional shipping services (e.g. priority shipping), this checkbox must be selected and the amount specified to apply to each service. - Tap Save.
- (Optional) Create an additional option (e.g. Express Shipping) by tapping +Add Shipping Option and follow the instructions above.
- (Optional) Add a handling fee:
- Select the Add a handling fee to every order checkbox.
- Enter the fee amount.
- Tap Save.
- Tap Save.
- Tap Save again.
Setting your shipping rate by weight is ideal for stores that sell items that cost very different rates to ship because of their weight (e.g. a store that sells jewelry and winter coats).
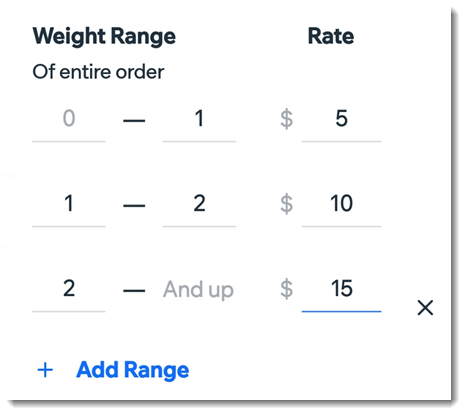
To set it up, create 2 or more weight categories and set a shipping price for each. For example, shipping can cost $5 for orders under 1 pound, $10 shipping for orders between 1 - 3 pounds, and $15 shipping for orders that weigh over 3 pounds.
To set up shipping rates by weight.
- Tap the existing shipping rule.
- Tap the Shipping method drop-down and select Rate by Weight.
- Tap Next.
- Create a delivery option (e.g. Standard Shipping, Express Shipping):
- Enter a title in the Delivery Option Name field.
Note: Customers see this name at checkout. - (Optional) Enter a time in the Est. Delivery Time field.
- Enter the top limit of the first weight range (e.g. enter 1 lb. to create a rule for purchases from 0 - 1 lb).
Note: The top limit of the first weight range is automatically set as the bottom limit of the second weight range.
- Enter the rate (shipping price) for the first weight range (e.g. $5).
- Create the second weight range: (e.g. 1 lb- 2 lb) and add the shipping rate (e.g. $10): Tap + Add Range to enter the new range or If this your last weight range (e.g. 2 lb and up), just enter the shipping rate.
- (Optional) Tap Add Range to add any additional ranges.
- (Optional) Offer free shipping on orders above a specific price:
- Select the Offer free Shipping when... checkbox.
- Enter the price above which shipping is free and tap Done.
Note: If you create additional shipping services (e.g. priority shipping), this checkbox must be selected and the amount specified to apply to each service. - Tap Save.
- (Optional) Create an additional option (e.g. Express Shipping) by tapping +Add Shipping Option and follow the instructions above.
- (Optional) Add a handling fee:
- Select the Add a handling fee to every order checkbox.
- Enter the fee amount.
- Tap Save.
- Tap Save.
- Tap Save again.
Rate by order price shipping
You can set your shipping fees so that the price of the order determines how much customers pay for shipping. For example, you can charge $10 for shipping for orders between $0 - $100. Then, you can charge less or more for shipping, when the order is for $100 and over.
To set up shipping rates by price:
- Tap the existing shipping rule.
- Tap the Shipping method drop-down and select Rate by Order Price.
- Tap Next.
- Create a delivery option (e.g. Standard Shipping, Express Shipping)
- Enter a title in the Delivery Option Name field.
Note: Customers see this name at checkout. - (Optional) Enter a time in the Est. Delivery Time field.
- Create the first price range: (e.g. $0 - $15) and add the shipping rate (e.g. $4).
- Create the second price range: (e.g. $15 - $30) and add the shipping rate (e.g. $8):
- If this is your last price range (e.g. $15 and up), just enter the shipping rate.
- If you plan to add more price ranges, tap + Add Range to enter the new range and shipping rate.
- (Optional) To offer free shipping on orders above a specific price:
- Tap to enable the Offer free Shipping toggle.
- Enter the price above which shipping is free and tap Done.
Note: If you create additional shipping services (e.g. priority shipping), this checkbox must be selected and the amount specified to apply to each service. - Tap Save.
- (Optional) Create an additional delivery option (e.g. Express Shipping) by tapping + Add Shipping Option and following the instructions above.
- (Optional) Add a handling fee:
- Tap Add next to Handling Fee.
- Enter the fee amount.
- Tap Save.
- Tap Save.
- Tap Save again.
Setting up local delivery in a region
Offer a hand-delivery option to customers who are located near your business location(s).
Note: To set up scheduled delivery (where your customer can select the delivery time), go to desktop.
To set up local delivery:
- Go to your site in the Wix app.
- Tap Manage at the bottom.
- Tap Sales.
- Tap Orders.
- Tap the Settings icon .
- Select Set shipping.
- Select the region you want to set up.
- Tap + Add Local Delivery.
- Enter an area name (e.g. Delivery to Bronx).
- Select how you want to define the delivery area:
- Radius:
- (Optional) edit your business address.
Tip: This address is the center of the radius you set. - Enter the radius (e.g. 3 miles).
- Postal code:
- Tap + Add ZIP/Postal Codes.
- Select any of the following options:
- Tap Add at the top right.
- Enter an estimated delivery time (e.g. 2 - 3 Business Days).
- Enter your delivery rate (e.g. $5).
- (Optional) Offer free delivery for orders above a set price:
- Select the checkbox.
- Enter the price that qualifies for free delivery.
- Tap Add.
- Tap Save.
Setting up store pickup
You can set up store pickup (curbside pickup) as the only form of delivery, or in addition to another shipping option, such as free shipping.